Create the Default Sync Profile
When using the Sync Profile Wizard Admin Tool, you must create a default sync profile.
-
In the org’s Back Office, select Setup.
-
Click
 .
. -
Type
Adminand select Admin Dashboard. -
Select Sync Profile Wizard.
-
Select Start Wizard.
The first time you use the Sync Wizard, you must first create a Default Sync Profile.
After creating the Default Sync Profile, you can create additional profiles and are prompted to customize the profile’s name.
-
Select Let’s Get Started.
-
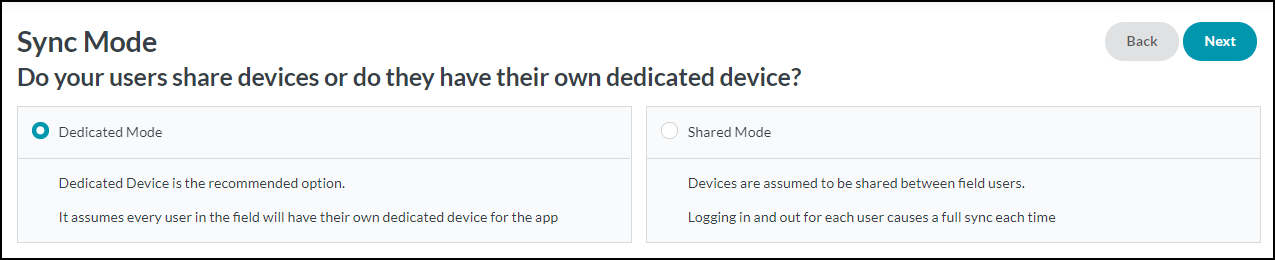
In Sync Mode, select the types of devices for this group of users, then click Next.
Dedicated Mode:
Users each have their own device that is not shared by other users.
FieldFX recommends dedicated devices for field users. Shared Mode:
A device may be used by multiple users, such as between shifts.
-
Select the type(s) of records (objects) users either add or modify on their devices, then click Next.
Be sure to only select the type(s) the set of users for this Profile add or modify on their devices.
If they only view the records, do not select the checkbox.
Example 1. Appropriate Types by Job FunctionField technicians do not add or modify quotes while sales people likely do not add or modify tickets or work orders.

-
Select whether members of Job Crews should only sync the crew’s jobs and related price books, then click Next.
-
In Synced Objects, review the objects the wizard determined should sync for these users and make any desired adjustments by selecting or deselecting objects.
Data from objects that are not selected do not sync to mobile devices for users assigned to this Sync Profile.
The selected options do not change any user’s permissions to the object or access to individual records or fields in the object.
Users must also have permission to the object from their User Profile or at least one Permission Set for data from the object to sync!
To display each object’s API name, select the Show Details checkbox.
-
After making the selections for Synced Objects, the Sync Wizard runs a query to search for required fields, then presents a series of screens to determine what fields to sync for specific objects.
Master data objects display first, then transactional objects.
To see the API names for fields, select the Show Details checkbox.
Recommended fields are pre-selected, but can be removed if not needed on mobile devices. Fields required for syncing display in a separate group at the bottom of the page and cannot be deselected.
The selected options do not change any user’s permissions to fields on the object. Users must have permissions to the selected fields from a User Profile or at least one Permission Set to sync data for the field.
-
Make any desired changes to the selected fields for the displayed object, then click Next. Repeat for each additional object.
Not all objects display.
The query that runs after selecting the objects to sync also tests the size of the fields and number of records on an object.
The Sync Wizard doesn’t have a selection screen for an object if syncing the fields from that object doesn’t add significant size to the sync packet.
-
Click Finish to exit the wizard.
