PM Group Schedules
Introduction
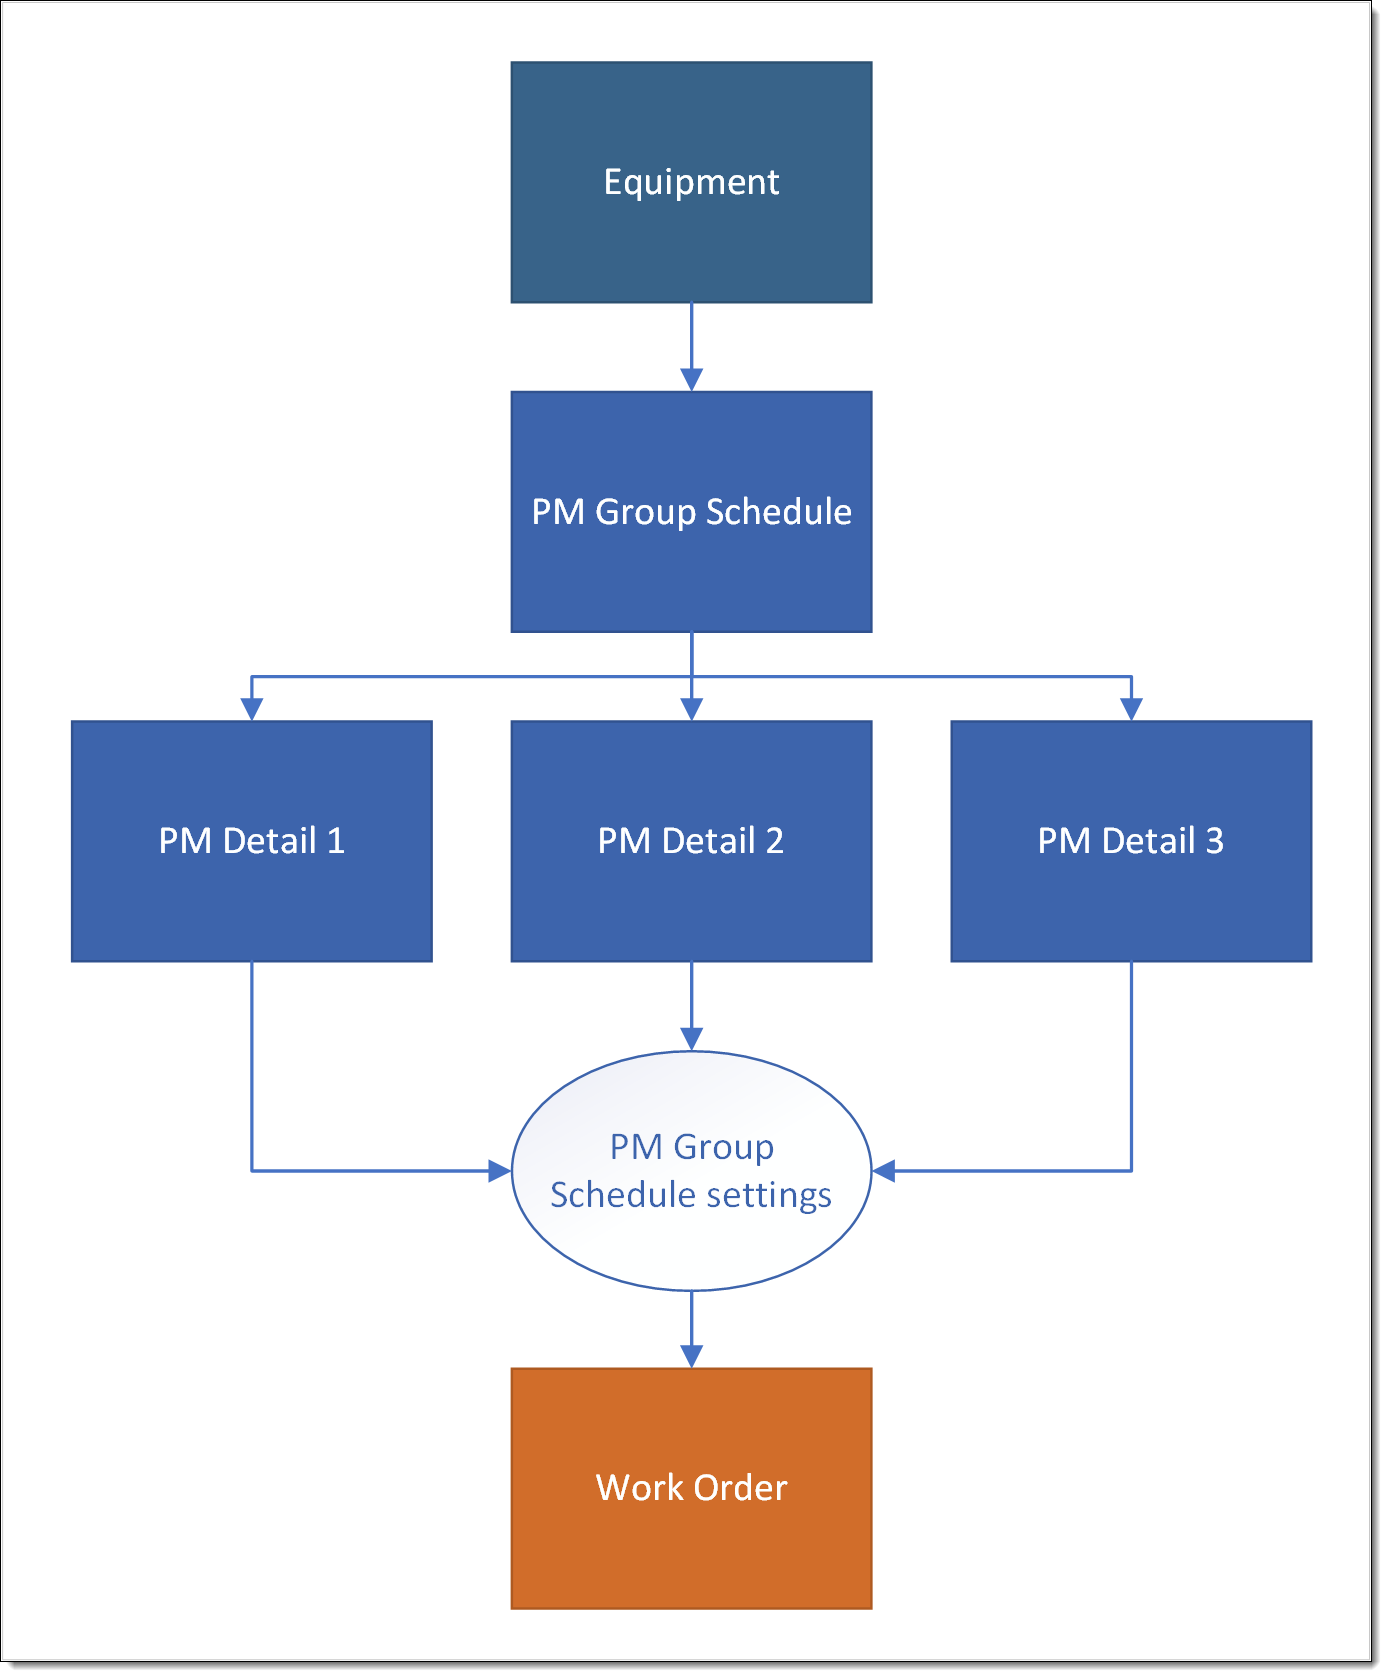
A Preventative Maintenance (PM) Group Schedule is a set of possible work orders for a single piece of Equipment. For calendar-based and in any given month, only one of the Work Orders is required.
The PM Details specify the work required in a given month. It is also arranged in a hierarchy so that higher-ordered PM Detail work takes priority in a month over lower-ordered PM Details.
PM Group Schedules consists of two objects:
-
PM Group Schedule - where you enter asset, time frame (month day or weekday, and starting month), and status
-
PM Group Details - a child record of the PM Group Schedule where you enter the Model Work Order, Monthly Interval, Release Window and either a default PM Work Order record or a default vendor assignment
Calendar-Based |
Meter-Based |
These schedules are based on a calendar schedule when certain tasks should be performed. The timeframe can be daily, weekly, monthly, quarterly, or yearly. |
These schedules are when a certain level is reached for an asset and a series of tasks need to be performed. The level can be miles, run-time hours, or others units of measure. When that milestone is reached, a work order is created containing a PM Group Schedule Detail that contains the individual tasks needing to be done. The advantage with meter-based PM Group Schedules is you won’t have to generate multiple PM Schedules each with its own work order. The PM Schedules can be grouped together based on the milestone. |
Key Features
FieldFX PM Group Schedules in the Enterprise Asset Management (EAM) module can:
-
Works with a calendar schedule based on monthly periods. Work does not have to be done in every month.
-
Uses Model type Work Orders as the template for generated Work Orders.
-
Relies on the
SchedulePMGroupDetailBatchandScheduleCalcPMGroupScheduleDatesBatchScheduled Apex Classes.
How PM Group Schedules Works
Once you activate a PM Group Schedule, Work Orders are automatically released via a batch APEX job scheduled to typically run at night. With every PM Group Detail that has Ready to Release set to true, a work order is generated and becomes the current work order. Typically an hour later after the first job, another batch APEX job recalculates the Next Due Date and Next Release Date considering the work orders just created. You only need to setup the PM Group Schedules and set them to Active. The releasing work orders and due dates are automatically recalculated.
Step-by-Step Guides
| Before you create the PM Group Schedule, you must have an Equipment record defined and then Meter record that matches the Equipment record. |
Create a Calendar-Based Example for a PM Group Schedule
Example: A truck is inspected monthly, has a oil change with inspection quarterly, has tires rotated with the oil change and inspection every 6 months, and requires an emission inspection with other work annually.
-
From the PM Group Schedules tab, click New.
For this example, it will titled Truck Maintenance.
-
Within the PM Group Schedule, create four separate PM Detail schedules:
Frequency Icon For the monthly inspection, set at 1 (for every month).

For the quarterly inspection and oil change, set at 3 (for every third month).

For the semi-annual inspection, oil change, and tire rotation, set at 6 (for every sixth month]).

For the annual inspection, oil change, tire rotation, and emission inspection, set at 12 (for every twelfth month or once a year)

-
Once activated, this PM Group Schedule results in the following Work Orders each month:
Month Description 1
2
3
| Month Description 4
5
6
| | Month Description 7
8
9
| Month Description 10
11
12
| | | 13
Create a Meter-Based Example of a PM Group Schedule
You have a fleet of trucks that need their oil changed every 5,000 miles. You can set up a PM schedule in FieldFX to generate a work order to automatically generate a work order when one or more of trucks hits 5,000 miles from the last oil change.
-
In the FieldFX EAM section, click the PM Group Schedules tab.
The list of PM Group Schedules appears, use the dropdown arrow to select between Recently Viewed (default), Active, All, Draft, or Inactive.
-
To create a new PM Group Schedule, click New.
-
Name the new schedule something like
Truck Oil Change. -
Enter these entries in the Information section:
Field Action Schedule By Meter
Check
Meter Id
Choose a meter record.
Status
Set the Group Schedule status:
Option Description Draft
Group Schedule design in progress and not yet in use.
Active
Group Schedule currently in use to create Work Orders.
Hold
Group Schedule temporarily paused.
Inactive
Group Schedule no longer in use.
Starting Month
Month number for the next required Work Order.
End Date
Date after which FX EAM sets the PM Group Schedule to Inactive status.
Asset ID
Select the ID for the Equipment the Work Orders are for, or create a new Equipment record.
-
Complete these fields in the Scheduling Interval section:
Field Action Monthly Interval
Enter the interval for the schedule.
Meter Schedule Interval
Enter the interval such as 400, 800, 1200, etc.
Release Window
Read to Release Meter
-
Change the PM Group Schedule status from Draft to Active.
-
Make the following entries in PM Work Order Due On:
Field Action Day/Weekday of Month
Select to set the due date as either a particular day of the month (the fifteenth) or a particular weekday (first Friday of the month)
Day of the Month
Numerical day of the month work is due, or Last for Day of Month schedules
On
Select the week of the month for the work to be due for Weekday of Month schedules
Weekday
Select the weekday for work to be due for Weekday of Month schedules
-
For this truck maintenance example, create 4 separate PM details records.
-
Click Save or Save & New.
Create PM Detail
-
From the PM Group Schedule record’s Related tab or Quick Links, select PM Group Details and click New
-
Make the following entries in Information:
Field Action PM Group Schedule
Defaults, but can be changed
Model Work Order
Select the Model type work order to use for the Work Order, or create a new one
-
Make the following entries in Schedule Interval:
Field Action Monthly Interval
How many months to wait between Work Orders of this detail
Release Window
Number of days in advance of the due date to release the Work Order
-
Make the following entries in Work Order Assignment:
Field Action Default Work Order
OwnerSelect the user to define as the record owner.
Default Account
Assignment3rd party vendor expected to complete the work.
New Work Order
StatusSelect the Status to use for the generated work order.
-
Make the following entries in Next Work Order:
Field Action Next Due Date
DO NOT EDIT THIS FIELD. System populated via Apex Code. Field security should be set to read only for all user profiles.
Next Due Date represents the Date when the next Work Order for this PM Group Detail will be due.
Next Release Date
DO NOT EDIT THIS FIELD. System populated via Apex Code. Field security should be set to read only for all user profiles.
Next Release Date equals the Next Due Date minus the Release Window.
-
Make the following entries in Planned Workload & Costs:
-
Click Save or Save & New.