FieldFX Page Layouts
Page layouts are like templates and can be used to organize and display data to a user clearly and effectively. They display only the information relevant to the role of a user.
They define the appearance and provide consistency for ease of data entry. You can also hide sensitive or irrelevant information.
A page layout consists of the following:
Organization |
|
Field visibility |
A field can be hidden, read-only, or editable. |
Required fields |
These fields are required for the user to complete before the entered information can be saved. |
Each object has a default page layout and can have a customized layout. Different page layouts can be assigned to different users depending on their role.
You can also add or edit the FX Header section that can appear on the Ticket Item Grid or the Quote Item Grid.
Page Layout Types
There are four types of Page Layouts:
| Type | Description | Managed/Customized in |
|---|---|---|
Home Page |
|
Lightning App Builder |
Details Page |
|
Object Manager > Page Layouts |
Edit Page |
|
|
List View |
|
Object Tab > List Views |
Best Practices
-
Group related fields logically
-
Keep layouts simple and don’t overwhelm users with unnecessary fields
-
Review layouts on a frequent basis to update per user feedback or new/changed workflows
Page Layout Assignments
Page layout assignments control the page layouts that display for each user profile. They also give you the ability to display a different page layout for each record type.
-
Under Record Types, click Page Layout Assignment.
-
Click Edit Assignment.
-
Click the column header for the record type.
-
In Page Layout To Use, select the record type’s page layout.
-
Repeat these steps if other record types are needed.
-
Click Save.
Configure FX Header for the Ticket Object
As a system admin, you can configure the FX Header section of a ticket to show key information about the ticket. Typically this could include the ticket number, job status, customer details, and other high-level information. The FX Header is an overview providing a snapshot of essential job information. Using the FX Header can make it easier for users to reference and navigate the ticket’s main details. It can be static, remaining visible as users scroll through the ticket.
-
In the Back Office setup for your org, type
objectin the Quick Find search bar. -
Select Object Manager.
-
Find the Ticket object and open it.
-
Select Page Layouts.
-
Select the name of the page layout.
-
In the top portion, select the Fields category.
Fields that are grayed out can’t be added to the FX Header section. Solid fields can be added.
-
Click and hold on the desired field and drag it down to the FX Header section.
As you drag it down, the section area turns green and a thick line appears above or below the existing fields, indicating where you can add the field.
-
Release the mouse when the field is at the desired location.
-
When finished adding fields to the FX Header section, click Save.
The mobile user will need to log out and back into the FieldFX Mobile App then open a ticket. The changes made appear in the Ticket layout.
Add Job Logs to Job and Ticket Objects' Page Layout
For the LOGS menu to appear in a Job or Ticket using the FieldFX Mobile App, the Job Logs entry must be added to the Job and Ticket object.
-
In your org’s Setup, use the Quick Find box and enter
object. -
Select Object Manager and open it.
-
Use the Quick Find and enter
job. -
Find and open Job.
-
At the Job Details screen, select Page Layouts.
-
Open the job object page layout.
The name of the Job object may differ in your org. -
Scroll down the categories to the Related Lists entry.
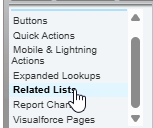
-
Find and drag the Job Logs block down to Related Lists section to a green bar and then release the mouse.
-
Click Save to save the page layout.
Add eForm List to Object’s Page Layout’s Related List
-
In your org’s setup, use the Quick Find box and enter
object. -
Select Object Manager.
-
Since eForms are only used for Tickets and Jobs in the FieldFX Mobile App, open the Job (
FX5__Job__c) or Ticket (FX5__Ticket__c) object.Use the Quick Find box to quickly find the object you are looking for. The following steps are the same for either object.
-
In the object, select Page Layouts.
-
Open the object’s page layout.
-
In the menu section categories, click the Related Lists category.
-
Find the object you created for the eForm and drag it down to the Related Lists section.
The eForm object appears in the Related Lists section.
-
Click Save to save the page layout.
Mini Page Layouts
Mini page layouts are condensed view of key fields from a full page layout. They appear when a user hovers over or clicks the small preview icon next to records in related lists or lookups.
They control the fields that display in record detail pop-ups. They are used so the user doesn’t have to open the page layout but see a pop-up preview.
Record detail pop-ups display in FieldFX Back Office when you move the mouse over a record that has a master-detail or lookup relationship with the current object. They give users immediate access to essential information so the user doesn’t have to navigate away from the current page they are on.
Each page layout has a mini page layout that features standard fields. They appear in related lists on Detail pages or in look-up pop-ups.
To edit a mini page layout, open a page layout and click Mini Page Layout on the toolbar.
Mini page layouts inherit the page layout assignments from their associated page layout.
When a user hovers over a job number in a related list, the mini layout might quickly show:
-
Job Number
-
Job Status
-
Scheduled Date
-
Customer Name