FX Reports
Introduction
FX Reports display FieldFX data in report format in FieldFX Mobile.
To add a new report or edit an existing report, see FieldFX Back Office Report Template Editor in FieldFX Admin Portal Tools.
Following are the most common FX Reports:
| Report | Usage |
|---|---|
Quote Report |
|
Job Report |
|
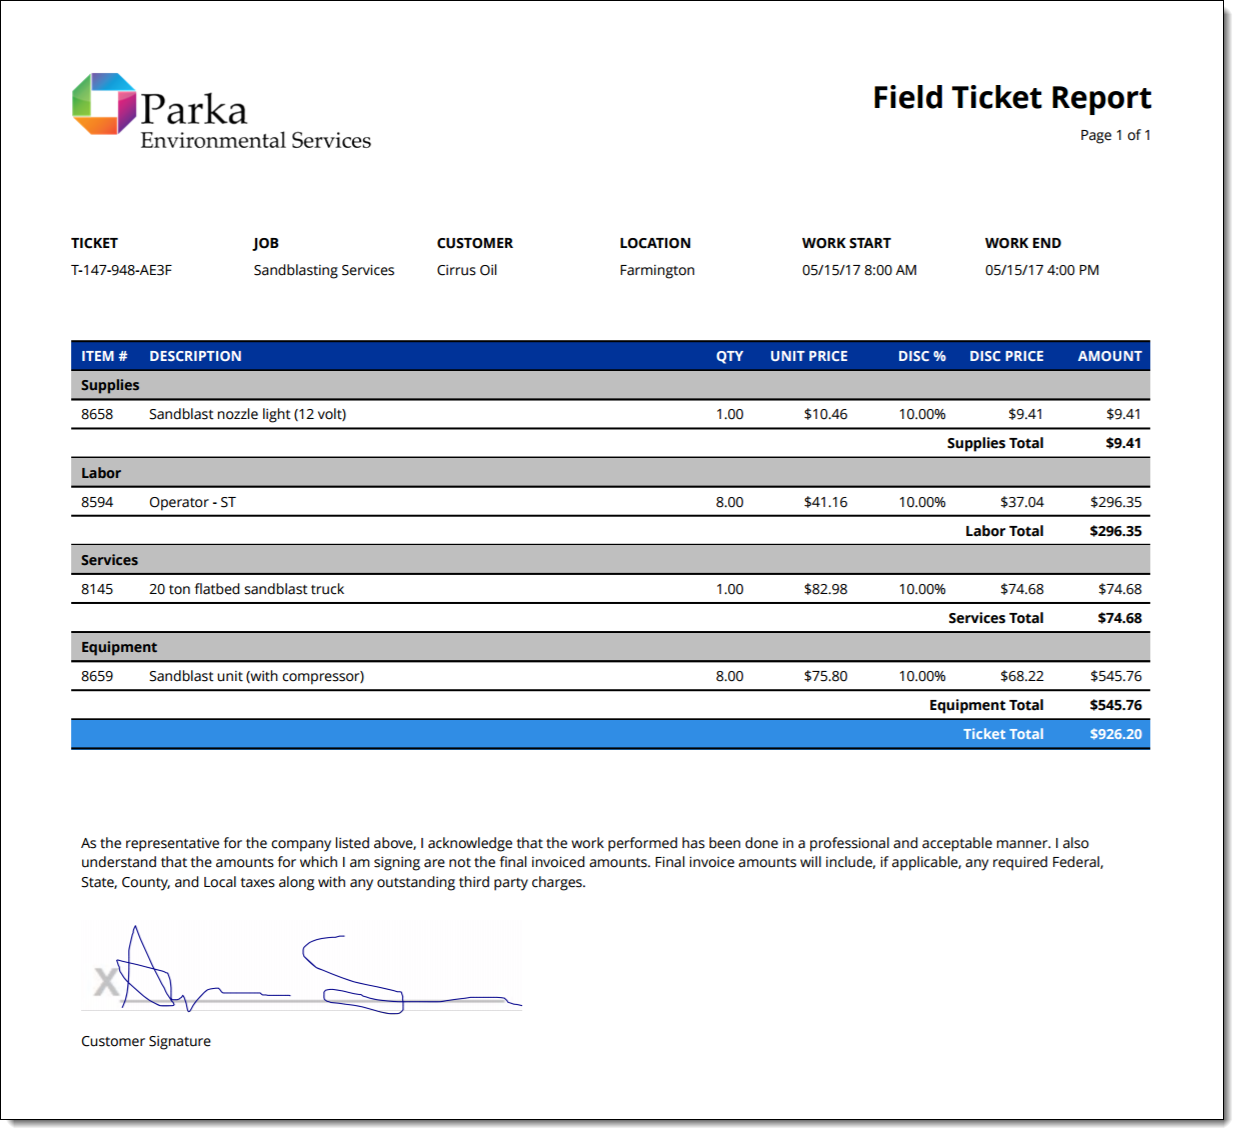
Ticket Report |
|
FX Form Report |
|
Prerequisites
To setup and use FX Reports, you need to:
| Have these user licenses | Have these permissions | Complete these tasks and review these topics before continuing |
|---|---|---|
Step-by-Step Guides
Build FX Reports
You can use FX Reports as a PDF Report using the Report Template Editor.
The reports in PDF format can use XML markup to control layout.
| HTML reports are deprecated and will not receive any additional enhancements. Existing HTML reports continue to function. You should use the Report Template builder in the Admin Portal to create new PDF reports. |
|
Use the Admin Portal’s Report Template and its report wizard to create new PDF reports. We fixed an issue where the bold, italic, and underline formatting for a Report PDF wasn’t working. Those formatting controls now work when the report is made into PDF and rendered. |
Setup
Refer to the PDF Report Setup article for instructions on how to build PDF reports.
Run FX Reports
FieldFX Back Office
-
Open the record.
-
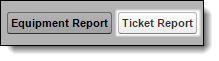
Click the report’s button.
A print preview displays.
-
(Optional) Add a signature to the report:
If you use a Topaz signature pad to sign the report, connect the signature pad to your device before clicking the signature line.
-
Click the signature line.
-
Draw a signature.
Click Delete to clear and try again.

-
Click Save.

-
-
Click Add to attach the report to the record.

FieldFX Mobile
Click to expand, click again to collapse
-
Open the record.
-
Select Reports on the sidebar.
TIP: If the report you want to run doesn’t display, select Show All (shown below) and select the report on the sidebar.

-
(Optional) Add a signature to the report:
IMPORTANT: If you use a Topaz signature pad to sign the report, connect the signature pad to your device before clicking the signature line.
-
Click the signature line.
-
Draw a signature.
TIP: Click Delete to clear and try again.
-
Click Save.
-
-
Click Add.
-
(Optional) Print the report:
-
Select Print.

-
Print the report on a printer connected to the device.
-
-
Select Save to attach the report to the record.

-
You can see the preview of the report,
NOTE: If the report has been configured to render in multiple languages, you can select the language in the drop down at the top of the report.
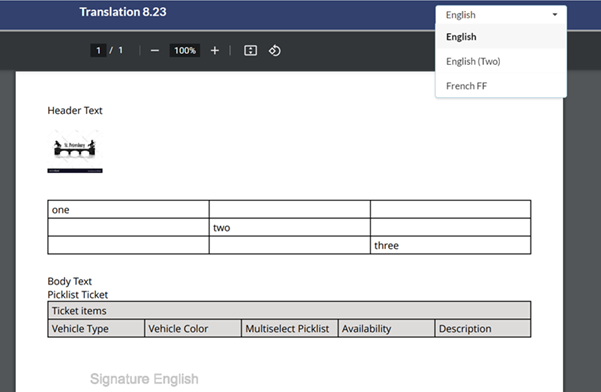
This dropdown menu only appears for reports where the report template has been configured for multiple languages.
The report renders in the selected language.
View FX Reports Attached to Records
| In FieldFX Back Office | In FieldFX Mobile | ||
|---|---|---|---|
|
|

Recommended Reading
-
Expressions to learn how to use expressions to build FX Reports.
-
Report Helpers to learn how to use report helpers to build FX Reports.