Mobile Filters
Introduction
You can use Mobile Filters to display only relevant options to FieldFX Mobile users when they select a lookup field. Filters are used in both FieldFX Back Office and FieldFX Mobile, but the filters are maintained separately. You can import already defined Filters for FieldFX Back Office for use in FieldFX Mobile.
Prerequisites
To setup and use Mobile Filters, you need to:
| Have these user licenses | Have these permissions | Complete these tasks and review these topics before continuing |
|---|---|---|
|
Enable Customer Application Permission
| Access to the Admin Portal is available to anyone with the ability to edit or update your org’s Static Resource files. This access can only be granted through Permission Sets to users with a Salesforce license. |
-
From Setup, enter
Permission Setsin the Quick Find box, then select Permission Sets. -
Click the link for the Permission Set Label you need to modify.
-
Scroll to the bottom of the page and select System Permissions.
-
Click Edit Properties.
-
Mark the Enabled checkbox for Customer Application.
-
Click Save.
How Mobile Filters Work
When a FieldFX Mobile user selects a lookup field of an object, Mobile Filters apply rules. Only selections that meet the filter rules display to the user. The filtered rules helps the user quickly make an accurate selection for the field.
Admin Portal users can:
-
Import the lookup filters created for FieldFX Back Office users to make them available to users in FieldFX Mobile.
-
Create filters for lookup fields that exist on objects but do not yet have mobile filters in place.
-
View, modify, or delete lookup filters that already exist for FieldFX Mobile users.
Considerations
Keep these considerations in mind when using Mobile Filters.
|
The Admin Portal tool is for lookup filters for FieldFX Mobile only. |
|
The filters created in this tool have no impact to the data that displays for lookup fields for FieldFX Back Office users. Separate lookup filters can be created for FieldFX Back Office. |
-
The lookup field must already exist on the object.
-
Sync rules impact the data that is available for the lookup field for the FieldFX Mobile user. If the data does not sync to the user’s device, it cannot display to the user.
-
Transactional Objects, such as these, aren’t supported:
-
Job
-
Ticket
-
Ticket Item
-
Ticket Log
-
Price Book
-
Quote
-
Quote Item
-
FX Forms
-
Master-Detail children of FX Forms
-
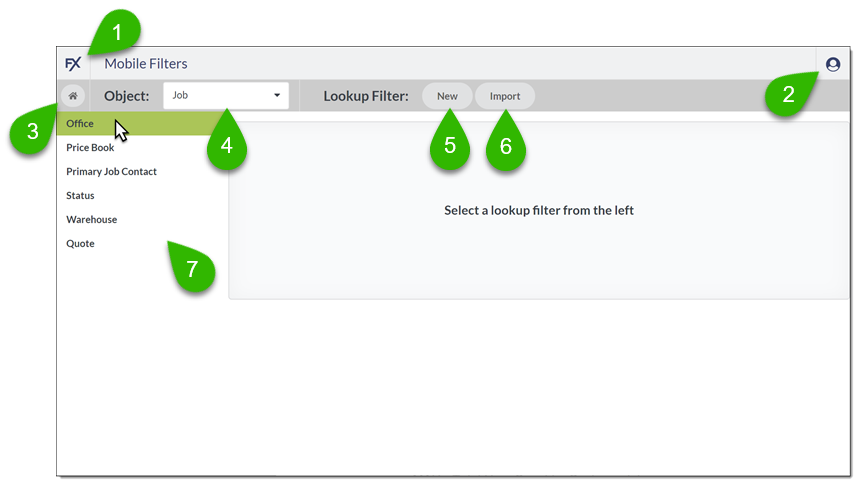
Navigate the Filters Screen
| Callout | Description | ||
|---|---|---|---|
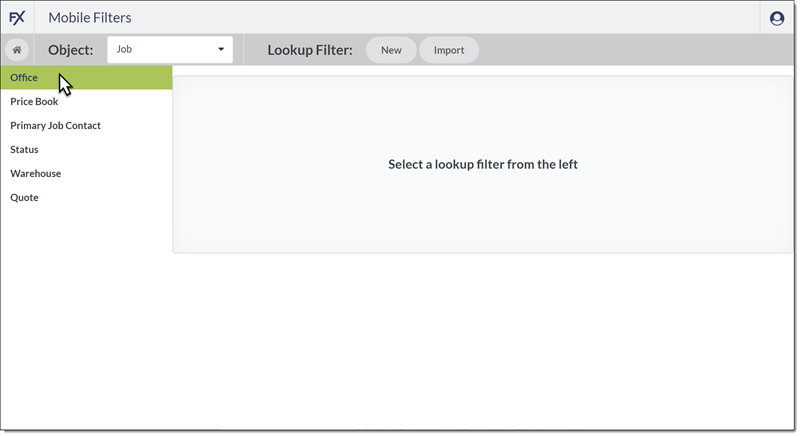
1 |
To return to the Admin Portal Dashboard, select the FX logo. |
||
2 |
To view information about the current Mobile Filters session, select the profile icon. |
||
3 |
To return to the Mobile Filters main page, select the Home icon. |
||
4 |
To display lookup fields for a different object, use the Object dropdown. |
||
5 |
To create new Mobile Filters for a lookup field from the selected object that does not have mobile filters, Click New.
|
||
6 |
Click Import to create Mobile Filters based on the lookup filters for FieldFX Back Office users. |
||
7 |
Select a lookup field name to view or modify the existing Mobile Filters for a different lookup field on the active Object. |
Step-by-Step Guides
You can create, view, and modify existing mobile filters from the Admin Portal.
Determine Prod or Sandbox and Log In
-
Select whether you are working in a Production or Sandbox org.
-
Log in with the org’s credentials.
Access the Admin Portal
| Inside of FieldFX Back Office, the Admin Dashboard accesses the FieldFX Admin Portal. |
Click to expand
-
Access the Admin Portal either by:
-
Open a browser tab to admin.fieldfx.com and log into the org with your system credentials.
-
In FieldFX Back Office,
-
Click on
 and type
 admin. -
Select Admin Dashboard.
The Admin Dashboard tab appears along the top of the nav bar as the last item.
-
-
Click Add X Nav Item(s).
-
Move the newly added nav item by clicking on the item and dragging the move icon up or down on the list. If you want to add more items, repeat the steps above.
-
When in position, click Save.
A browser toast message appears that the nav item was added.
-
-
To save the Admin Dashboard tab as a permanent tab,
-
click
 to open the navigation items edit box.
The name in the title differs depending on the FieldFX module you are in. If you switch FieldFX modules, the nav item won’t appear. Repeat these steps to add the Admin Dashboard tab to the FieldFX module you are in. -
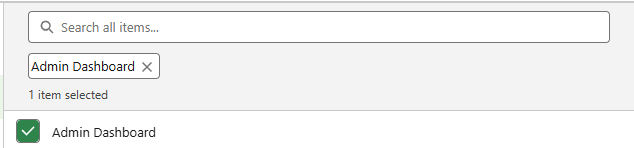
Click Add More Items.
-
Click Available Items > All
-
Click Admin Dashboard.
A green check appears next to Admin Dashboard item and a "Admin Dashboard" pill appears below the search field. The number of items selected is also displayed.
-
===
Setup Mobile Filter
-
At the admin portal, click Mobile Filters in the Mobile Tools section.
-
You can complete these tasks:
Add New Lookup Field for use in Mobile Filters
You can create mobile filters for an existing lookup field. The lookup field isn’t created on the object.
|
The lookup field must already exist on the object prior to creating the Mobile Filters. |
-
In the Admin Portal and the Mobile Tools section, select Mobile Filters.
-
Under Option 1, click the dropdown and select Add a new filter.
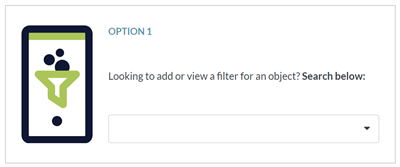
Enter characters into the dropdown field to filter the objects that display.
-
Make the following entries:
Field Action Object
Select the object that has the lookup field you want to add a mobile filter for.
Lookup
Select the lookup field.
Only existing lookup fields without mobile filters display.
You can type characters into either field to search within the available options.
-
Click Create.
A blank filter criteria screen displays.
Add or Modify Mobile Filter Criteria
-
Navigate to an existing Mobile Filter or add a new lookup field to add the Mobile Filter to.
-
(Optional) Change the Lookup Label that displays to FieldFX Mobile users.
-
Use the criteria table to enter the rules to use for what to show to the user when they select the field.
As you add a criteria, a new, blank row appears for additional criteria as needed. Continue adding as many criteria rows as needed to filter the lookup results correctly.
Leave the last row blank when an additional row is not needed.
Field Name Information Field
Beginning with the relevant object, specify the field to use to limit the results that display to the use
-
Using your mouse, click in the field to see valid options.
or
Using your keyboard, enter characters to specify the object
Only valid objects for lookup field can be selected.
-
Continue to specify object levels until the desired field can be selected
Only valid objects or fields display as you make selections.
Operator
Specify the kind of comparison the result must match in order to display to the user
-
Valid Operator choices depend on the data type of the selected Field.
-
Click in the Operator dropdown to see what is valid for the selected Field, which could include:
-
not equal -
equals -
less than or equal -
greater than or equal
-
less than -
greater than -
is null
-
is blank -
contains -
doesn’t contain -
starts with
Leave the Operator field blank if the field should be blank for the result to be included.
-
Value
Specify a value or select another field to use for the comparison
-
-
In Filter Logic, enter a Boolean expression for how to use the criteria rows
If you only have one criteria row, enter the row number,
1If you have more than one criteria row, combine the row numbers with
andororso that the correct filter is used.A set of criteria with six rows might use a Filter Logic of
( 1 or 2 ) and ( 3 or 4 ) and ( 5 or 6 ). -
When the mobile filter is defined as desired, select the Filter Status: Active checkbox to begin using the Mobile Filter when FieldFX Mobile users access the lookup field.
Field users must perform a full sync after activating the mobile filter for the filter to be available on their device.
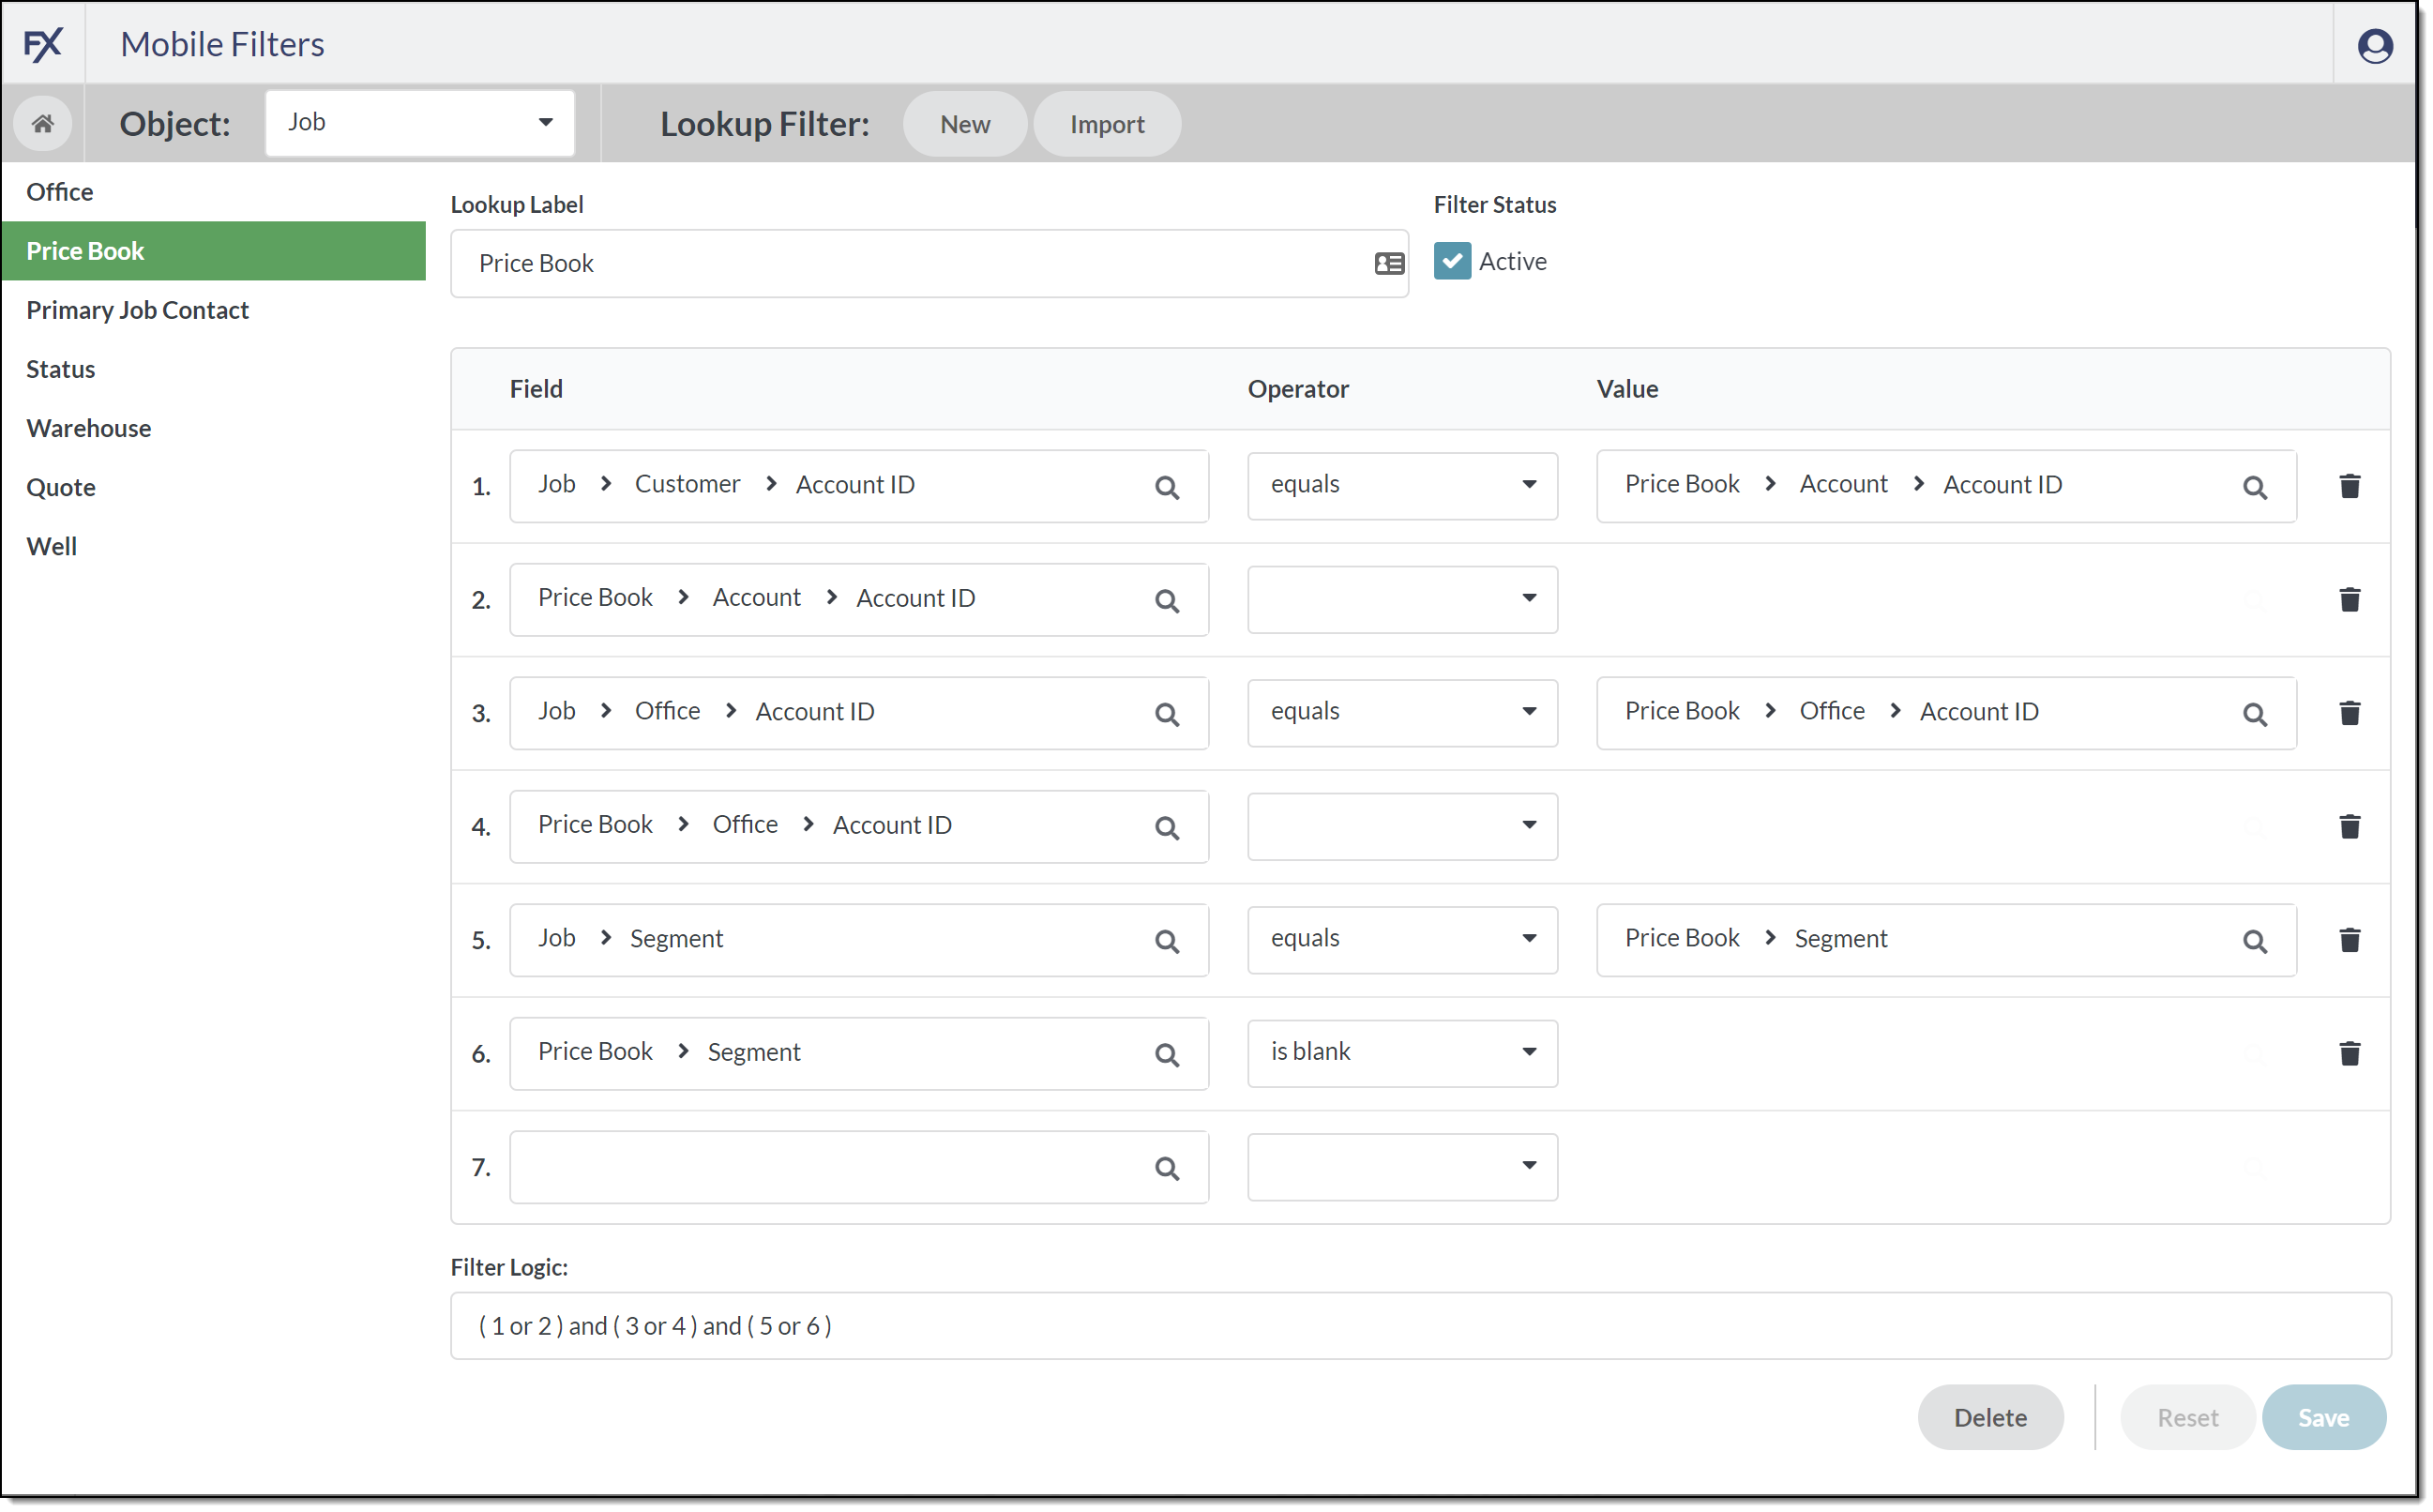
In this example, for a price book to display for a job when a user selects the Price Book lookup field, the following three rules must all be true:
-
The Customer on the Job matches the Account on the Price Book.
or
The Account field on the Price Book is blank.
-
The Office on the Job matches the Office on the Price Book.
or
The Office field on the Price Book is blank.
-
The Segment on the Job matches the Segment on the Price Book.
or
The Segment field on the Price Book is blank.
Create Filtered Lookup for Ticket Items
| You can only create a filtered lookup on contacts and price book item for ticket items. |
-
In Mobile Filters and the filter already exists, click Ticket Item to open it.
-
Choose either the Contact or Price Book Item lookup.
Under Lookup Label, the name is shown.
-
Click the Active checkbox under Filter Status.
-
Set up the filter per Add or Modify Mobile Filter Criteria.
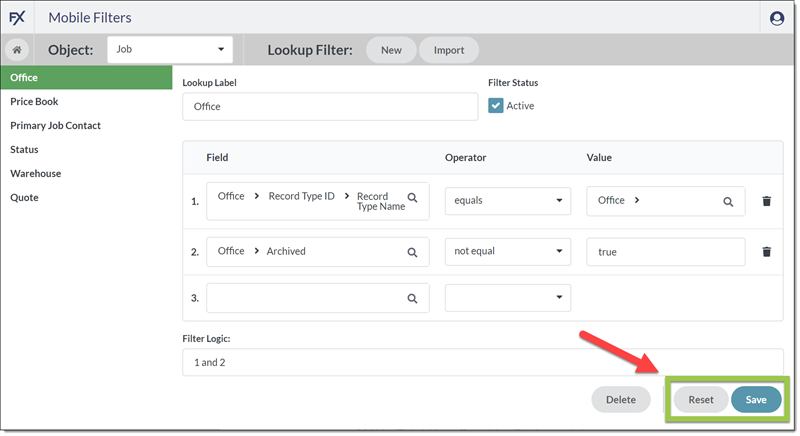
Create Filtered Lookup for Jobs
-
In Mobile Filters and the filter already exists, click Job to open it.
-
When creating a Lookup Filter you can choose the lookup type:
-
Office
-
Customer
-
Price Book
-
Primary Job Contact
-
Status
-
Warehouse
Under Lookup Label, the name is shown.
-
-
Click the Active checkbox under Filter Status.
-
Set up the filter per Add or Modify Mobile Filter Criteria.
Import Existing Lookup Filters from FieldFX Back Office
-
In the Admin Portal and in the Mobile Tools section, select Mobile Filters.
-
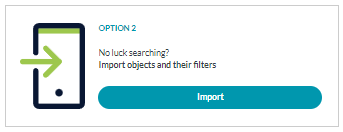
Under Option 2, select Import.
-
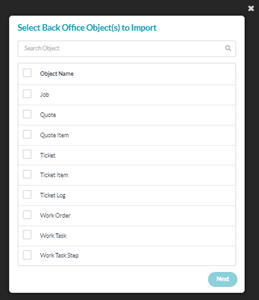
Select the Object(s) whose lookup filters for FieldFX Back Office you want to import.
-
Use the search field at the top of the dialog to find a particular object.
-
Use the checkbox to the left of Object Name to select all objects for importing
-
-
Click Next.
-
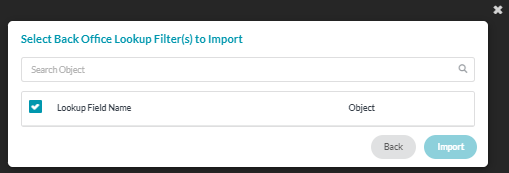
Select the Lookup Field Name(s) whose FieldFX Back Office filters you want to import.
-
Use the search bar to limit the fields that display by object.
-
Select the checkbox next to Lookup Field Name to select all of the listed fields.

The lookup field must already exist on the object.
-
-
Click Import.
The lookup field filters are imported for use in FieldFX Mobile, and you are returned to the Mobile Filters main page.
View or Modify an Existing Lookup Filter
-
In the Admin Portal, find the Mobile Tools section then select Mobile Filters.
-
Under Option 1, click the dropdown and select the sObject that contains the lookup field.
Enter characters into the dropdown field to filter the objects that display.
-
From the left side of the screen, select the lookup field to display
-
The details of the filters for the selected lookup field display and can be modified.
-
Click Save to update the filters with any changes.
-
Click Reset to discard any changes and reload the filters from the existing file.
-
Make a filter active or inactive
-
An Active filter is used when a FieldFX Mobile user clicks on the field on their device
-
An Inactive filter is ignored and a FieldFX Mobile user sees all entries for a field that has synced to their device
|
The filter must have been Active when the user last completed a full sync in order to be used on the device. Likewise, a filter marked Inactive is not cleared from a mobile device until the next full sync. |
-
In Admin Portal and in the Mobile Tools section, select Mobile Filters.
-
Under Option 1, click the dropdown and select the sObject that contains the lookup field.
Type characters into the dropdown field to limit the objects that display
-
From the left side of the screen, select the lookup field to delete.
-
Select the Filter Status: Active checkbox to make the filter apply to synced mobile devices.
or
Remove the Filter Status: Active checkmark to ignore the filters on synced mobile devices.
Delete Mobile Filters for a Lookup Field
|
If you are already viewing a filter, you can use the navigation options described above to display the field to delete. |
-
In the Admin Portal and the Mobile Tools section, select Mobile Filters.
-
Under Option 1, click the dropdown and select the sObject that contains the lookup field
Type characters into the dropdown field to limit the objects that display
-
From the left side of the screen, select the lookup field to delete.
-
Click Delete to remove the filters.
Recommended Reading
-
Read about Lookup Filters for FieldFX Back Office
-
Learn about Syncing data to FieldFX Mobile
-
Read about the latest Mobile Filters release notes