User Wizard
Introduction
The Admin Portal’s User Wizard provides a guided process for system administrators to create new user records or modify existing user records.
The step-by-step guide helps administrators complete all of the required steps for adding a new FieldFX user.
Modify the Profiles, Permission Sets, Groups, and Licenses of multiple existing users at once.
Prerequisites
To use the User Wizard Admin Portal Tool, you need to:
| Have these user licenses | Have these permissions | Complete these tasks and review these topics before continuing |
|---|---|---|
System administrator users need:
|
How the User Wizard Works
The User Wizard walks the administrator through all of the necessary steps to complete all of the required entries for a fully functioning FieldFX user record.
Step-by-Step Guides
Access the Admin Portal
| Inside of FieldFX Back Office, the Admin Dashboard accesses the FieldFX Admin Portal. |
Click to expand
-
Access the Admin Portal either by:
-
Open a browser tab to admin.fieldfx.com and log into the org with your system credentials.
-
In FieldFX Back Office,
-
Click on
 and type
 admin. -
Select Admin Dashboard.
The Admin Dashboard tab appears along the top of the nav bar as the last item.
-
-
Click Add X Nav Item(s).
-
Move the newly added nav item by clicking on the item and dragging the move icon up or down on the list. If you want to add more items, repeat the steps above.
-
When in position, click Save.
A browser toast message appears that the nav item was added.
-
-
To save the Admin Dashboard tab as a permanent tab,
-
click
 to open the navigation items edit box.
The name in the title differs depending on the FieldFX module you are in. If you switch FieldFX modules, the nav item won’t appear. Repeat these steps to add the Admin Dashboard tab to the FieldFX module you are in. -
Click Add More Items.
-
Click Available Items > All
-
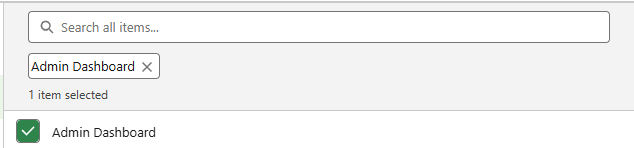
Click Admin Dashboard.
A green check appears next to Admin Dashboard item and a "Admin Dashboard" pill appears below the search field. The number of items selected is also displayed.
-
Create a New User Record
-
Access the Admin Portal and select User Wizard.
When you log in to the Admin Portal, you select to log in to either a Production or Sandbox org.
The org you log in to is the org you create the user profile in.
-
Select User Wizard.
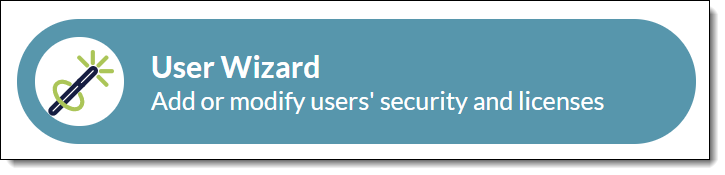 Figure 1. User Wizard is one of the tools available from the Admin Portal’s Dashboard
 -
Click Create New User.
-
Make the following entries (all entries are required):
Enter text in any field to filter the entry selection
Field Description / Action First Name
The new user’s given name, up to 40 characters.
Last Name
The new user’s surname, up to 80 characters.
Email
Enter the user’s email address.
+
This email must be unique. Used for notifications from Salesforce to the user.
Username
Automatically fills with the entered Email, but can be changed.
This is what the user will log in to Salesforce with.
Profile
Select the user profile type for the new user from the dropdown list.
The number of available licenses for the profile type displays in the list.
UserRole
Select a role from the dropdown list
Time Zone
The org’s time zone defaults, but can be changed.
Locale
The org’s Locale defaults, but can be changed.
Affects date and time formatting, number fields, and calendar display.
Email Encoding
Defaults to Unicode (UTF-8), but a different standard can be selected.
Language
Defaults to the org’s default language, but can be changed.
The user’s Language overrides the org’s default.
Alias
A suggested Alias defaults, but can be changed.
Appears on list pages, reports, and other places where the user’s full name does not fit.
Limited to 8 characters.
Nickname
Identifies the user in the community, up to 40 characters
-
Click Next
The wizard creates the Salesforce User record and looks for a matching Contact record to use. If it does not find a Contact record, it creates one automatically and links the User record to the Contact record.
-
Make the following entries to manage security for the user:
Field Description / Action Assign Profile
The profile entered in the previous step displays, but can be changed.
Assign Permission Sets
Select the permission set(s) to assign to the user.
Enter text to filter the list of permission sets in the dropdown. Multiple permission sets can be assigned.
Assign Groups
Select any group(s) for the user.
Assign Managed Package Licenses
Select the FX License(s) to assign to the user.
-
Click Next
The wizard adds the selected security to the user’s record.
-
Make any of the necessary entries to add to the user’s Contact record:
All entries are optional.
Field Description / Action Available for Field Work
Toggle to selected if the user can be assigned to a Job or Ticket, or if they use FieldFX Mobile
Office
Select the user’s base office
Job Title from Catalog
Defines the price charged for the user’s labor on tickets
Account
Select the company’s account
-
Click Next
The wizard displays a confirmation page. -
Click Restart User Wizard to return to the User Wizard’s start screen
-
Click User Record to display the user’s User Record in Salesforce and make changes or enter additional information
-
Click Contact Record to display the user’s linked Contact Record in Salesforce and make changes or enter additional information
Modify an Existing User’s Security or Contact Record Options with the Wizard
-
Access the Admin Portal and select User Wizard.
When you log in to the Admin Portal, you select to log in to either a Production or Sandbox org.
The org you log in to is the org you create the user profile in.
-
Select User Wizard.
Figure 2. The User Wizard is one of the tools available on the Admin Portal’s Dashboard -
Click Select Existing Users.
-
In Select Users add the user(s) to modify.
You can make changes to more than one user at the same time.
Select all user(s) to modify.
Begin typing characters to perform a search.
-
Click Next.
-
Make the following entries to manage security for the selected user(s):
Field Description / Action Assign Profile
The profile entered in the previous step displays, but can be changed.
Assign Permission Sets
Select the permission set(s) to assign to the user.
Enter text to filter the list of permission sets in the dropdown.
Multiple permission sets can be assigned.
Assign Groups
Select any group(s) for the user.
Assign Managed Package Licenses
Select the FX License(s) to assign to the user.
-
Click Next.
The wizard modifies the security of the selected user records.
-
Make any of the necessary entries to add to the user’s Contact record:
All entries are optional.
Field Description / Action Available for Field Work
Toggle to selected if the user can be assigned to a Job or Ticket, or if they use FieldFX Mobile.
Office
Select the user’s base office.
Job Title from Catalog
Defines the price charged for the user’s labor on tickets.
Account
Select the company’s account.
-
Click Next.
The wizard displays a confirmation page.
-
If there are errors, a table displays listing the user record, step, and message.
Review these errors and address them in the wizard or Salesforce.
 Figure 3. Review errors and make adjustments to the user record if required
 -
Take additional actions:
-
Click Restart User Wizard to return to the User Wizard’s start screen
-
Click User Record to display the user’s User Record in Salesforce and make changes or enter additional information
-
Click Contact Record to display the user’s linked Contact Record in Salesforce and make changes or enter additional information
-
-
Recommended Reading
-
Admin Portal - Read more about the Admin Portal
-
User Setup - Read about setting up a User Record for FieldFX using standard Salesforce declarative tools
-
User Records - User Records
-
Permission Sets - Use permission sets and Permission Set Groups to standardize user security
-
User Profiles - Use Profiles to classify users
-
User Licenses - Manage user access to your licenses