Rich Text Area Field Setup
Prerequisites
-
To set up rich text area fields, you need:
-
Minimum permissions for the FieldFX modules you are using
-
System permissions:
-
Customize Application
-
View Setup and Configuration
-
-
-
To use rich text area fields in FieldFX Mobile, you must use one of the following release channels:
-
Sync v4 Beta
-
Sync V4
-
V4 Quarterly Beta
-
V4 Quarterly
-
Basics
Use rich text area fields to embed photos inline inside records.
Embed a site photo inside a JSA FX Form.
How it Works
-
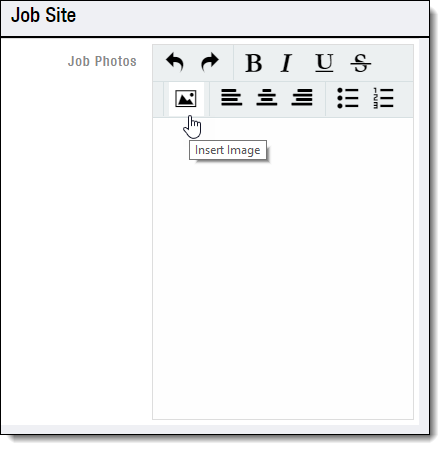
Select Insert Image in the rich text area field
-
Take a photo or select an image on your device.
-
You can only embed .gif, .jpg, or .png images.
-
You can embed up to 10 images per rich text field.
-
-
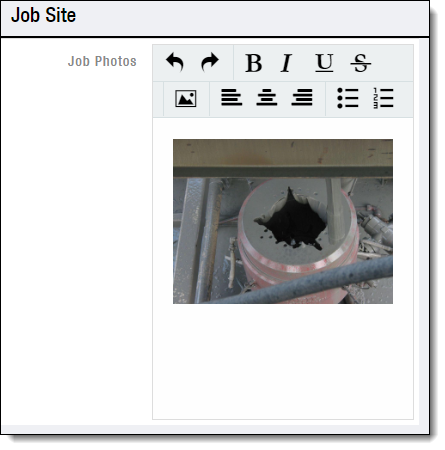
Select Confirm
The image displays inline inside the field.
|
When you embed an image in a rich text area field in FieldFX Back Office and view the field in FieldFX Mobile:
|
Image Resizing
When you embed an image in a rich text area field in FieldFX Mobile, the image is resized to be no greater than 150 KB.
| This resizing enables the image to sync. |
Limitations
You can only view images in rich text area fields if:
-
You are online
-
You are offline and embedded the image yourself in the current session
Adding a Rich Text Area Field
-
Open the Settings page for the object
-
Add the field:
-
Under Custom Fields & Relationships, click New
-
Select Text Area (Rich)
-
Click Next
-
Enter field attributes
Never give a field the same name as a managed field on a FieldFX object.
-
Click Next
-
Click Visible twice
-
Click Next
-
Select the page layouts on which to include the field
-
Click Save
-
-
Grant permissions for the field
-
Run a script for the field:
-
Select Utilities | Apex Execute
-
Enter the following script:
System.debug(FX5.FXWorkerLauncher.DoWork('FX5.CustomFieldInfoHandler', null)); -
Click Execute