FX Mobile Field Updates Admin Tool
Introduction
FX Mobile Field Updates is an Admin Tool enabling system administrators to define and maintain:
-
Default field values for when field users create new records using new record forms in FieldFX Mobile.
-
Field rules, including field values, for when field users create new records and/or edit existing records in FieldFX Mobile.
FX Mobile Field Updates can streamline data entry by field users and increase the consistency and accuracy of the data collected in FieldFX Mobile.
| The paging limit has been extended to allow over 1,000 records. |
Prerequisites
To setup and use FX Mobile Field Updates, you need to:
| Have these user licenses | Have these permissions | Complete these tasks and review these topics before continuing for the first time |
|---|---|---|
|
|
How Mobile Field Updates Work
A mobile field update is comprised of a field rule with one or more field actions defined for it.
-
Each field rule applies to a single object in FieldFX Mobile.
-
Each field action applies to a single field on that object in FieldFX Mobile.
-
An object in FieldFX Mobile can have multiple field rules defined for it.
You configure field rules and field actions by defining or editing them in FX Mobile Field Updates.
You can use formulas to configure field rules and field actions.
Step-by-Step Guides
Complete these tasks in order:
Access the Object
Access the object in FX Mobile Field Updates to configure field rules for it.
-
Click Field Updates.
-
Select the object for which you want to configure a field rule.
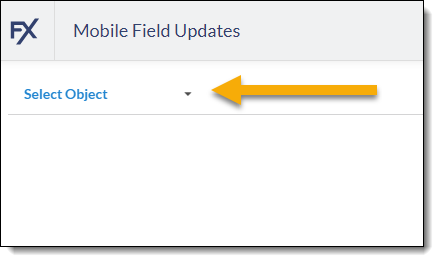 Figure 1. Click the Select Object dropdown to choose the object for the new rule
 -
Select one of the following tabs:
Tab Name Description Default Value
Sets default field values when opening new forms and creating new records.
Update When Created or Editing
Sets field values while editing records or when a record is created for the first time.
While editing a record, fields will update every time the criteria transitions to true.
Updated When Created
Sets field values when a record is created for the first time.
These updates are applied last when creating a new record.
-
Click either:
-
Add Criteria to define a new field rule
-
Active to deactivate the sync of the field rule while you edit the criteria for it
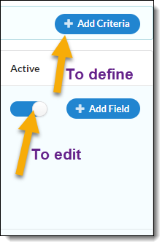 Figure 2. Select the Add Criteria button, then deactivate the rule while working on it
-
-
If you deactivated an existing field rule, click the name of the object to edit the field rule criteria.
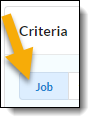 Figure 3. Click the name of the object for an existing rule to modify it
Configure the Field Rule
Define or edit the criteria that tests the field rule for true.
-
Access the Object in FX Mobile Field Updates.
-
Define or edit the Description of the field rule.
-
Define or edit when the field updates for this object apply by selecting either:
-
No criteria - always apply to field updates to set the field rule to always apply
-
Update fields when following formula evaluates to true to enter a formula to be more specific about when the field rule applies
-
-
If you selected to be more specific about when the field rule applies, enter the formula.
-
Click Save
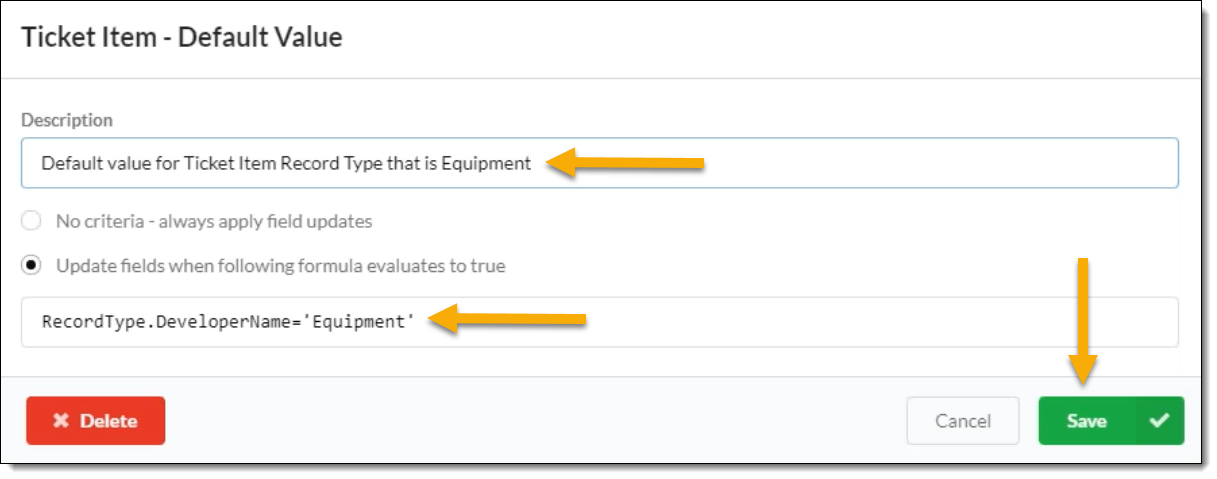 Figure 4. Make entries in Description and formula fields, then click Save
If you need to delete a field rule, access this form and click Delete.
-
Continue with configure the Field Action(s).
Configure the Field Action(s)
Define or edit a field and the action to apply to it.
-
Access the Object in FX Mobile Field Update.
-
Click either:
-
Add Field to define the field and action for the first time
-
Active to deactivate the sync of the field rule while you are editing the field action
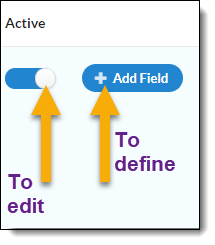 Figure 5. Deactivate a rule while editing it
-
-
If you deactivated the field rule, click the name of the field to edit the field action.
 Figure 6. Click the name of the field to edit it
 -
Complete or edit the fields in Field Update:
Field Entry Description:
Explanation of what the rule is doing
{Object} Field (required):
Field whose value should change by the update
Only fields from the rule’s object are available for selection.
Value:
Number, string or formula to use in the field
If you select a field with a data type of geolocation, the Value field is set to trueand cannot be changed.The field updates with the geolocation from the device when the action triggers.
-
Click Save
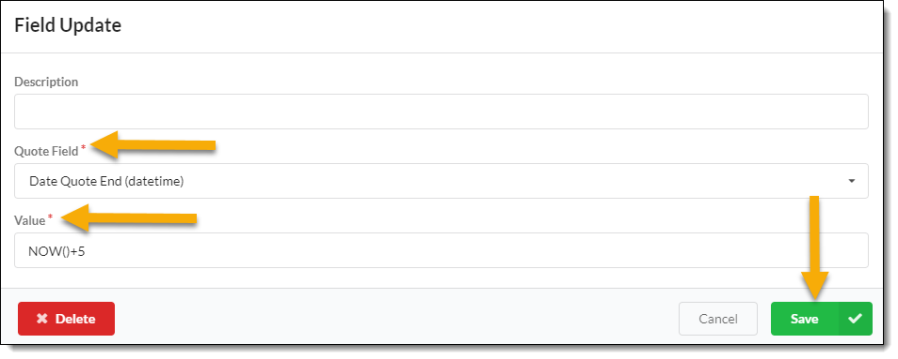 Figure 7. Fill in at least the required fields (marked with an *) and then click Save
If you need to delete a field action from the field rule, access this form and click Delete.
-
Repeat steps 2–5 as necessary for additional fields
-
Click the Active toggle so the field rule will sync to FieldFX Mobile.
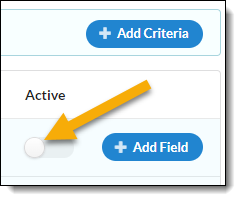 Figure 8. Click the Active toggle to slide the button to the right and make the rule available for use
Examples
Set Driver for Ticket Items as Current Contact
-
Access the Ticket Item object on the Default Value tab in FX Mobile Field Updates
-
Configure the field rule as follows:
Field Entry Description:
Always apply field updates
No criteria - Always apply field updates:
Selected
Unlabeled formula field:
true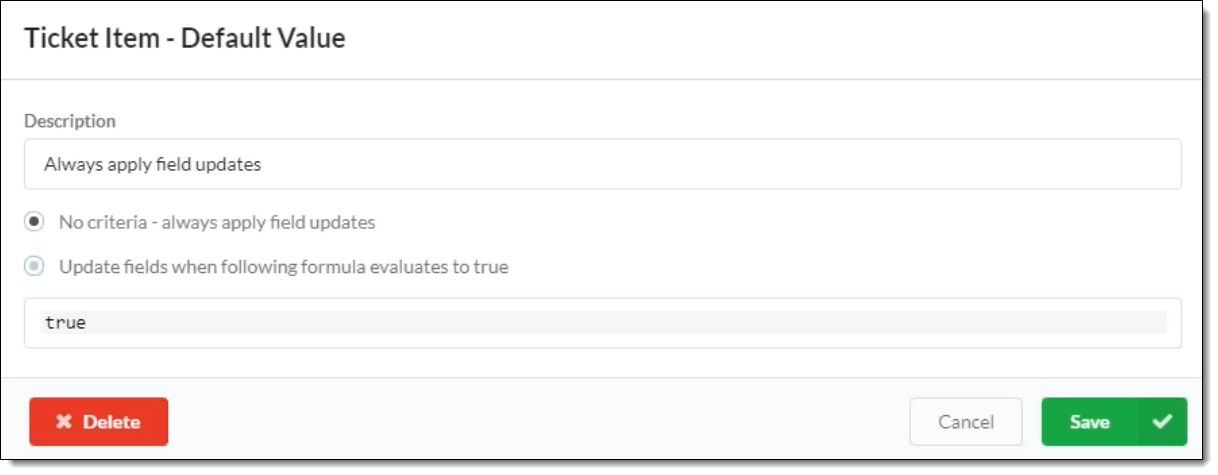 Figure 9. The completed fields should look like this rule screenshot
 -
Configure the field action as follows:
Field Entry Description:
Set driver to current user
Ticket Item Field:
Contact
Value:
$Contact.Id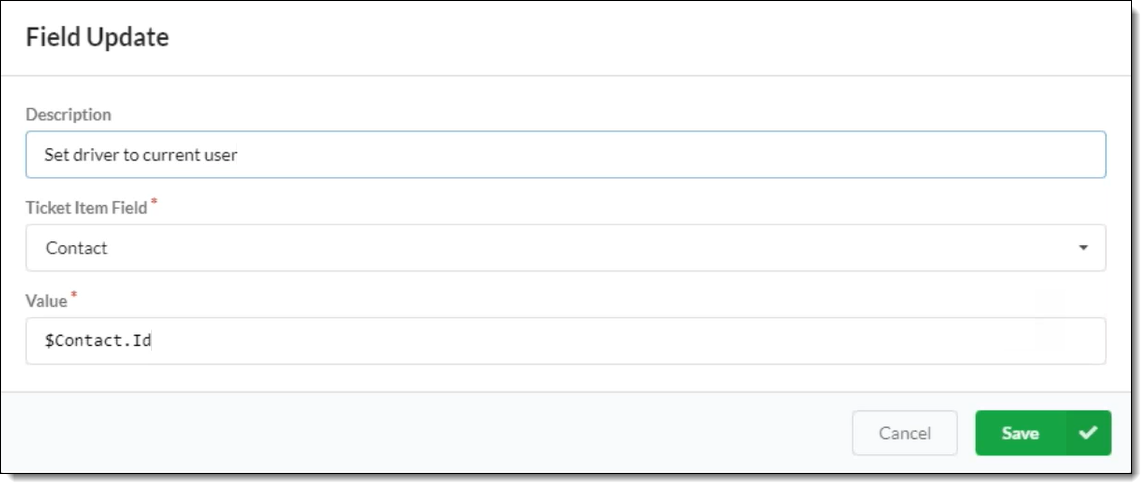 Figure 10. The completed field action should look like this screenshot
 -
Confirm the Default Value tab displays the field rule and field action accurately and the field rule is Active.
 Figure 11. The Default Value tab should show the criteria and field rule
Set Inspector for JSA Form as Current Contact
-
Access the JSA form on the Default Value tab in FX Mobile Field Updates
-
Configure the field rule as follows:
Field Entry Description:
Set the Inspector based on the current user contact
No criteria - always apply field updates:
Selected
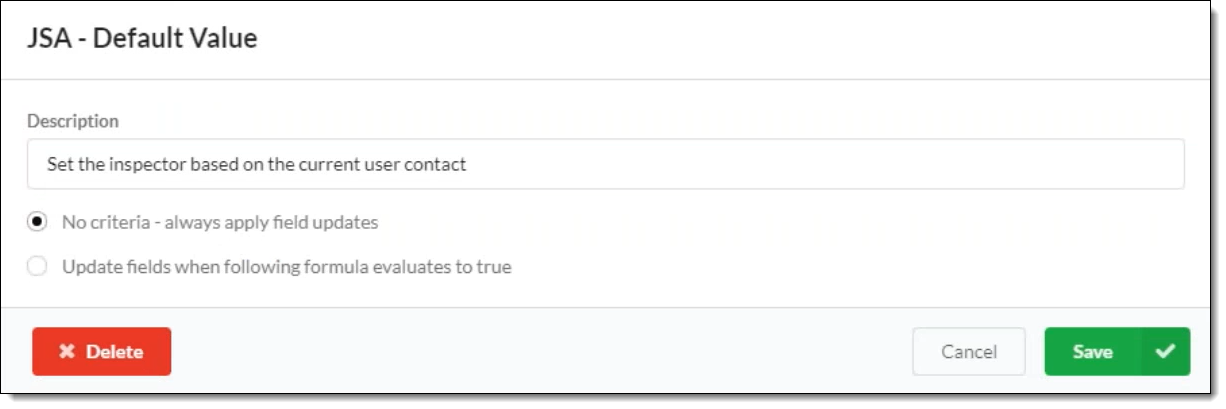 Figure 12. The rule for the JSA has a description, and is set to always apply
 -
Configure the field action as follows:
Field Entry Description:
Inspector
JSA Field:
Safety Inspector
Value:
$Contact.ID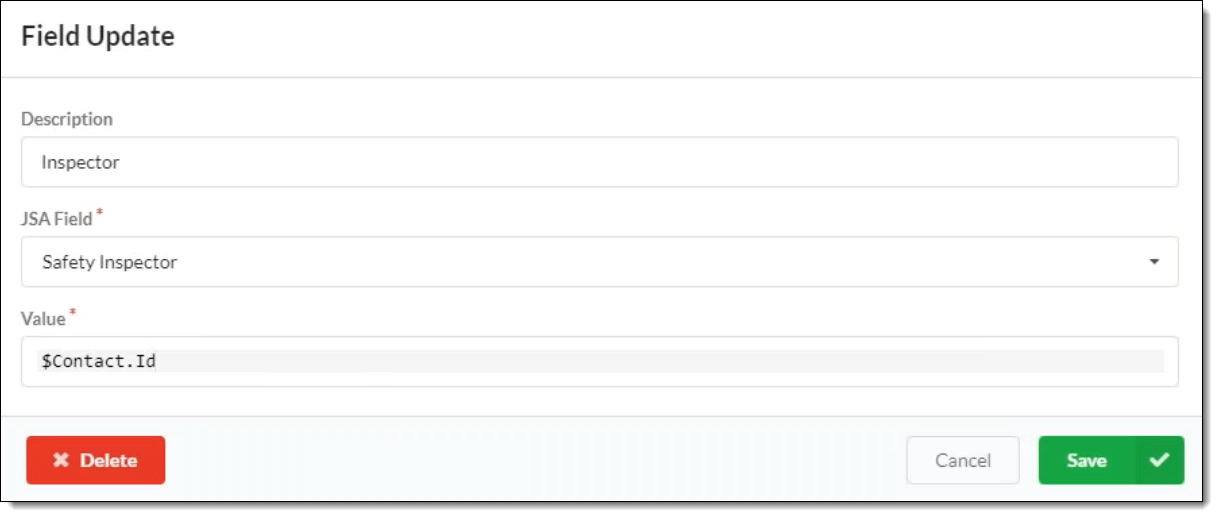 Figure 13. The rule uses the Contact ID of the current user to set the Safety Inspector field
 -
Confirm the Default Value tab displays the field rule and field action accurately and the field rule is Active
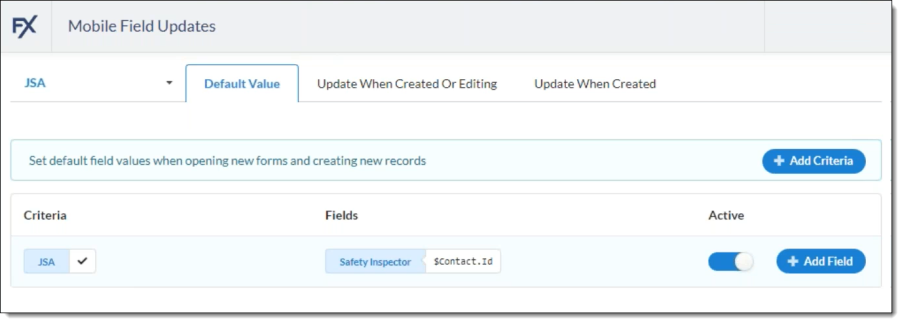 Figure 14. The JSA rule has criteria and fields, and it is set to active
Recommended Reading
-
See Mobile Field Updates for the latest changes.