Mobile Validations
Introduction
Validation rules improve data quality by preventing users from saving invalid data.
You can use validation rules to:
Prerequisites
To set up validation rules, you need:
-
Minimum permissions for the FieldFX modules you are using
-
System permissions:
-
API Enabled
-
Author Apex
-
Customize Application
-
View Setup and Configuration
-
How Validation Rules Works
Validation rules run when:
| If the Validation Passes… | If the Validation Fails… | |
|---|---|---|
Saving a Record |
Record Saves |
A warning displays and you can’t save the record until you enter valid data or discard your changes. |
Changing a Record |
The record transitions to the new status. |
A warning displays and you can’t change the status until you enter valid data or discard your changes. |
-
While validation rules can work in either FieldFX Back Office or FieldFX Mobile, this tool is specifically for creating validation rules for FieldFX Mobile.
To create validation rules for FieldFX Back Office, see Validation Rule Setup.
-
Validation rules can be added for the following objects:
-
Job
-
Quote
-
Quote_Item
-
Ticket
-
Ticket_Item
-
Ticket_Log
-
WorkOrder
-
WorkTask
-
WorkTaskStep
-
eForms with an eForm configuration
-
-
Each object can have an unlimited number of rules.
Step-by-Step Guides
Before you can use a Mobile Validation Rule can be created, the FX_Mobile_Rules Static Resource file must exist.
To work, Mobile Validations look for a Static Resource file called FX_Mobile_Rules first.
-
If this file already exists, skip to selecting an object.
-
If the file does not exist, start by importing objects and rules from Back Office.
Access the Admin Portal
| Inside of FieldFX Back Office, the Admin Dashboard accesses the FieldFX Admin Portal. |
Click to expand
-
Access the Admin Portal either by:
-
Open a browser tab to admin.fieldfx.com and log into the org with your system credentials.
-
In FieldFX Back Office,
-
Click on
 and type
 admin. -
Select Admin Dashboard.
The Admin Dashboard tab appears along the top of the nav bar as the last item.
-
-
Click Add X Nav Item(s).
-
Move the newly added nav item by clicking on the item and dragging the move icon up or down on the list. If you want to add more items, repeat the steps above.
-
When in position, click Save.
A browser toast message appears that the nav item was added.
-
-
To save the Admin Dashboard tab as a permanent tab,
-
click
 to open the navigation items edit box.
The name in the title differs depending on the FieldFX module you are in. If you switch FieldFX modules, the nav item won’t appear. Repeat these steps to add the Admin Dashboard tab to the FieldFX module you are in. -
Click Add More Items.
-
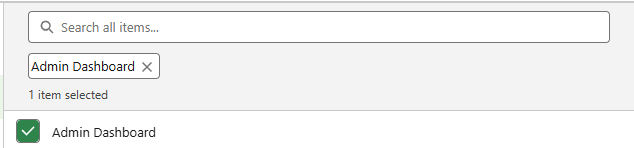
Click Available Items > All
-
Click Admin Dashboard.
A green check appears next to Admin Dashboard item and a "Admin Dashboard" pill appears below the search field. The number of items selected is also displayed.
-
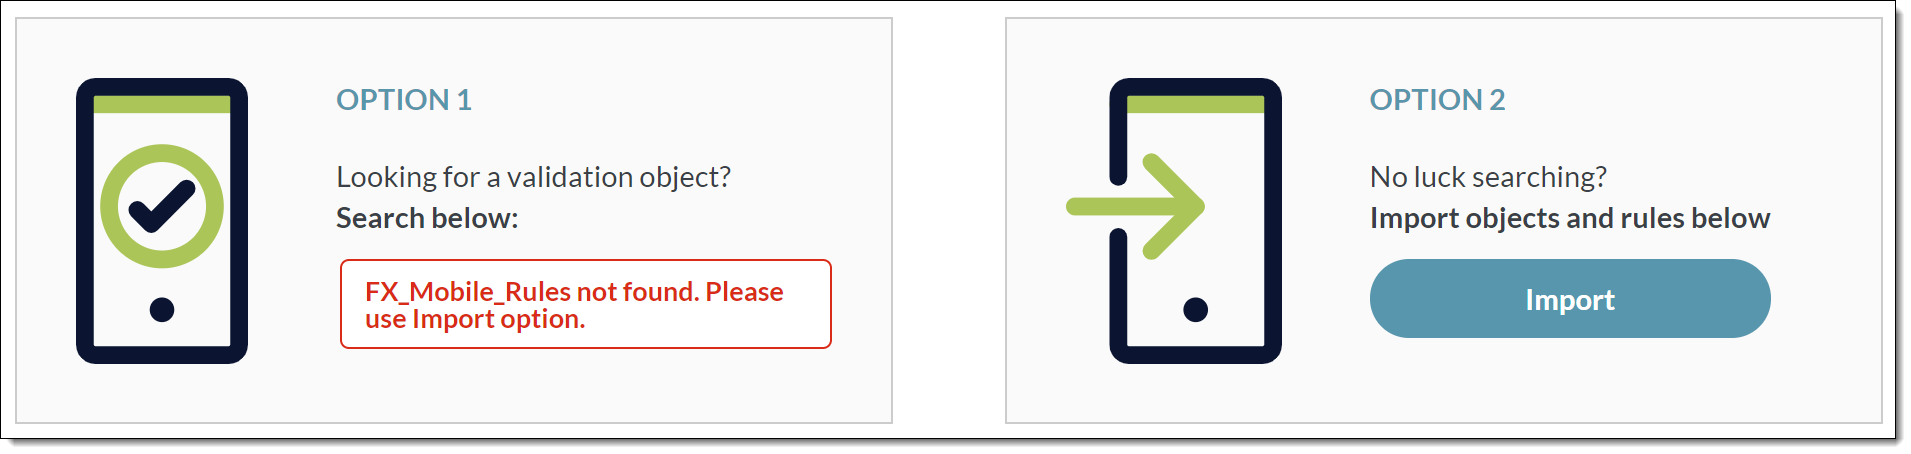
Import Existing Back Office Rules
-
Log in to the Sandbox or Production org to use for the validations.
-
Under Option 2, click Import.
-
Select FieldFX Back Office rules and objects to import to the Mobile Rules file, then click Next.
Select as many objects as needed.
Use the search bar to find the object to Import by an existing rule.
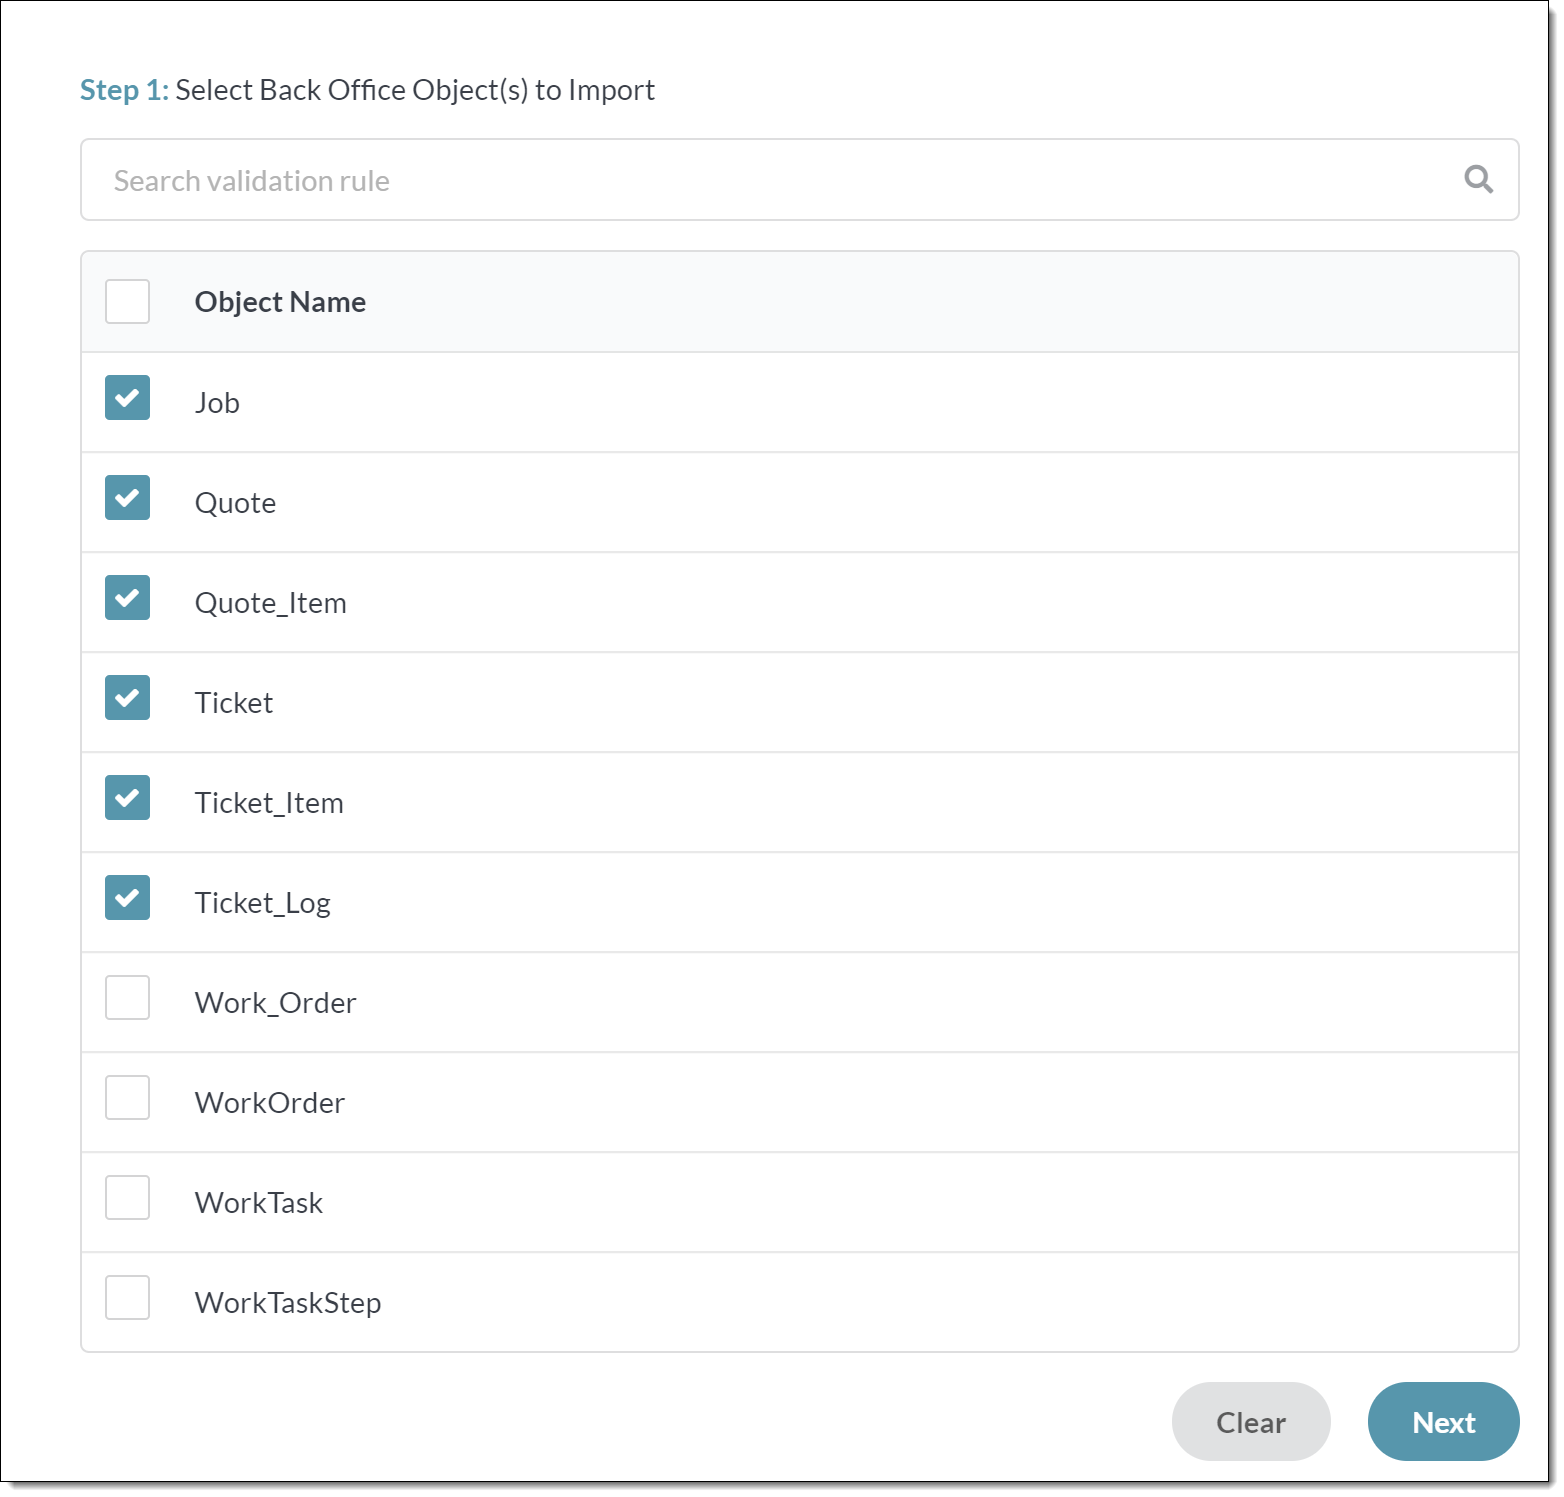
Rules that already exist for mobile display in a grayed-out list and cannot be selected for import.
-
Select the FieldFX Back Office rule(s) to import to the FX Mobile Rules file, then click Import.
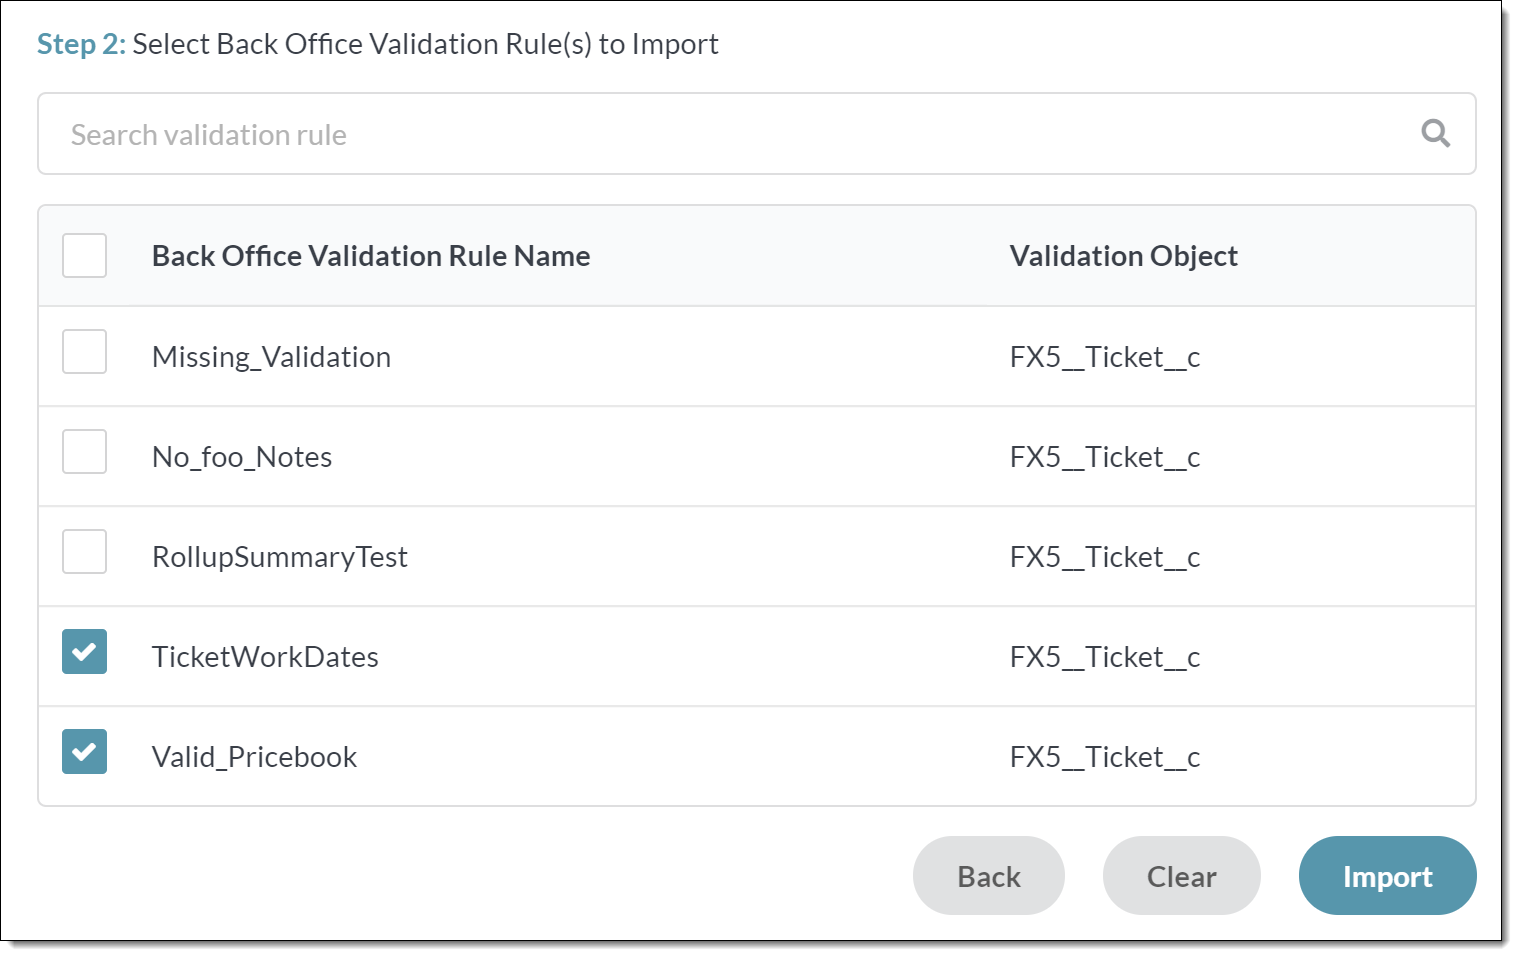
The Mobile Validations tool completes the Import and returns to the landing page.
Access Mobile Validations
-
Log in to the Sandbox or Production org to use for the validations.
-
Click Mobile Validations.
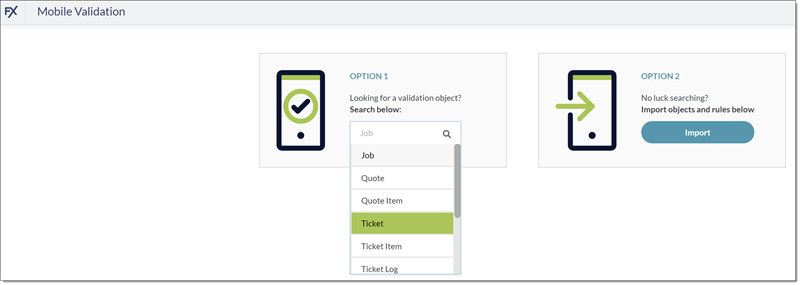
Create a New Rule
-
In Object, select the sObject for the rule, then click New.
If the
FX_Mobile_RulesStatic Resource file does not exist, complete the Import steps described above, then proceed. -
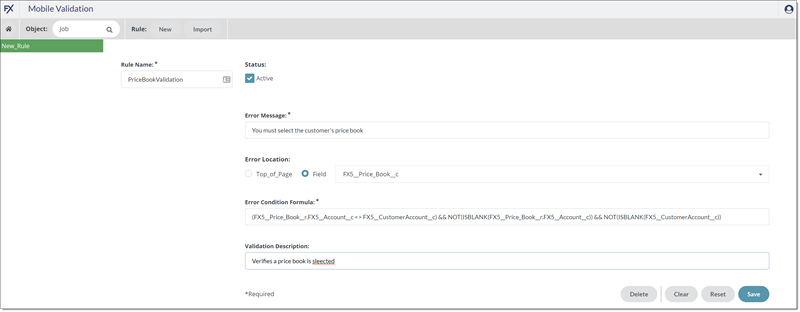
Make the following entries:
Field Action / Description Rule Name
(required)Unique name for the rule on this object.
Status
Select the Active checkbox when the rule is ready to apply.
Deselect the checkbox to temporarily disable the rule.
Error Message
(required)Message to display to the user if the validation is not met.
Error Location
Select Top_of_Page to show the message in a banner at the top of the user’s screen. or Select Field to show the message below a specific field on the user’s screen, then select the field the user needs to correct.
Error Condition Formula
(required)SOQL formula that must evaluate to
TRUEfor the rule to be met and the record to save.Validation Description
Description of the rule.
-
Click Save
This rule forces users to select the customer’s price book when adding a job.
Modify an Existing Rule
-
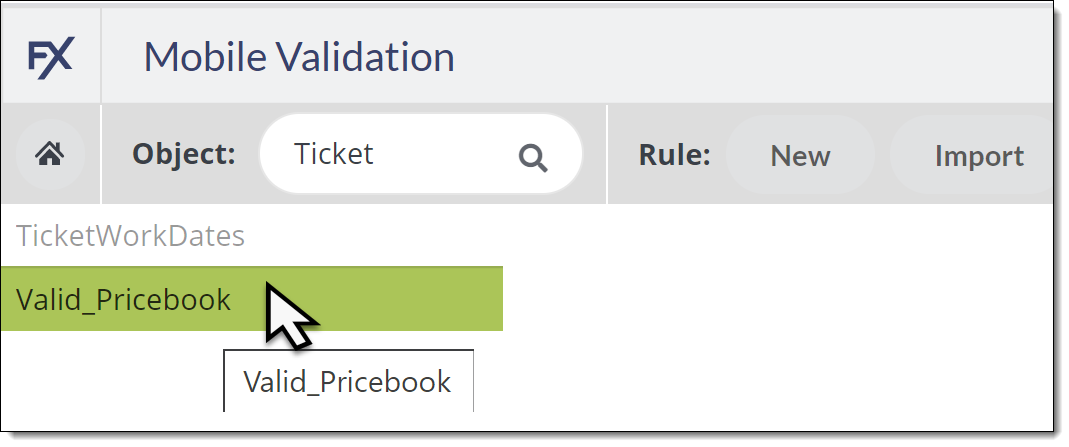
In Option 1, select the sObject for the rule to modify.
-
Select the rule to modify.
-
Make any of the the following entries:
Field Action / Description Rule Name
(required)Unique name for the rule on this object
Status
Select the Active checkbox when the rule is ready to apply
Deselect the checkbox to temporarily disable the rule.
Error Message
(required)The Message to display to the user if the validation is not met.
Error Location
Select Top_of_Page to show the message in a banner at the top of the user’s screen. or Select Field to show the message below a specific field on the user’s screen, then select the field the user needs to correct.
Error Condition Formula
(required)SOQL formula that must evaluate to
TRUEfor the rule to be met and the record to save.Validation Description
Description of the rule.
-
Click Save.
Recommended Reading
For more information, see:
| FieldFX Documentation | Salesforce Documentation |
|---|---|
|
|