Quoting Setup
Prerequisites
-
To set up the Quoting feature, you need the following licenses:
-
To set up the Quoting feature, you must:
-
To set up the Quoting feature, you need:
-
System permissions:
-
Customize Application
-
View Setup and Configuration
-
Enable Quote Record Type for System Administrators
Prior to setting up quoting, assign the Quote record type to the System Administrator profile.
-
From Setup, enter "profile" in the Quick Find box, then select Profiles
-
Click System Administrator
-
Under Apps, click Object Settings
-
Under All Object Settings, click Quotes
-
Click Edit
-
Under Record Types and Page Layout Assignments, select the Assigned Record Types checkbox for the Quote row
-
A warning displays stating that the Master record type cannot be included alongside a custom record type. Click OK to continue
-
Click Save
Setting Up Quoting
Configure the Quote Page Layout
-
Add fields:
-
From Setup, enter "object" in the Quick Find box, then select Objects
-
Click Quote
-
Under Page Layouts, click Edit next to Quote Layout
-
Add the Customer and Office fields to the layout
-
Click the wrench icon on the Customer field
-
Select Required
-
Click OK
-
Click the wrench icon on the Office field
-
Select Required
-
Click OK
-
Add additional fields to the layout as necessary
You must add fields that are required for jobs to the Quote page layout.
You must then enter information in these fields before you can convert a quote into a job successfully.
-
Click Quick Save
-
-
Remove extra Price Book fields
-
Click Fields & Relationships
-
In the Quick Find box, type
Price Books -
Use the arrow to the right of the field with the Field Name
FX5__Price_Book2__c(no underscore betweenBookand2) to delete the fieldDo not delete the field with the Field Name of
FX5__Price_Book_2__c. -
Use the arrow to the right of the field with the Field Name
FX5__Price_Book3__c(no underscore betweenBookand3) to delete the fieldDo not delete the field with the Field Name of
FX5__Price_Book_3__c.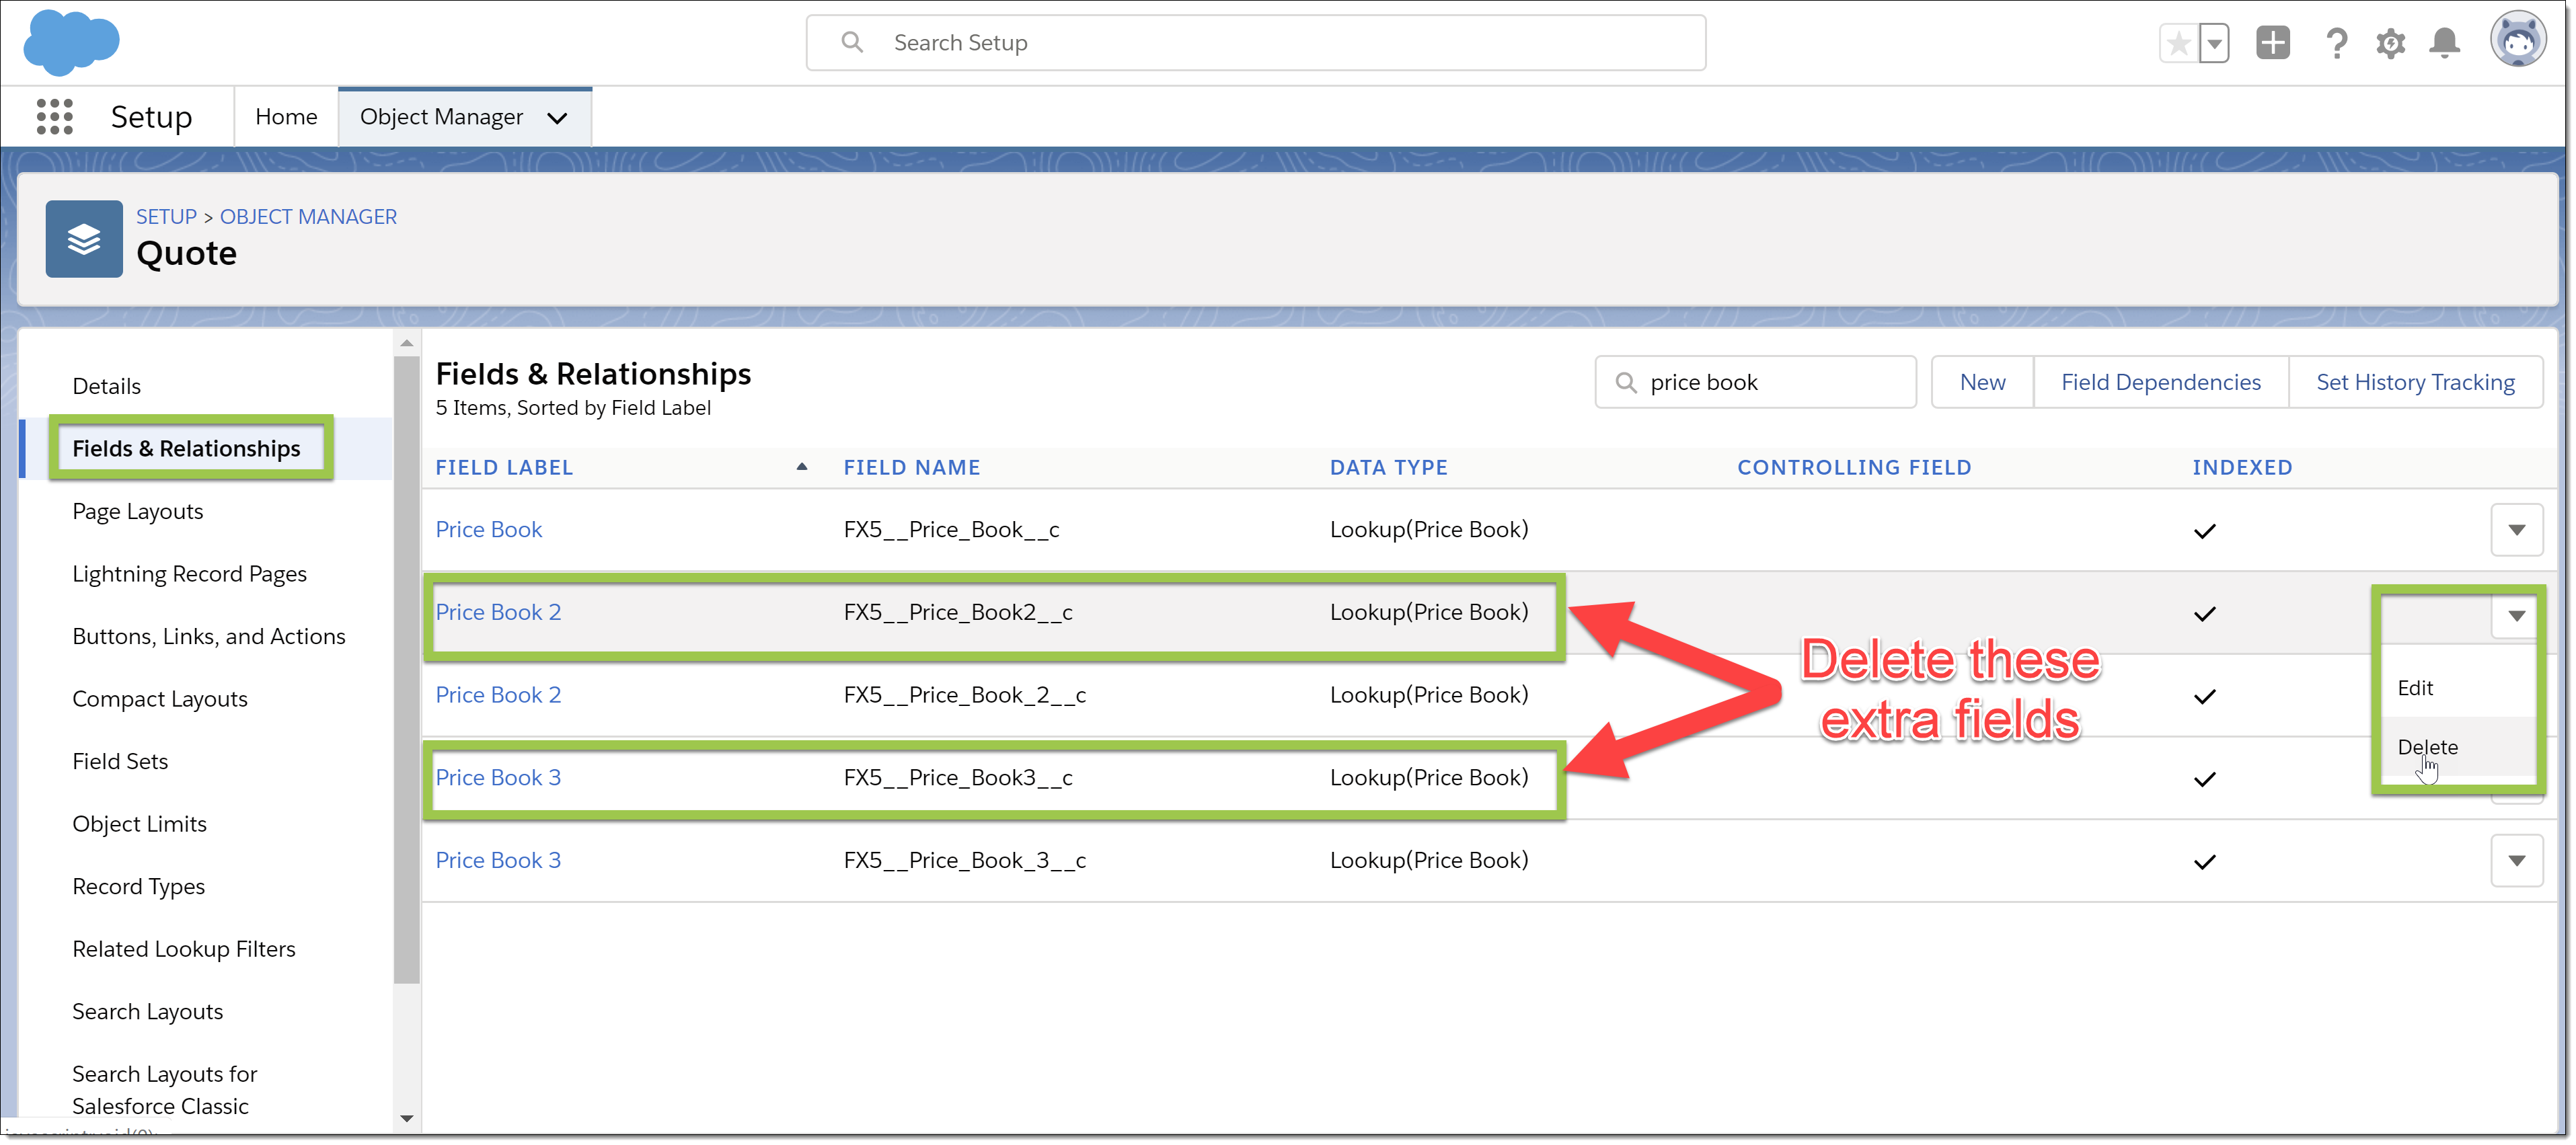
-
-
Add buttons:
-
On the toolbar, click Buttons
-
Drag Quote Item Builder and Create Job into the Custom Buttons section

-
Click Quick Save
-
-
Add related lists:
-
On the toolbar, click Related Lists
-
Drag Quote Items and Jobs into the Related Lists section
-
Click the wrench icon on the Quote Items related list
-
In the Columns section, select fields to display for quote items
-
Click OK
-
Click the wrench icon on the Jobs related list
-
In the Columns section, select fields to display for jobs created from quotes
-
Move down to the Buttons section and click
+ -
Deselect New
-
Click OK
-
Click Save
-
Click Yes
-
Configure Picklists
-
Configure the Job Type picklist:
-
Under Custom Fields & Relationships, click Job Type
-
Under Picklist Options in Values, click New
-
Enter job types, with each value on its own line
Enter the record type name for an item and not its label.
-
Select the Record Type Name checkbox
-
Click Save
-
Complete the following for every unused job type:
-
Under Picklist Options in Values, click Del next to the item
-
Click OK
-
-
Under Picklist Options in Values, click Reorder
-
Change the order
-
Click Save
-
Click Back to Quote at the top of the page
-
-
Configure the Segment picklist:
-
Under Custom Fields & Relationships, click Segment
-
Under Picklist Options in Values, click New
-
Enter business segments, with each value on its own line
-
Select the Record Type Name checkbox
-
Click Save
-
Complete the following for every unused business segment:
-
Under Picklist Options in Values, click Del next to the item
-
Click OK
-
-
Under Picklist Options in Values, click Reorder
-
Change the order
-
Click Save
-
Configure Job Page Layouts
-
From Setup, enter "object" in the Quick Find box, then select Objects
-
Click Job
-
If the Quote (FX5__Quote__c) lookup is listed as a custom field or relationship, delete it:
-
Under Custom Fields & Relationships, click Del next to Quote (FX5__Quote__c)
-
Select Yes, I want to delete the relationship
-
Click Delete
-
-
Configure Job page layouts:
-
Under Page Layouts, click Edit next to a layout
-
Add the Quote (FX5.Quote2) lookup to the layout
-
Click Save
-
Repeat steps a to c for other page layouts as needed
-
Configure Ticket Item Page Layouts
-
From Setup, enter "object" in the Quick Find box, then select Objects
-
Click Ticket Item
-
Configure Ticket Item page layouts:
-
Under Page Layouts, click Edit next to a layout
-
Add the Quote Item field to the layout
-
Click Save
-
Repeat steps a to c for other page layouts as needed
-