FX Customer Self-Service Module Setup
Prerequisites
-
Licenses
To set up the FX Customer Self-Service module, you need:-
Partner Community licenses
-
-
Setup
To set up the FX Customer Self-Service module, you must:-
Assign yourself to a role
-
Permissions
To set up the FX Customer Self-Service module, you need:-
System Administrator permissions for Salesforce
-
In 2021, Salesforce rebranded Communities to Experience Cloud and now refers to an instance of a community as a site.
|
| Complete each setup section in order from top down. Some of the later instructions depend on the completion of earlier sections. |
Enable Experience Cloud
-
Log in as a user who has the System Administrator user profile
-
From Setup, enter "Digital Experiences" in the Quick Find box, then select Digital Experiences → Settings
-
Complete the following:
-
Select Enable Digital Experiences
-
In Domain Name, enter a domain name to use for the portal
-
Click Check Availability
If the domain name is unavailable, repeat the prior two steps until you find an available domain name. -
Click Save
-
Click OK
-
Grant Permission to Manage the Portal
-
From Setup, enter "profile" in the Quick Find box, then select Profiles
-
Complete the following:
-
Open a user profile that needs to manage the portal
-
Under System, click System Permissions
-
Click Edit
-
Select View Global Header
-
Click Save
-
-
Repeat step 2 as necessary for other users
Add a User Profile for Portal Users
-
From Setup, enter "profiles" in the Quick Find box, then select Profiles
-
Click Clone next to Partner Community User
-
In Profile Name, enter a name for the user profile
-
Click Save
Add a Permission Set for Portal Users
-
From Setup, enter "permission" in the Quick Find box, then select Permission Sets
-
Click New
-
In Label, enter a name for the permission set
-
Click Save
-
Grant the minimum permissions for the portal
Refer to the FX Customer Self-Service Minimum Permissions article to view the minimum permissions required to use the portal.
Enable Partner Accounts
-
Open the Accounts tab
-
Open a customer account that needs access to the portal
-
Click the more options arrow button for the record, then select Enable As Partner
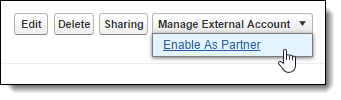
-
Click OK
-
Repeat steps 2 to 4 for additional customer accounts as needed
Add Portal Users
-
Add a contact for the user:
-
Open the Contacts tab
-
Click New
-
In Record Type, select the record type you use for customer contacts
-
Click Continue
-
In Account, select the customer for whom the user works
-
Enter the user’s name
-
Enter other details as necessary
-
Click Save
-
-
Add a user record for the user:
-
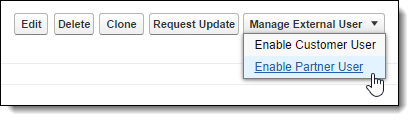
Click the more options drop down if needed, then select Enable Partner User
-
Enter the user’s name and email address
-
In User License, select "Partner Community"
-
In Profile, select the user profile for portal users
-
Scroll down to Locale Settings and select applicable options
-
Under Approver Settings, deselect Generate new password and notify user immediately
Portal users receive an email with instructions for setting their login password after you complete the setup. -
Click Save
-
Under Permission Set Assignments, click Edit Assignments
-
Add the permission set for portal users to Enabled Permission Sets
-
Click Save
-
Under Managed Packages, click Assign Licenses
-
Select FieldFX Base Package
-
Click Add
-
-
Repeat steps 1 and 2 as necessary for other contacts
Configure Sharing Settings
-
From Setup, enter "sharing" in the Quick Find box, then select Sharing Settings
-
Click Enable External Sharing Model
-
Set the default level of access for accounts and jobs:
-
Click Edit
-
Complete the following under Default External Access:
-
Select "Private" next to Account, Contract and Asset
-
Select "Private" next to Job
-
-
Click Save
-
Click OK
-
-
Add account sharing rules:
-
Under Account Sharing Rules, click New
-
Under Step 1, complete the following:
-
In Label, enter a name for the sharing rule
For example, Cirrus Oil Rule
-
-
Under Step 2, complete the following:
-
In Rule Type, select Based on Criteria
-
-
Under Step 3, complete the following:
-
In Field, select "Account Name"
-
In Operator, select "equals".
-
In Value, enter the name of a customer that needs access to the portal.
-
-
Under Step 4, complete the following:
-
In Share with, select "Portal Roles"
-
Select the applicable partner user for the customer
For example, Cirrus Oil Partner User
-
-
Under Step 5, complete the following:
-
In Default Account, Contract and Asset Access, select "Read Only"
-
-
Click Save
-
Click OK
You will receive an email confirmation once the sharing rule is active
-
Repeat steps a to h as necessary
-
-
Add job sharing rules:
-
Open the Accounts tab in a new tab in your web browser
-
Open a customer account that needs access to the portal
-
Copy the customer ID from the address bar in the browser (as shown below)

-
Move back to the Sharing Settings page on the other tab in the browser
-
Under Job Sharing Rules, click New
-
Under Step 1, complete the following:
-
In Label, enter a name for the sharing rule
For example, Cirrus Oil Rule
-
-
Under Step 2, complete the following:
-
In Rule Type, select Based on Criteria
-
-
Under Step 3, complete the following:
-
In Field, select "Customer ID"
-
In Operator, select "equals"
-
In Value, paste the customer ID you copied in step c
-
-
Under Step 4, complete the following:
-
In Share with, select "Portal Roles"
-
Select the applicable partner user for the customer
For example, Cirrus Oil Partner user
-
-
Under Step 5, complete the following:
-
In Default Access, select "Read/Write"
-
-
Click Save
-
Click OK
Salesforce sends an email confirmation to you once the sharing rule is active.
-
Repeat steps a to l as necessary
-
Add Page Layouts
-
Add a page layout for the Job object:
-
From Setup, enter "object" in the Quick Find box, then select Objects
-
Click Job
-
Under Page Layouts, click New
-
In Existing Page Layout, select a page layout for FieldFX Back Office
-
In Page Layout Name, enter "Portal Layout"
-
Click Save
-
Remove buttons, fields, and related lists you don’t want portal users to view
-
Click Save on the toolbar
-
Under Page Layouts, click Page Layout Assignment
-
Click Edit Assignment
-
Select the record types next to the user profile for portal users
-
In Page Layout To Use, select "Portal Layout"
-
Repeat steps k and l until you assign the layout to every applicable record type
-
Click Save
-
-
Add a page layout for the Ticket object:
-
From Setup, enter "object" in the Quick Find box, then select Objects
-
Click Ticket
-
Under Page Layouts, click New
-
In Existing Page Layout, select a page layout for FieldFX Back Office
-
In Page Layout Name, enter "Portal Layout"
-
Click Save
-
Remove buttons, fields, and related lists you don’t want portal users to view
-
Click Save on the toolbar
-
Under Page Layouts, click Page Layout Assignment
-
Click Edit Assignment
-
Select the record types next to the user profile for portal users
-
In Page Layout To Use, select "Portal Layout"
-
Repeat steps k and l until you assign the layout to every applicable record type
-
Click Save
-
Add the Portal
| You must have completed Step 1 above to enable Digital Experiences and establish a Domain Name for the portal. |
-
From Setup, enter "Sites" in the Quick Find box, then select All Sites
-
Add the portal:
-
Click New
-
Select the Salesforce Tabs + Visualforce template
You may have to scroll on the page to see this template option. -
Click Get Started
-
In Name, enter a name for the portal
-
In URL, "customers"
-
Click Create
A preview of the site displays once the process completes.
-
-
Add members to the portal:
-
Select the Administration button under My Workspaces
Or, click on the Workspaces tab at the top of the page, then select Administration from the menu.
-
Select Members
-
In Search, select "All"
-
Add the user profile for portal users to Selected Profiles
-
Add the permission set for portal users to Selected Permission Sets
-
Click Save
Salesforce sends an email confirmation to you once the process completes.
-
-
Select the tabs to display in the portal:
-
Select Administration → Tabs
-
Add "Jobs" and "Tickets" to Selected Tabs
-
Click Save
-
-
Customize the portal’s appearance:
-
Select Branding
-
You must upload images for the header and footer of portal pages using the Documents tab
-
The header can be
.html,.gif,.jpg, or.png -
The footer must be an
.htmlfile -
The maximum file size for
.htmlfiles is 100 KB combined -
The maximum file size for
.gif,.jpg, or.pngfiles is 20 KB
-
-
In Header, select the header to use for portal pages
The header you choose replaces the Salesforce logo below the global header. -
In Footer, select the footer to use for portal pages
The footer you choose replaces the standard Salesforce copyright and privacy footer. -
Under Colors, select the color scheme to use for portal pages
-
Click Save
-
-
Customize the Login page for the portal:
-
On the sidebar, select Login & Registration
-
In Logo Type, select whether the logo is a file or a URL
-
In Logo File, select the previously uploaded logo
A preview of the image diplays.
-
Make other entries for the Logo branding as desired for color scheme
-
In Footer Text, enter the text to display in the Login page footer
-
In Login Page Type, select "Visualforce Page" then select "CommunitiesLogin"
-
Select the remaining options as necessary
-
Click Save
-
-
Configure email settings:
-
Select Emails
-
Under Sender, select the from name and email address to use for emails to portal users
-
Under Chatter Email Branding, select the logo and text to include in the footer of emails to portal users
-
Under Email Templates, select Send welcome email and select the email templates to use for emails to portal users
-
Click Save
-
-
Configure page settings:
-
Select Pages
-
In Home Page, select "Visualforce Page" then select "CommunitiesLanding"
-
Click Save
-
-
Under Advance Customizations, select Go to Force.com
Test Portal Users
-
Open the Contacts tab
-
Open the contact for a portal user
-
Click the dropdown arrow for more options for the record if necessary, then select Log in to Experience as User
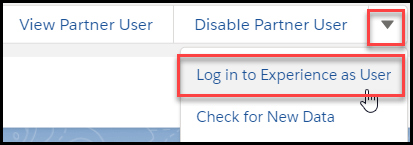
The customer portal opens.
-
Open the Jobs tab
-
Open a job and verify necessary information displays
-
Open the Tickets tab
-
Open a ticket and verify necessary information displays
-
Adjust the permission set and page layouts for the portal as necessary
-
Repeat steps 1 to 8 for portal users linked to other partner accounts
Publish the Portal
-
From Setup, enter "Digital Experience" in the Quick Find box, then select All Sites
-
Click Manage next to the portal
-
Select Administration
-
Click Activate Site
-
Click OK