PM Routes
Basics
-
PM Routes are Standard Work Task maintenance done on a series of Equipment items.
-
Crew member picks up the PM Route and completes individual Work Orders on each Equipment item in the route.
Key Features
-
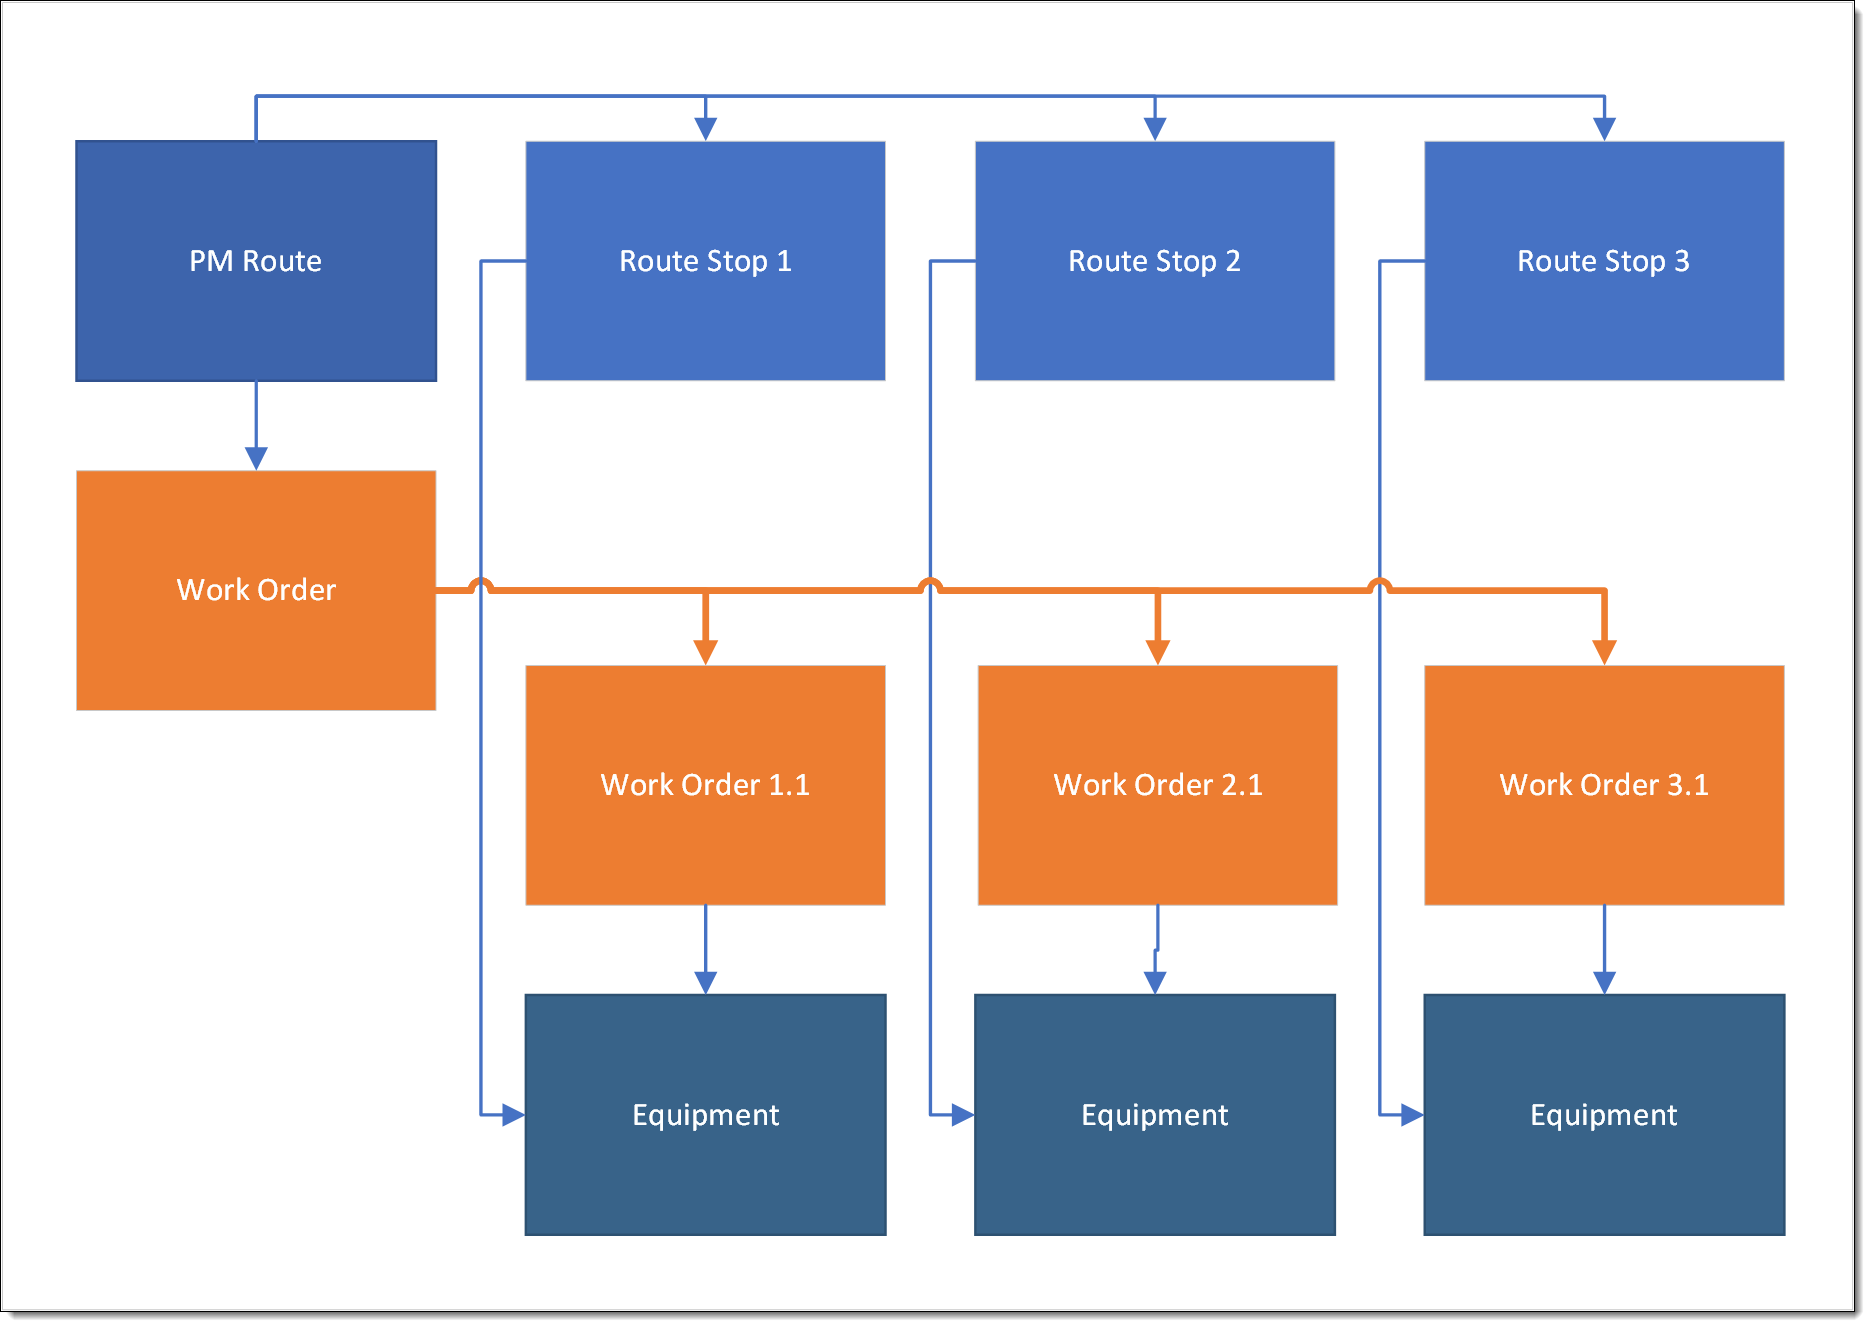
Rather than individually picking up the Work Orders for a set of Equipment items always maintained in the same sequence, the Crew Member works the PM Route and automatically inherits all of the Work Orders at each Route Stop.
For example, an inspector reviews 15 separate points along an assembly line, with each point having a unique set of tasks to complete.
Create a Route type work order for the entire assembly line and then Route Stop type Work Orders for each inspection point.
The inspector selects the Assembly Line Work Order, which includes all of the Route Stops for the entire line.
-
Add, remove, or pause Route Stops as needed.
-
Each Route Stops can have a different Standard Work Task to complete.
-
FX EAM can automatically generate Work Orders, or they can be manually generated.
-
Work Orders can be set to In Planning or Ready to Schedule status.
How It Works
-
A Crew Member begins working the PM Route Work Order.
-
The Crew Member is automatically assigned the Work Orders for each Equipment item at each Route Stop.
-
The Crew Member completes the Work Orders for each Equipment item at each Route Stop
-
After completing the work at all Route Stops, the Crew Member completes the Work Order for the PM Route.
Step by Step
Create a PM Route
-
From the PM Route tab, click New
-
Make the following entries in Information:
-
Route Description: Route name (255 characters)
-
Craft: Select the Craft for the Work Orders for this PM Route
Create a Route from this screen if needed.
If no Route is selected, Work Orders use the default labor rate defined in Custom Settings.
-
PM Status: Select the status of the PM Route
-
Draft: PM Route design in progress; Work Orders not generated
-
Active: Currently generating work orders
-
Inactive: PM Route not currently in use
-
-
Default Account Assignment (Optional): 3rd party vendor or contractor that performs the work
-
Default Work Order Owner: Select the User or Group to assign to the Work Order
LiquidFrameworks, Inc. recommends assigning to a Group.
-
-
Make the following entries in Route Dates:
-
Release Window: Number of days in advance of the Due Date to release the Work Order
-
PM Due Date Override: Use to specify a date to generate the Route’s Work Orders, such as to avoid a holiday
This field is automatically cleared the next time the Work Orders generate to resume the schedule.
-
End Date: Date after which Work Orders should no longer generate
-
-
Make the following entries in Route Scheduling:
-
Calendar Interval: Number of intervals to wait between generated Work Orders
-
Calendar Interval UOM: Select Days, Weeks, or Months
-
AutoRelease: Select to have FX EAM automatically release the Work Orders or leave deselected to manually release the Work Orders
-
Floating Interval: Select to use the last Work Order’s completion date to determine the next Due Date, otherwise FX EAM uses the last Due Date to determine the next Due Date
-
New Work Order Status: Select the status to use for the generated Work Orders, either In Planning or Ready to Schedule
-
-
Click Save or Save & New
Add Route Stops
-
From the PM Route, selected Route Stops from either the Quick Links or the Related tab, then click New
-
Make the following entries:
-
PM Route: PM Route for this Route Stop, defaults to the PM Route selected
-
Equipment/Asset: Equipment on which to perform the work
-
Standard Work Task: Select the Standard Work Task to use for this Route Stop
Create a New Standard Work Task from this screen if needed.
-
Sequence: Order in which to complete the work
Consider sequencing in increments of 10 to make inserting future additional stops easier.
-
Active: Select to mark this Route Stop for work on the PM Route or leave deselected to pause work on this Route Stop
Planned Hours automatically populates from the Standard Work Task selected.
-
-
Click Save or Save & New
Repeat for as many Route Stops as needed.