FX Mobile Reports Page
| This information and these steps are for the older FieldFX Mobile and not the newer FieldFX Mobile App. |
Use the FX Reports page to view and print FX Reports in FieldFX Mobile.
To add a new report or edit an existing report, see Document Template Editor in FieldFX Admin Portal Tools.
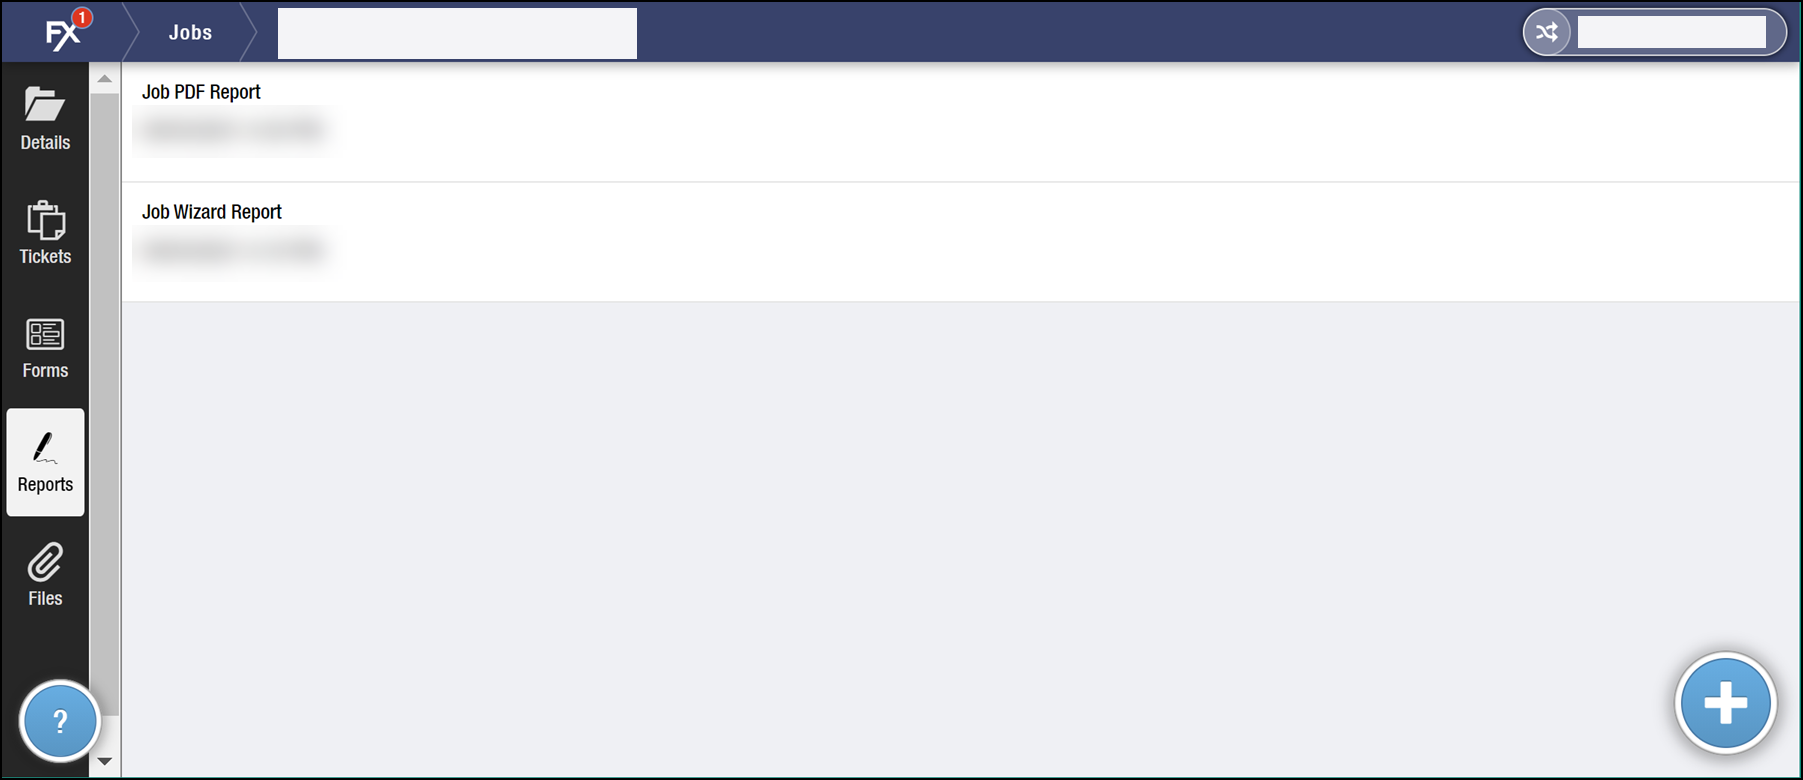
Layout
The FX Reports page in FX Mobile is laid out as follows:
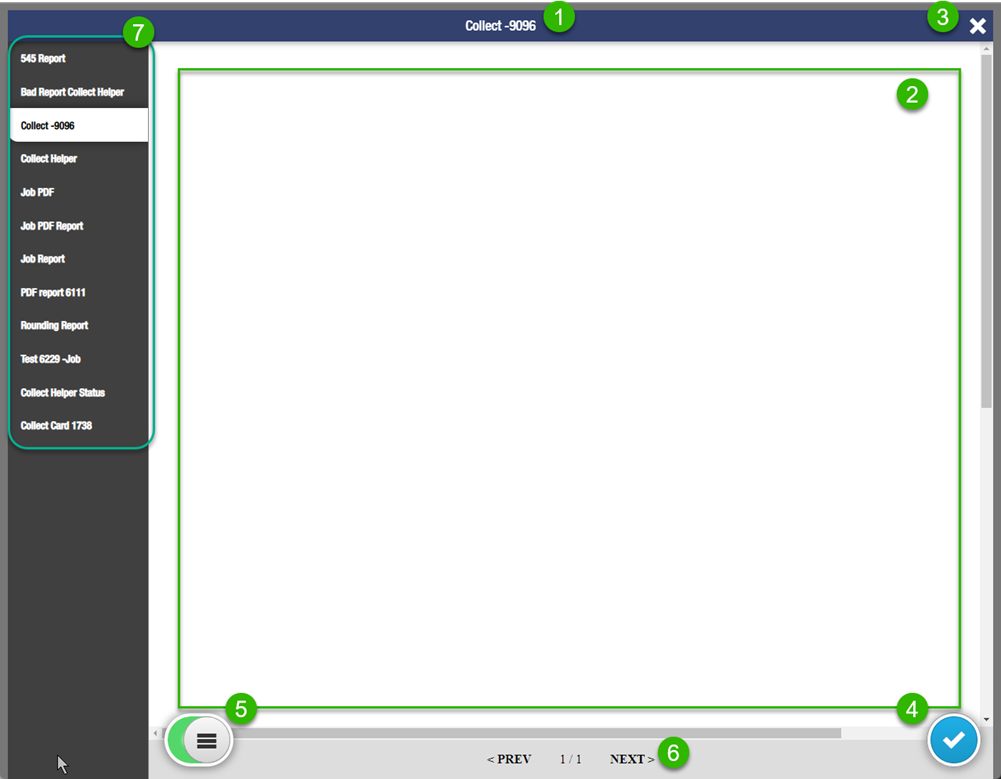
| Callout | Section | Description |
|---|---|---|
1 |
Report Name |
Name of the report appearing in the preview window. |
2 |
Rendered preview of the report |
This is where the contents of the report appears. |
3 |
Close button |
Closes the report window and returns to the main Job, Ticket, or Quote window. |
4 |
Edit button |
This button opens the report for printing. If you select the |
5 |
Report List toggle |
This slider shows or hides the list of reports. |
6 |
Report Navigation buttons |
If the report has more than one page, you can use the <PREV or NEXT> buttons to move to the different pages. The center numbers show the current page number of the total page count of the report. |
7 |
Report List |
Reports that are attached to the selected Job, Ticket, or Quote. |
Step-by-Step Guides
How to Access FX Reports
-
Access FX Reports from:
-
Click
 to open the FX Report.
 -
You can do the following:
View Reports for a Job, Ticket, or Quote
The screen shows the last actions taken on a report.
Select the blue plus button to a list of report(s) to the record.
| If there are no reports for the record, the Add Reports screen displays automatically when you select the Reports tab. |
Preview an Individual Report
| The list of reports is context sensitive, meaning only the reports valid for the selected record display. Reports that cannot be added for the selected record because of its office, record type, or other factors do not display. |
-
Select an available report from the list on the left to preview the report.
FieldFX Mobile adds details from the selected record to the report preview to help you confirm you selected the correct report.
The screen displays a list of reports available to add for the selected record.
-
Select
to either or attach files to a report, capture signatures on a report, or print the report.If the report has multiple pages, you can navigate to other pages in the report.

-
If the report has been configured to render in multiple languages, select the language in the drop down at the top of the report.
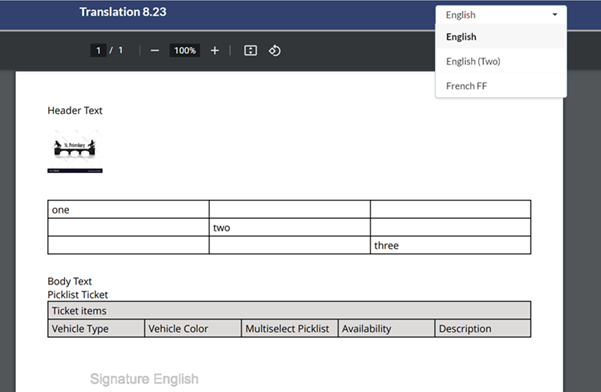
This dropdown menu only appears for forms where the report template has bee configured for multiple languages.
Attach Files in a Report
-
In the report preview (and if you have the permission and the report allows it), tap on the
 so it is enabled
  .
. -
Depending on the report, you may see a larger blue box with a picture and paperclip icon.
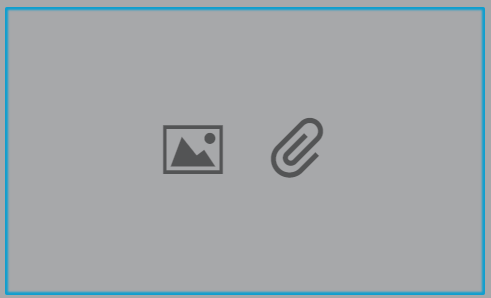
-
If you have the right permissions, tap in the box to attach the files or pictures.
Capturing Signatures
-
If the previewed report has one or more Signature Capture areas defined, select the pencil toggle
to enter the Signature Capture window to add signatures to the report. -
Scroll through the report on the screen and select the signature to add.
-
Add the signature by drawing on the screen, using the mouse, or using a signature capture device.
-
Select
 to clear the drawing and try again.
 -
Select
 to accept the signature and return to the report.
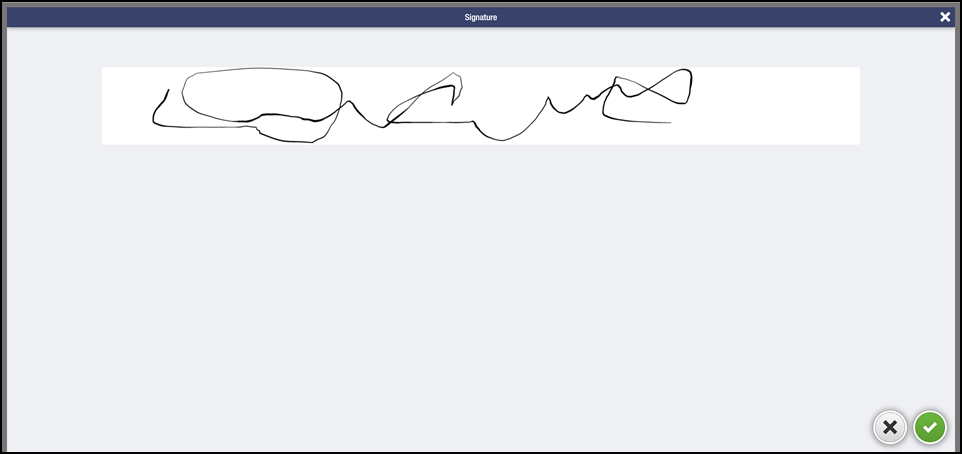
-
To return to the report, click
 .
. -
Repeat for any other signatures on the report.
Print an Existing Report
If reports already exist for a record, a list of reports displays.
-
Select a report to display it on your device.
Use the list toggle button
 to show or hide the last actions taken on a report.
 -
Once displayed, select the print icon
 to send the report to a printer available to your device.
 -
To close the report, tap
 .
. -
Select the blue checkmark button
 to exit the displayed report and return to the actions taken for the record’s reports.
|
To see other reports for that record,
|
Save the Report to the Record
After previewing the desired report and adding any signatures, select the green check mark button in the lower right of the report preview screen to add the report to the record.
| The button is customizable and may also display text next to the checkmark, as in the example above that adds the word "SAVE". The default button has no text and only displays a white checkmark on a green circle. |
Walkthrough
Basics
Use the walkthrough to view explanations of buttons and controls available on the current screen.
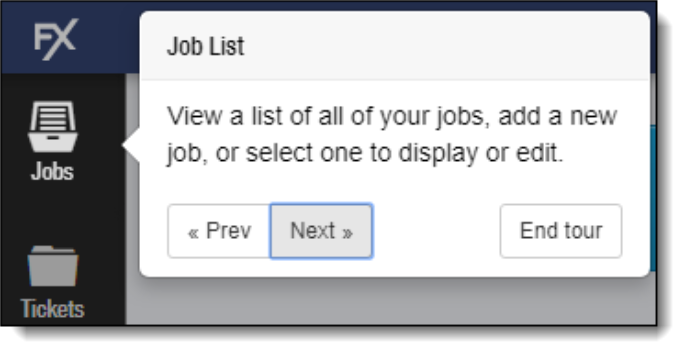
Using the Walkthrough
To display the walkthrough, select the help question mark button on the sidebar.

To move through the explanations of each feature, select Prev or Next.
To close the walkthrough, select End tour.
Customizing Walkthrough Text
Administrators can customize the text that displays in the walkthrough messages to conform to your processes and language.
In addition to text, the walkthrough can display images, PDFs, and videos available from a static URL.
Each stop can display multiple slides.
For details on customizing the help text, see FX Mobile Tour Builder.