FXL Report Viewer Setup
Introduction
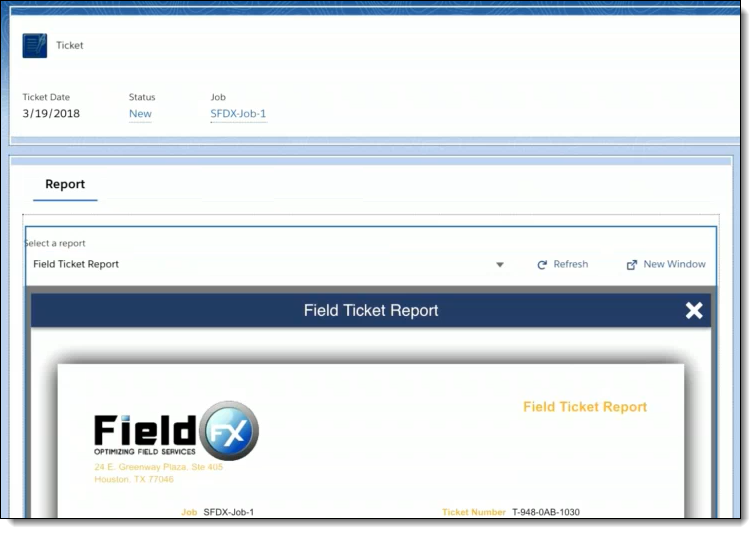
FXL Report Viewer displays the PDF reports for the active record in FieldFX Back Office when using Lightning Experience. Reports displayed in the FXL Report Viewer are live and are automatically refreshed when data on the underlying record is changed.
FXL Report Viewer provides immediate confirmation of record updates to Back Office users. You can also configure custom labels for the FXL Report Viewer Lightning Component.
If using Back Office and the FX Report Lightning component, you will only see the report templates meeting the criteria set by the report template administrator.
The report template administrator could create a report filter that uses Logical Operators, like AND or OR, and also could contain custom filters on the report template’s master SObject.
The resource file must be named en_US.js, not en_US with no extension.
|
|
To use the FieldFX Lightning package starting with version 1.287, you must use the FieldFX Managed Package version 1.542 or higher. To find the version numbers you have installed, see Check Version Number for FieldFX Managed Package and FieldFX Lightning Managed Package. |
Prerequisites
To setup and use FXL Report Viewer, you need to:
| Have these user licenses | Have these permissions | Complete these tasks and review these topics before continuing |
|---|---|---|
|
Step-by-Step Guides
To setup the report viewer, follow the steps in these sections:
Set Up FXL Report Viewer
-
Switch to the Lightning Experience.
-
Access the applicable record page.
-
Click Save.
-
If this is the first time the FXL Report Viewer has been set up on the page, activate the configuration of the page as the Org default
-
Click Back.

-
Click Back.
-
Verify FXL Report Viewer is displaying where you expected.
Set Active checkbox in AppSetting to ReportAsFiles
-
From Setup, enter
Custom Metadatain the Quick Find box. -
Select Custom Metadata Types.
See AppSetting (Managed) for more information. -
In the AppSetting row, click Manage Records.
-
In the AppSetting section, click Edit in the ReportAsFiles row.
-
In AppSetting (Managed), click Edit.
Only certain attributes can be edited. Since it is managed, you can only edit the Protected Component, Active, and Value fields. All other fields locked. -
In AppSetting Edit,
-
Click Edit.
-
Select the Active checkbox.
If the Active checkbox isn’t present, you will have to edit the layout and add it. You only have to do this once.
-
In AppSetting (Managed), click Edit Layout.
-
Find the Active button.
-
Click and drag it down to the AppSetting Sample section to just above the Value field.
Active with a checkmark appears.
-
Click Save.
-
-
For the Value, select True.
-
-
Click Save.
Define Google Chrome PDFs Option
| Google Chrome is a 3rd party application, and the instructions for how to enable this option may change at any time without warning. |
Google Chrome allows PDFs to either be saved to the user’s device or opened in the browser. The Report Viewer requires that reports be opened in the browser.
-
Open Google Chrome.
-
In Google Chrome, select the three vertical dot menu button at the top right, then click Settings.

Or, in the search bar, go to
chrome://settings. -
In Search settings type
PDF. -
Select Site Settings.
-
Scroll to the bottom of the screen and select Additional content settings.
-
Select PDF documents.
-
Select Open PDFs in Chrome.
Recommended Reading
-
FXL Report Viewer - Learn how to use the FXL Report Viewer.