Shift Scheduling Overview
Prerequisites
-
To use Shift Scheduling, you need the following licenses:
-
To use Shift Scheduling, you must:
-
To use Shift Scheduling, you need:
|
Prior to using Shift Scheduling, be sure to complete the Shift Scheduling Setup. |
Basics
-
Shift Scheduling adds a convenient action layer within the Job to schedule coverage for both crew members and equipment.
-
See which crew and equipment are available for project days and create planning records.
-
Review requirements and current compliance for the Job and schedule accordingly.
-
See visual notifications for personnel or equipment that is over- or doublebooked.
-
Create planning records in a visual calendar scheduling display.
Getting There
-
Shift Scheduling is accessed from a job record
-
Access a job record in Back Office, then select the Shift Scheduling action button
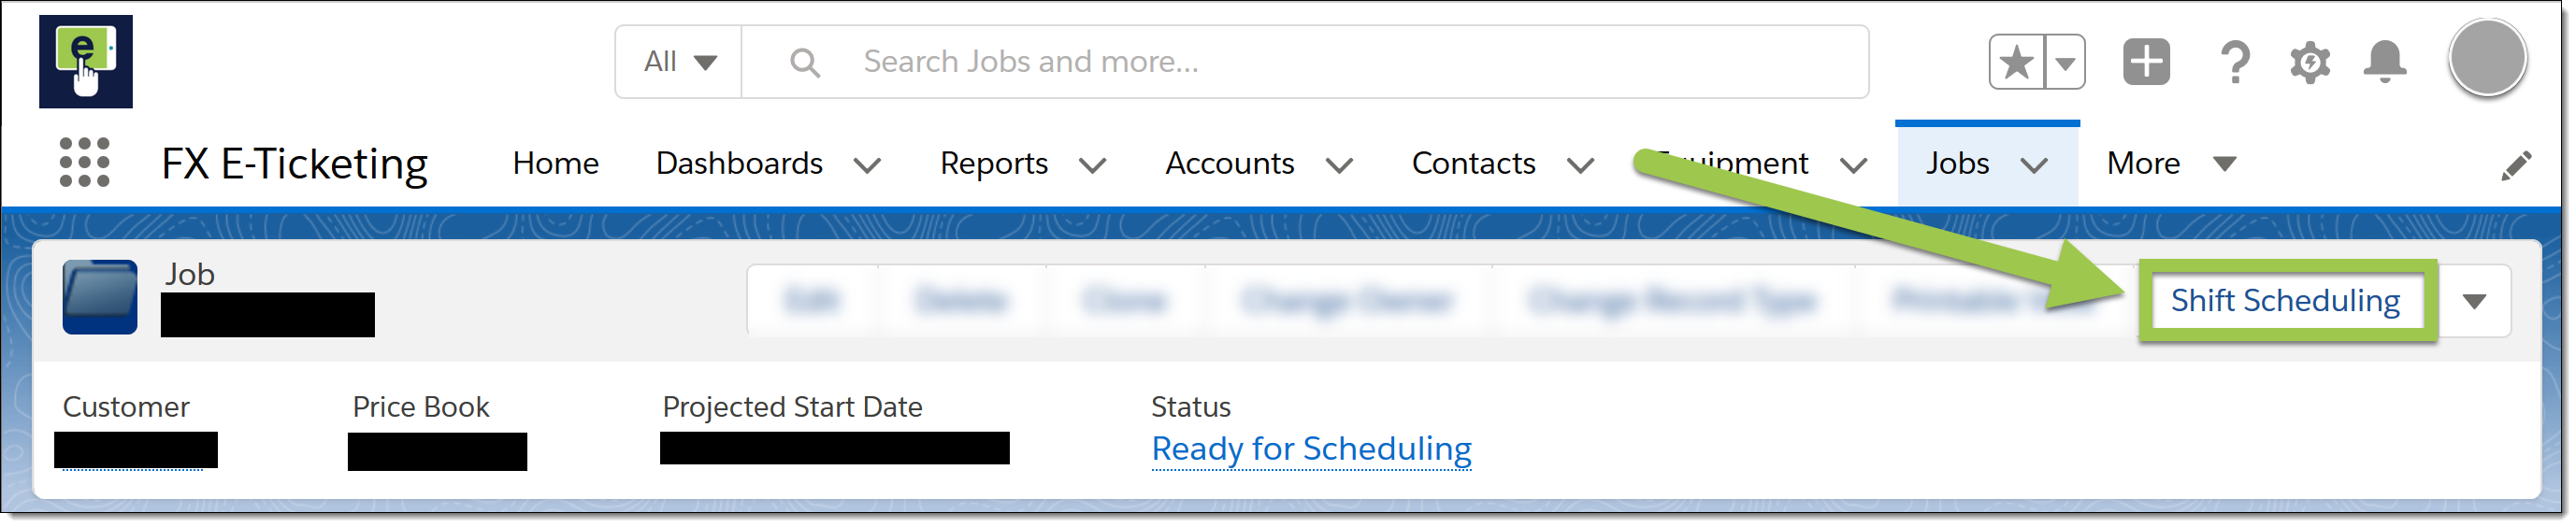
|
If the action is not available, click the drop down arrow for more options. If Shift Scheduling is still not available, ask the system administrator to add the Shift Scheduling action button to the page layout. |
|
The Job must have dates entered in the Projected Start Date and Projected End Date fields to use Shift Scheduling. |
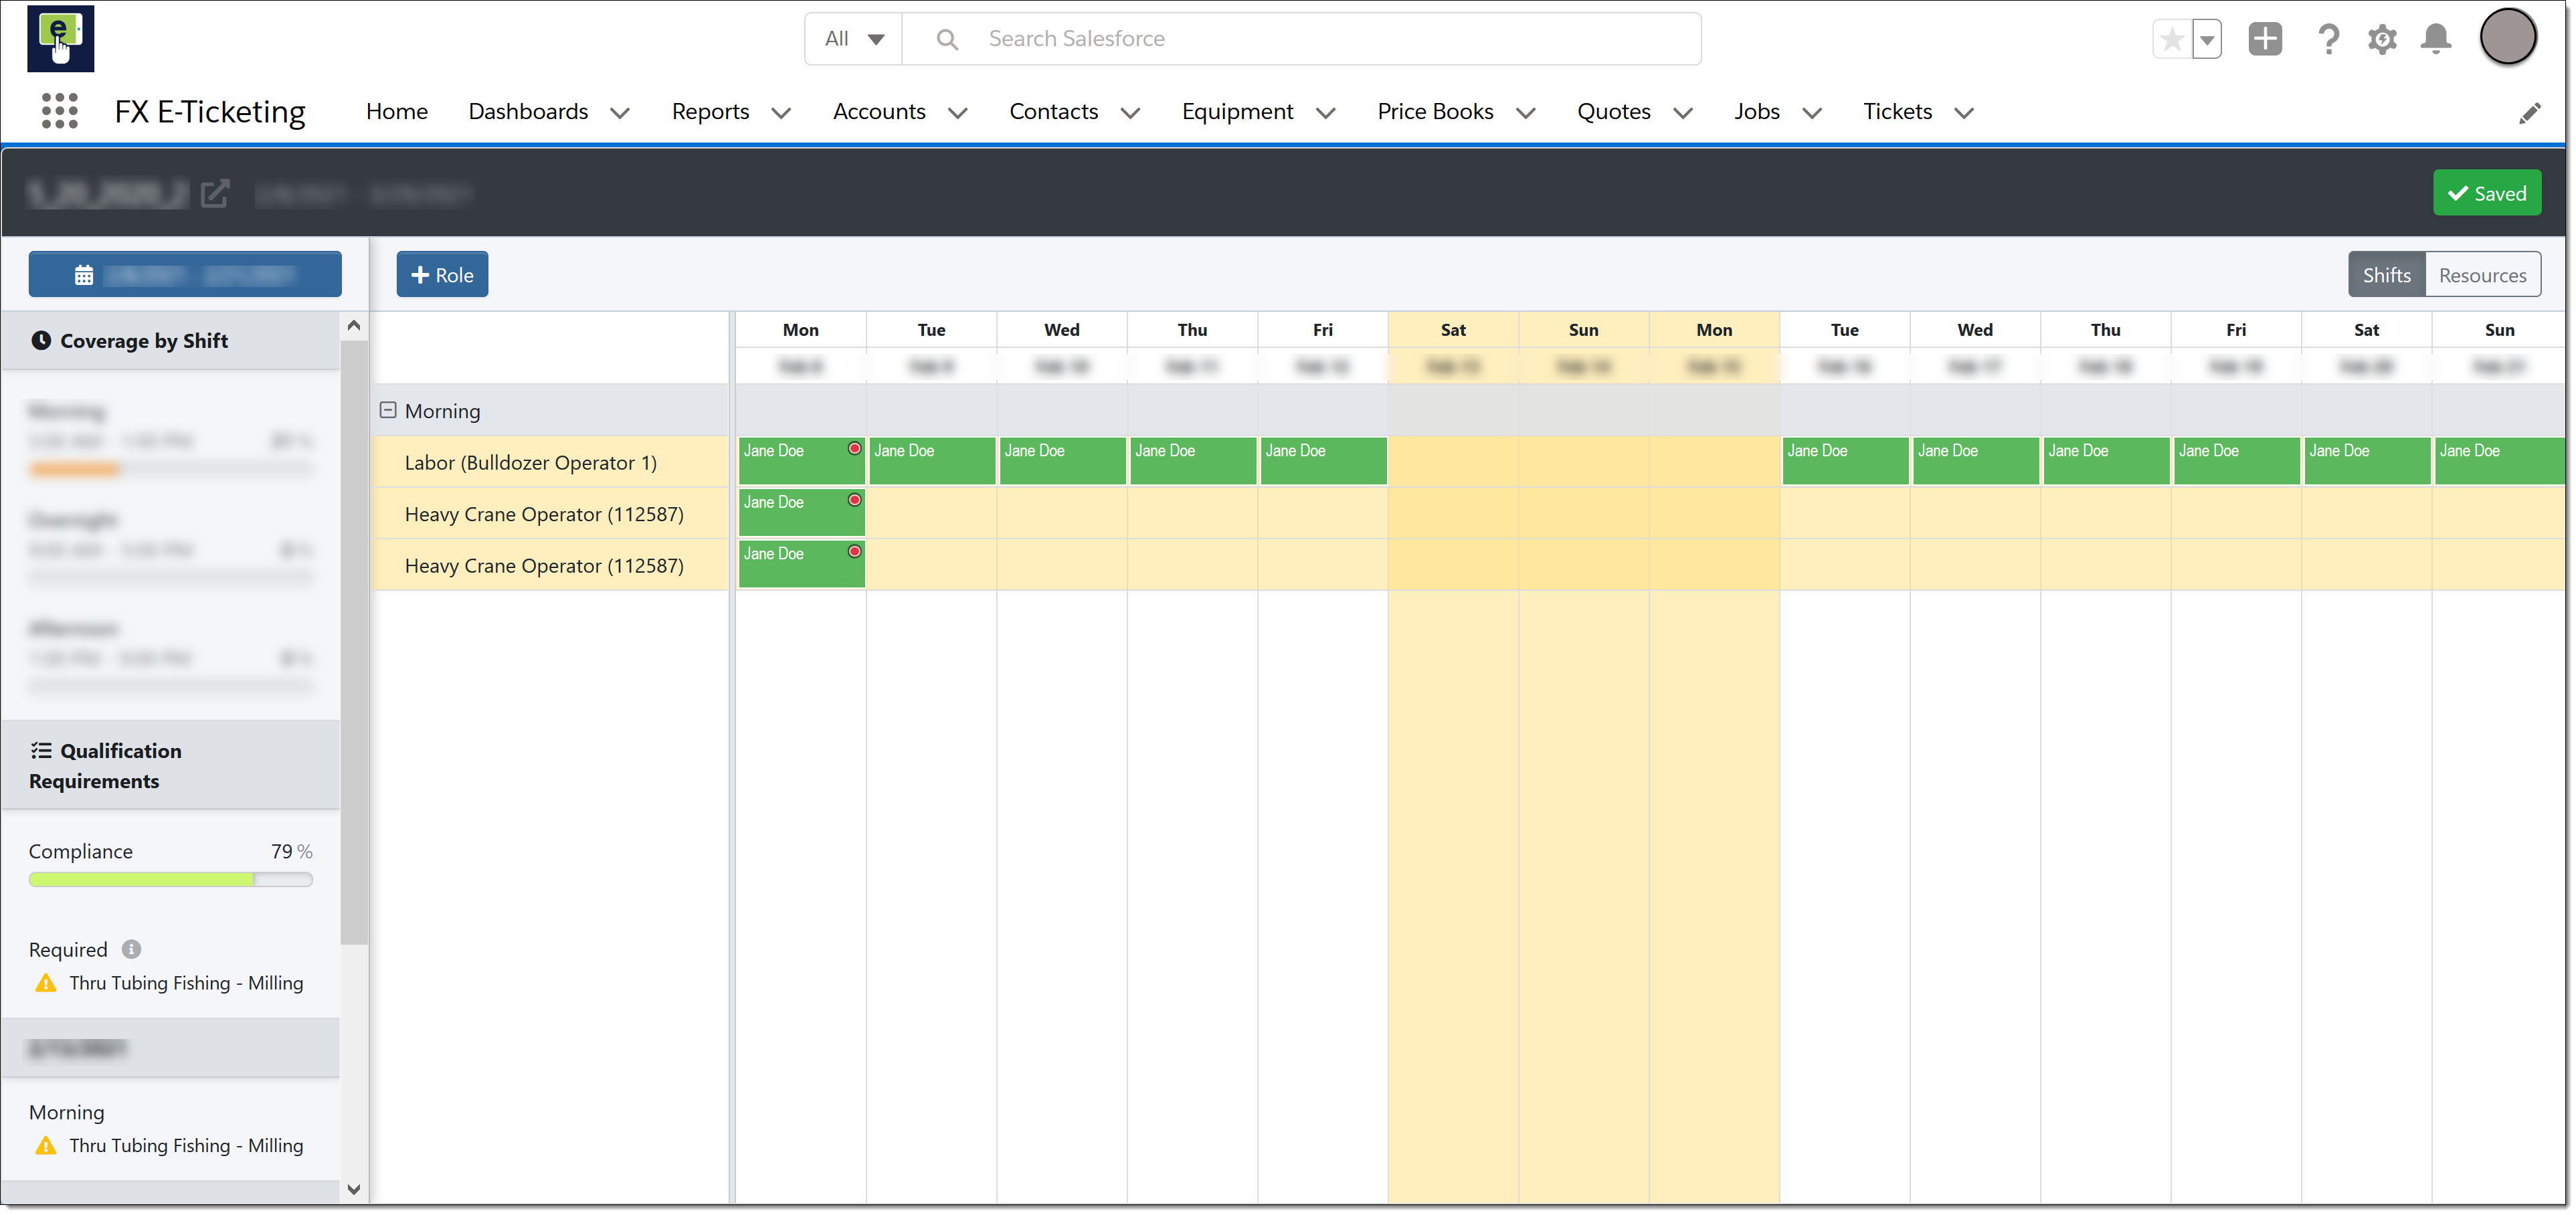
How it Works
Header Controls

-
Displays the Job Name
Click the name to return to the Job
-
Return to Job icon
Click the button to return to the Job
-
Displays the Job’s Projected Start Date and Projected End Date range
-
If one or more scheduled resources are selected, an additional red Delete button displays
Click the button to delete the selected record(s)
Caution! This cannot be undone.
-
Displays a green Saved button if all Shift Scheduling changes have been saved as planning records
-
If unsaved changes exist, the button changes to a yellow Publish Changes button with the number of records not yet saved
-
Click the yellow Publish button to publish the change(s) and write planning records
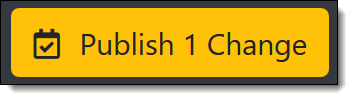
Planning records are not created until the changes are published.
If you navigate away from the page without Publishing changes, any unsaved changes are lost.
-
-
Shows the working date range currently displayed for scheduling and compliance
Compliance and coverage checks are against the working date range.
-
Click to display a calendar to adjust the working date range
-
Select the date or date range to view for scheduling, then click the date range button in the bottom right
-
Dates outside the Job’s projected date range are not available for selection and are grayed out on the calendar view
Click and drag the mouse across the desired date range to select multiple dates.

-
-
Click the +Role button to add a new Labor type Price Book Item for scheduling
-
Click the +Equipment button to add a new Equipment type Price Book Item for scheduling
The +Equipment button can be hidden in settings.
-
Shifts and Resources toggle
Click to switch whether to view the calendar by shifts or by the resource already scheduled
The darker gray item is currently selected.
Add a Role or Equipment
-
Roles define the crew members required for the job for a shift
-
Click the +Role button to add a Labor type Price Book Item to schedule for the Job
-
Click the +Equipment button to add an Equipment type Price Book Item to schedule for the Job
The example screenshot is for the Add Role option.
The Add Equipment screen works similarly.
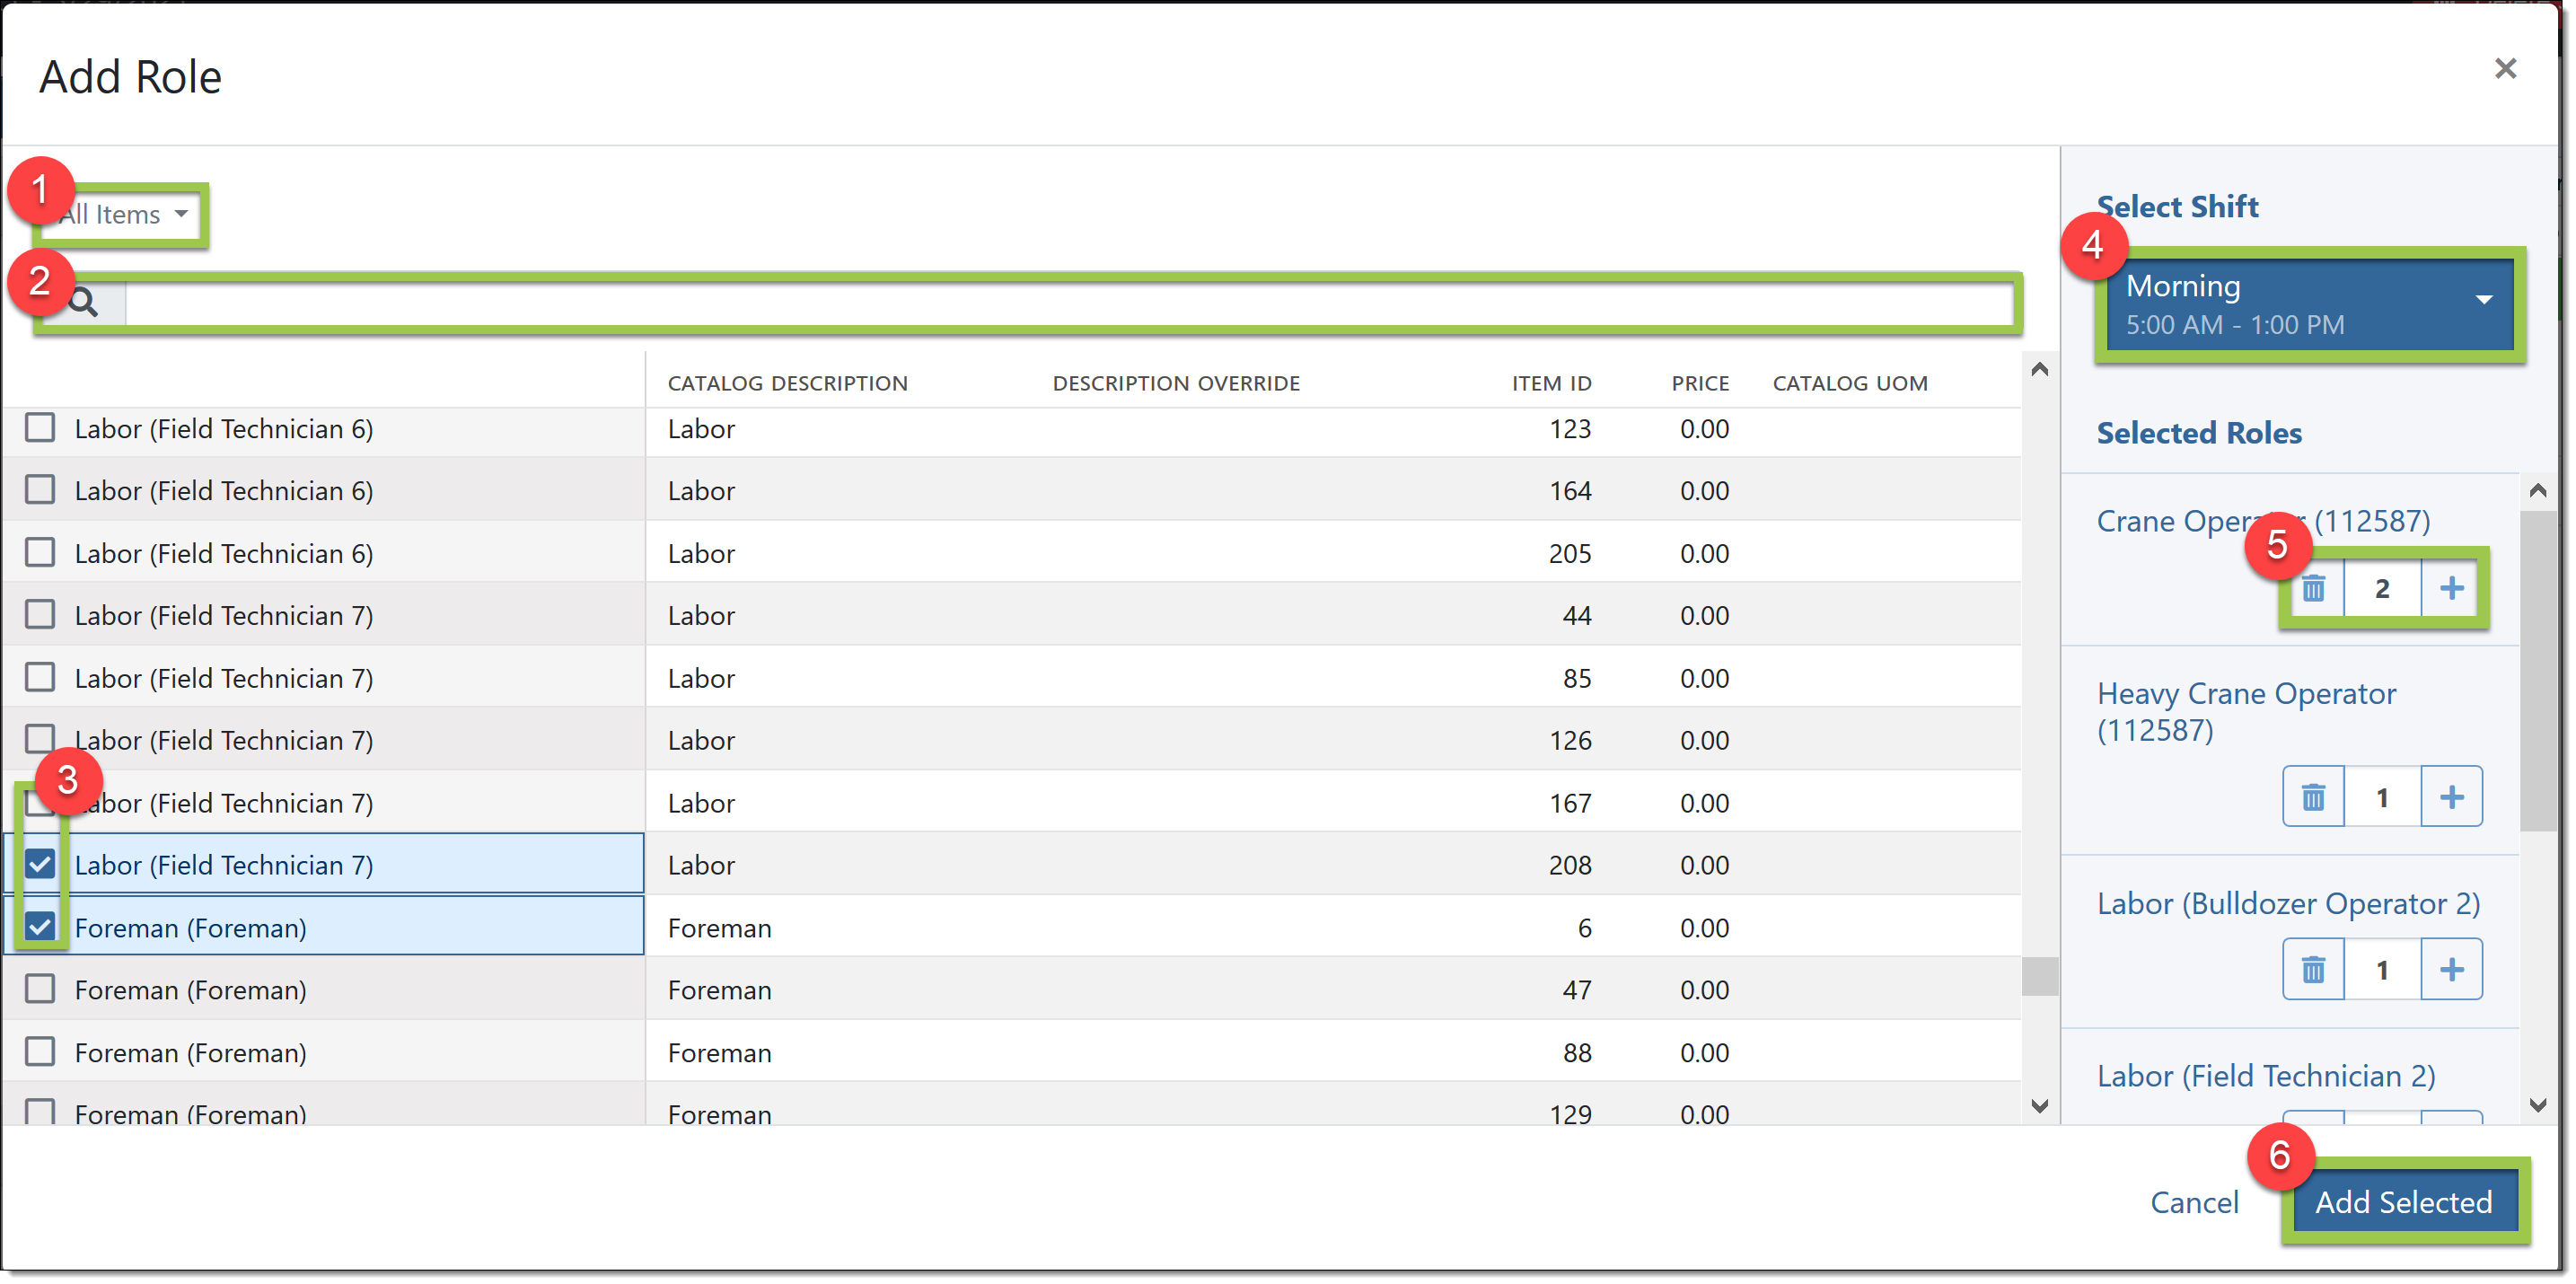
-
Filter the list of available roles to select by a Price Book Item list view.
Only the Price Book Item list views the user has access to display.
-
Search field: Enter text to search within the displayed list of Roles or Equipment
-
Mark the checkbox next to the role(s) to add to the scheduling for the Job
-
Select the Shift to which to add the roles. Only one shift can be selected.
Only the shifts in the Job’s Shift Group display.
Add roles for one shift, then add the roles for each additional shift that requires them.
-
Click the trash can icon to delete a role previously selected or change the quantity of crew members needed for the role.
-
Click the Add Selected button to add the Selected Roles to the Shift Scheduling screen for the Job.
Review Coverage and Qualifications
-
The Left panel displays summaries of coverage for the Job for the selected date range
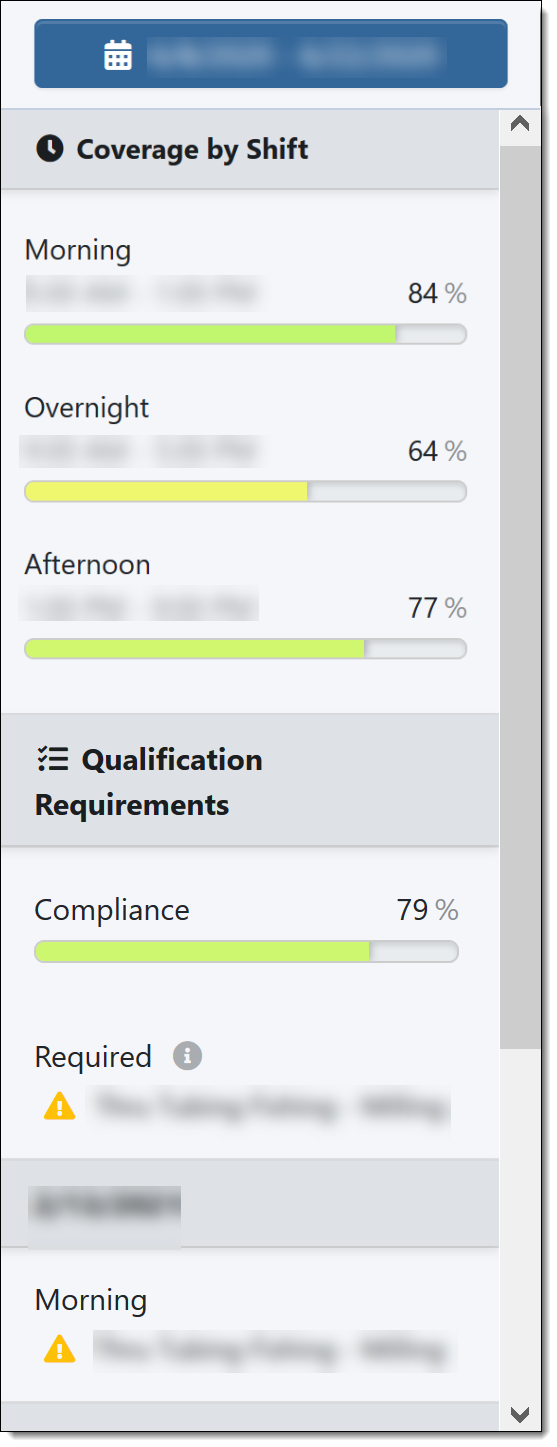
Coverage by Shift
-
Displays all of the Shifts for the Job
Displayed shifts depend on the Shifts assigned to the Job’s Shift Group.
-
The percentages indicate the total number of shifts in the working date range that already have scheduled resources
Qualification Requirements
-
Lists the requirements for resources
-
Compliance indicates the percentage of adequate requirements coverage across all shifts in the working date range for all requirements
-
Required qualification requirements must be met by all resources scheduled for each shift
-
Other qualification requirements must be met by at least one resource scheduled for the shift
-
A triangle icon displays next to a requirement if the listed qualification is not met by current scheduling for the specified shift
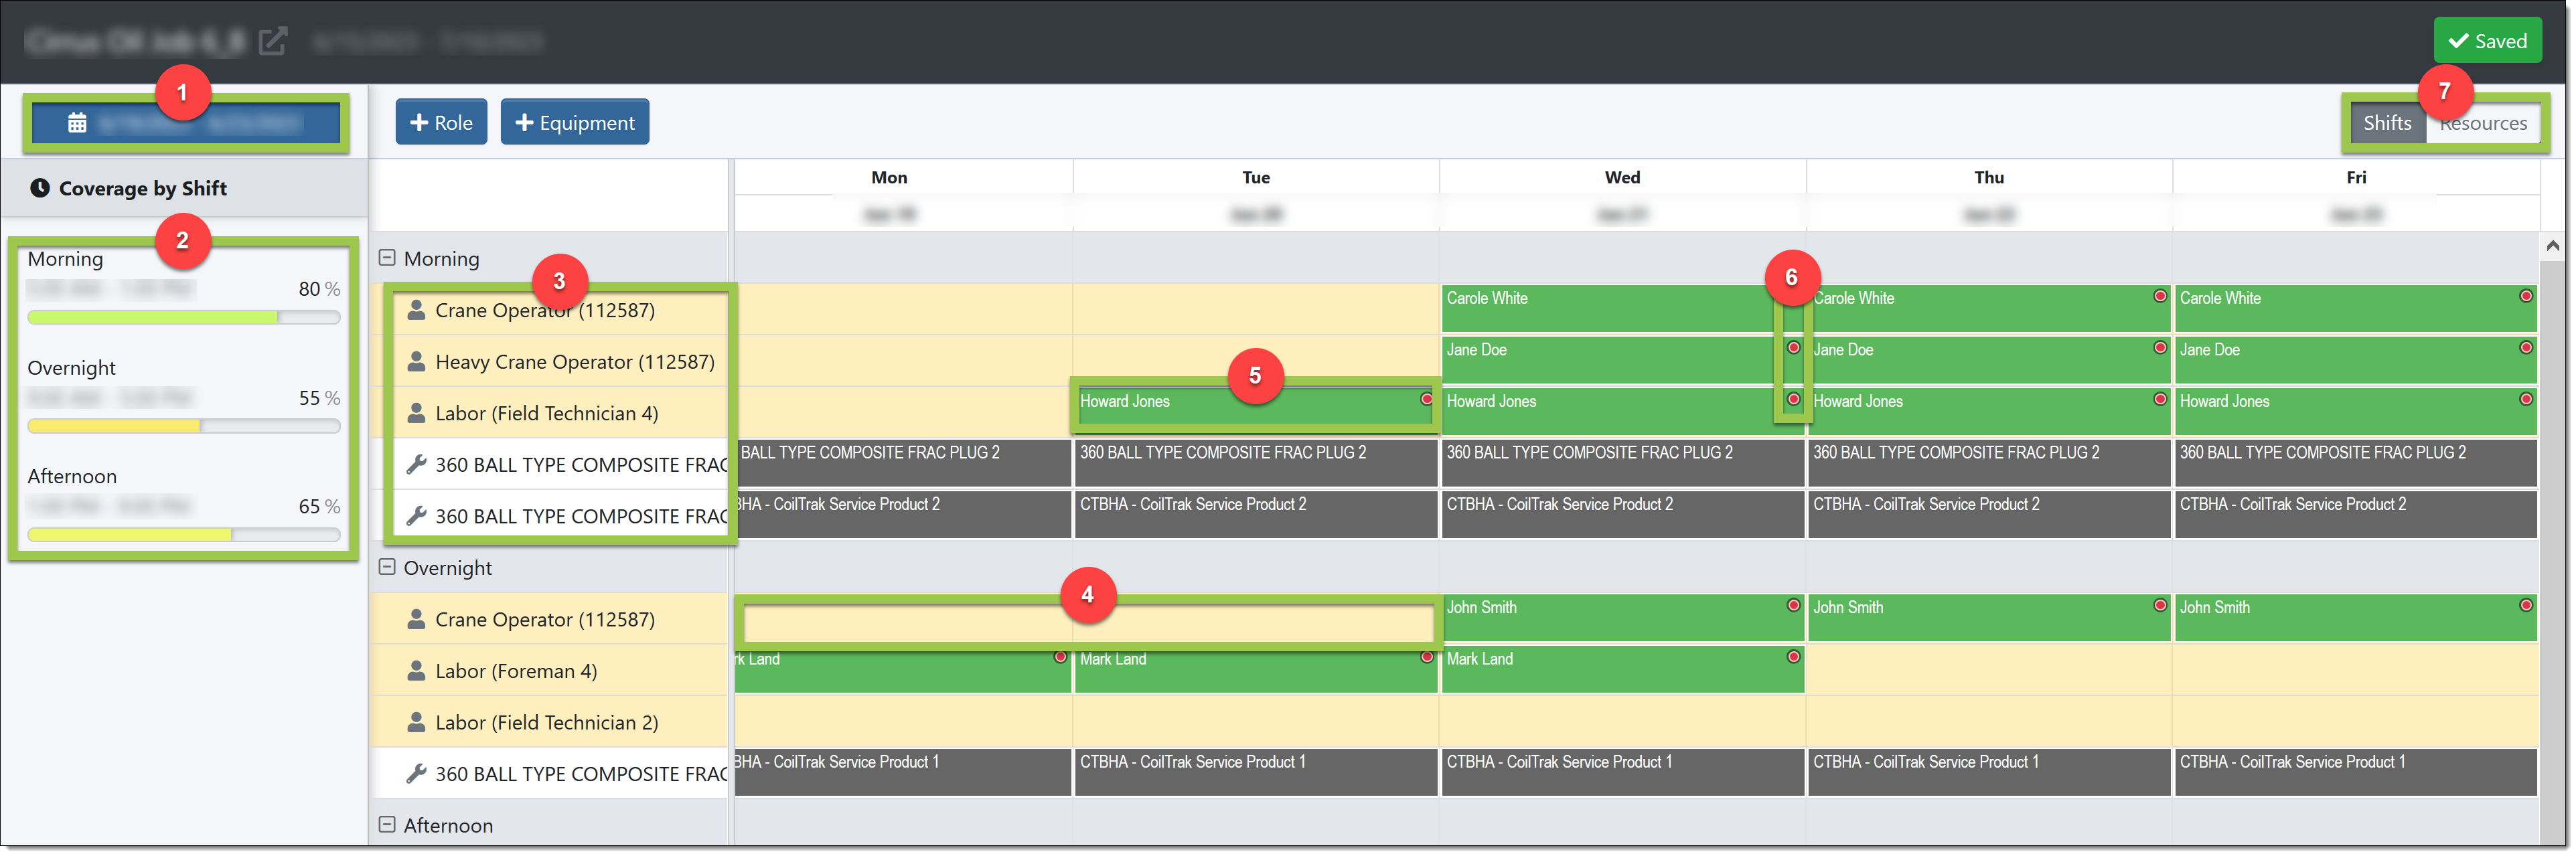
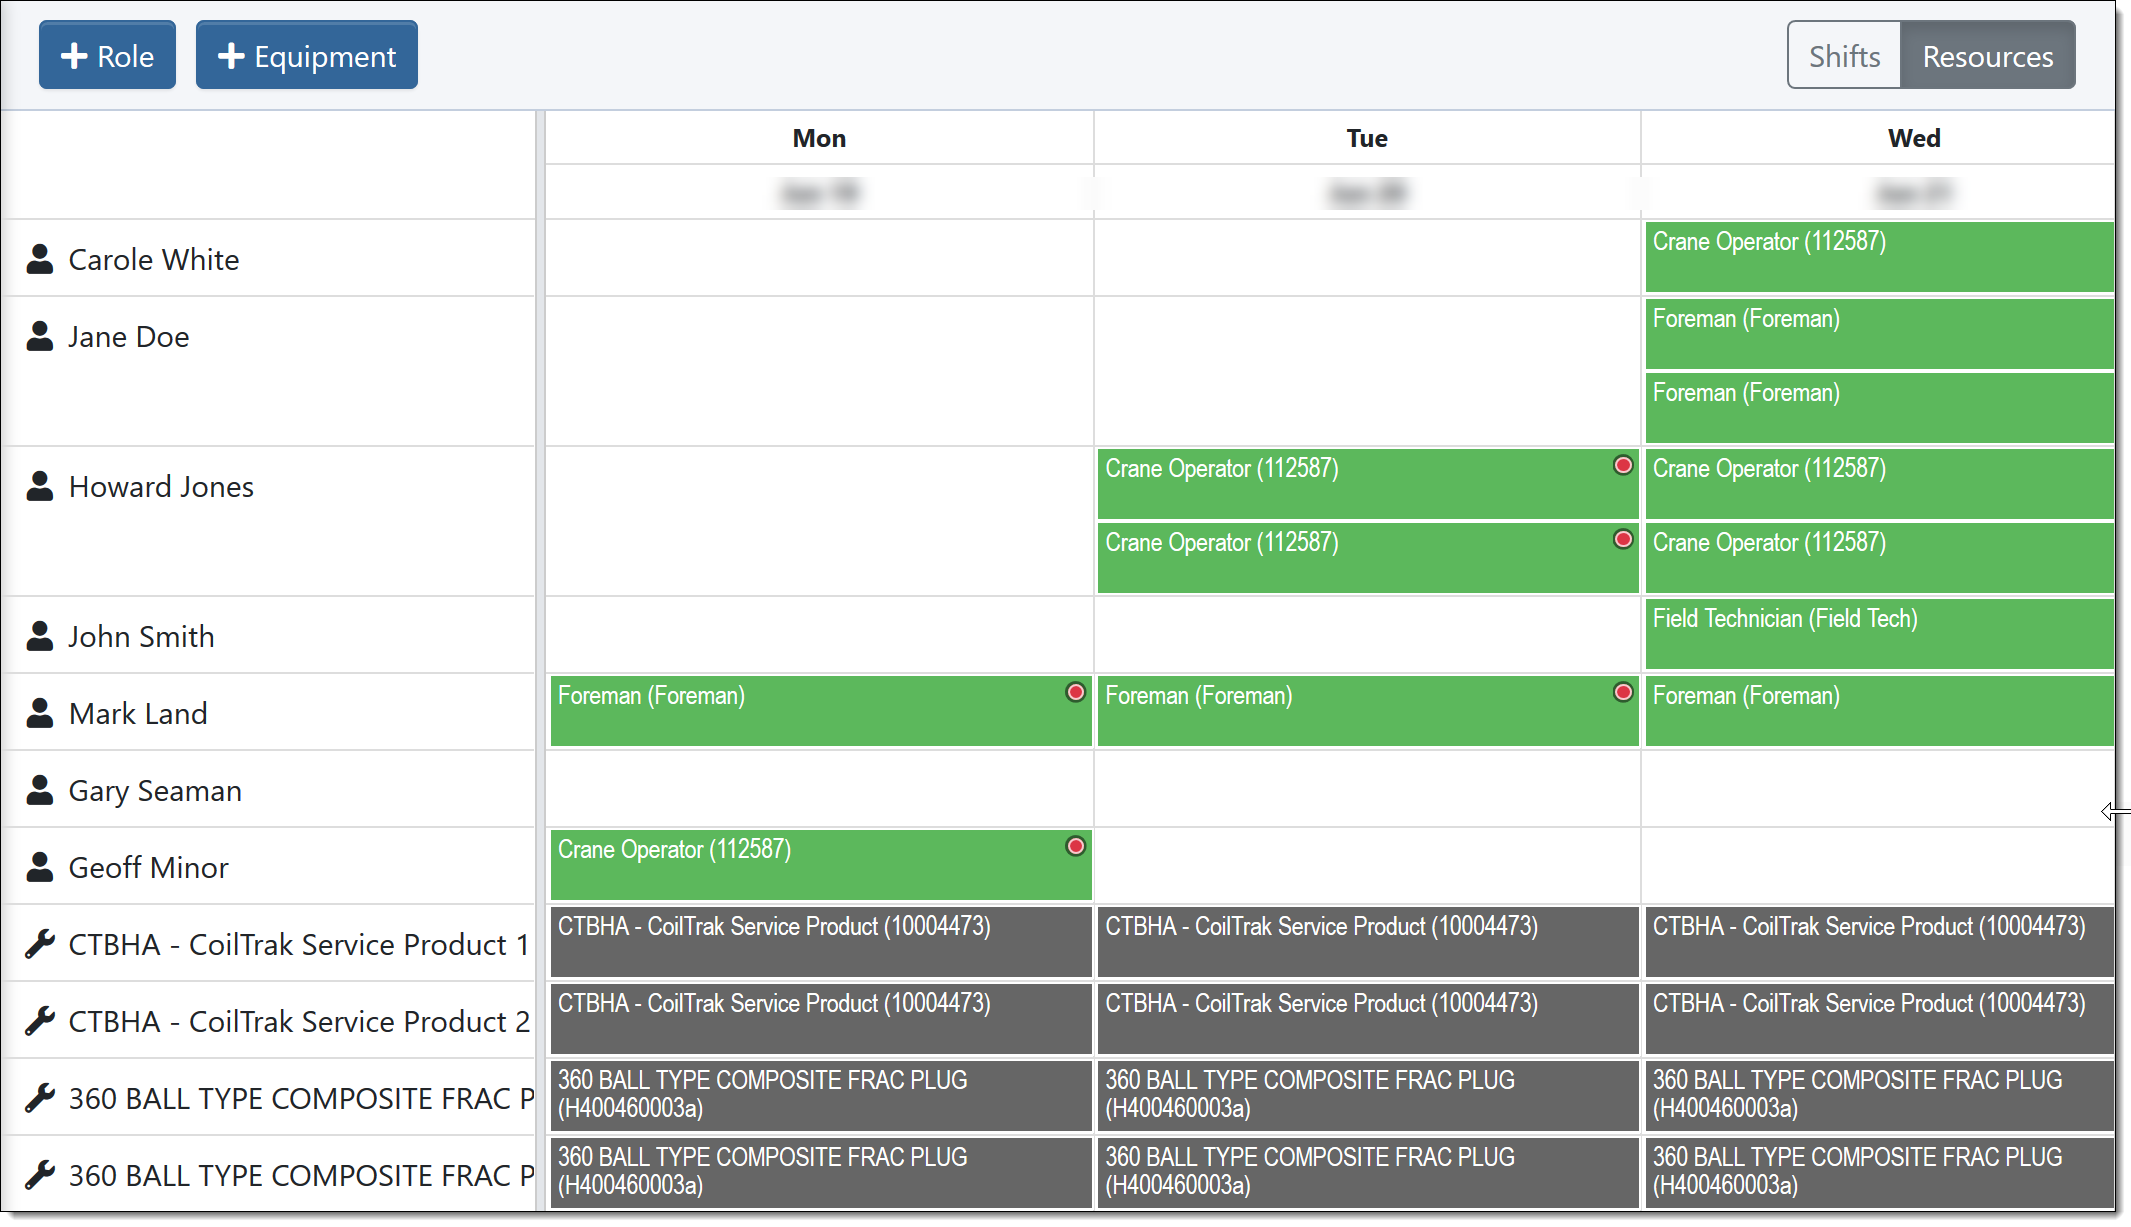
Schedule Resources
-
Use the calendar display to schedule resources to a specific Role or Equipment for each shift
-
If the Shifts toggle is selected, the items display grouped by Shift
-
If the Resources toggle is selected, scheduled resources display
-
The current working dates display
Click the button to change the working date range
-
Coverage percentage for the current working date range is listed for each shift in the Job’s Shift Group
If the job has any Qualifications, missing qualifications display below the Coverage by Shift section.
The example job has no Qualifications to display.
-
In Shifts view, the calendar displays the list of planned Roles or Equipment for each Shift.
Expand or collapse each Shift as needed to focus on a particular set of items.
-
Roles for the Job display with a person icon
-
Equipment for the Job display with a wrench icon
-
Shaded background indicates either the date or the item is not compliant
The example shows the calendar in Shifts view. When in Resources view, the list changes to display the scheduled crew member or equipment item instead of the planned role.
-
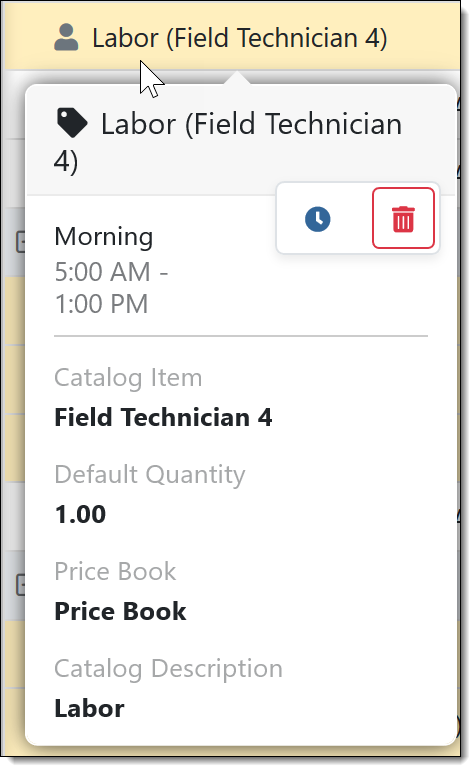
When in Shifts view, hover over a planned Role or Equipment item to see details of the Price Book Item
-
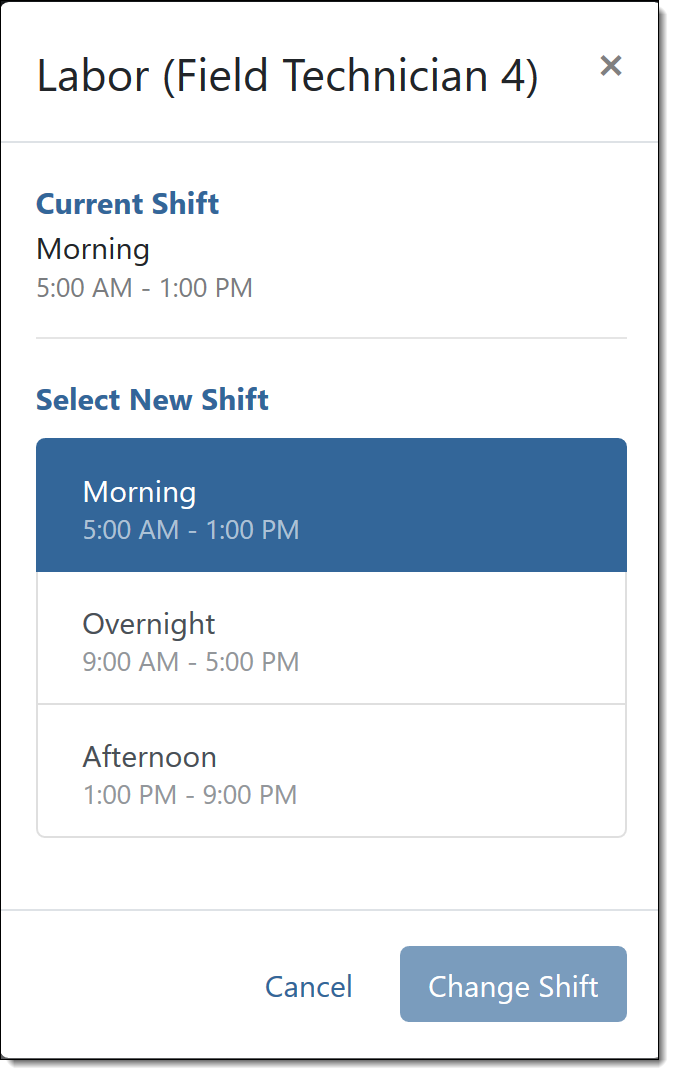
Hover over an item for more details, to delete the item with the trash can icon, or to assign the item to a different shift with the clock icon
-
-
Select a blank slot in the calendar to schedule a worker or equipment item
For more information on scheduling, see the Assign Resource section below
Select multiple, connected blank slots on the same row to schedule the same worker or equipment item for multiple days.
-
Click a scheduled resource to select it and mark the planning record for deletion
A Delete button displays in the action bar.
You can select multiple scheduled resources to delete more than one record at a time.
-
Hover the mouse cursor over the resource instead for a popup of details
-
Click the trash can icon to unassign the resource
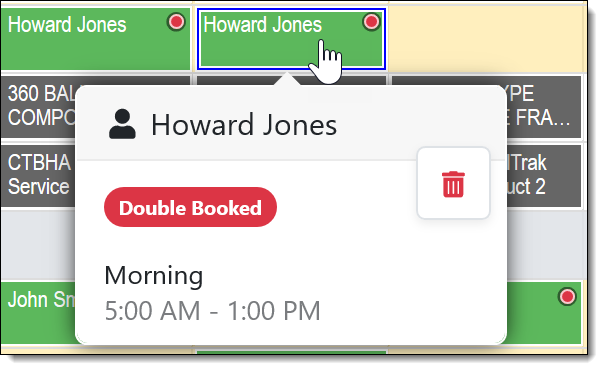
-
-
Red dots on a scheduled slot indicate that the worker is double booked or overbooked
-
Toggle the calendar view between Shifts view and Resources view
-
In Resources view, the calendar displays the list of Crew Members or Equipment items already scheduled for the Job
You cannot schedule resources while in the Resources view.
-
Assign Resources
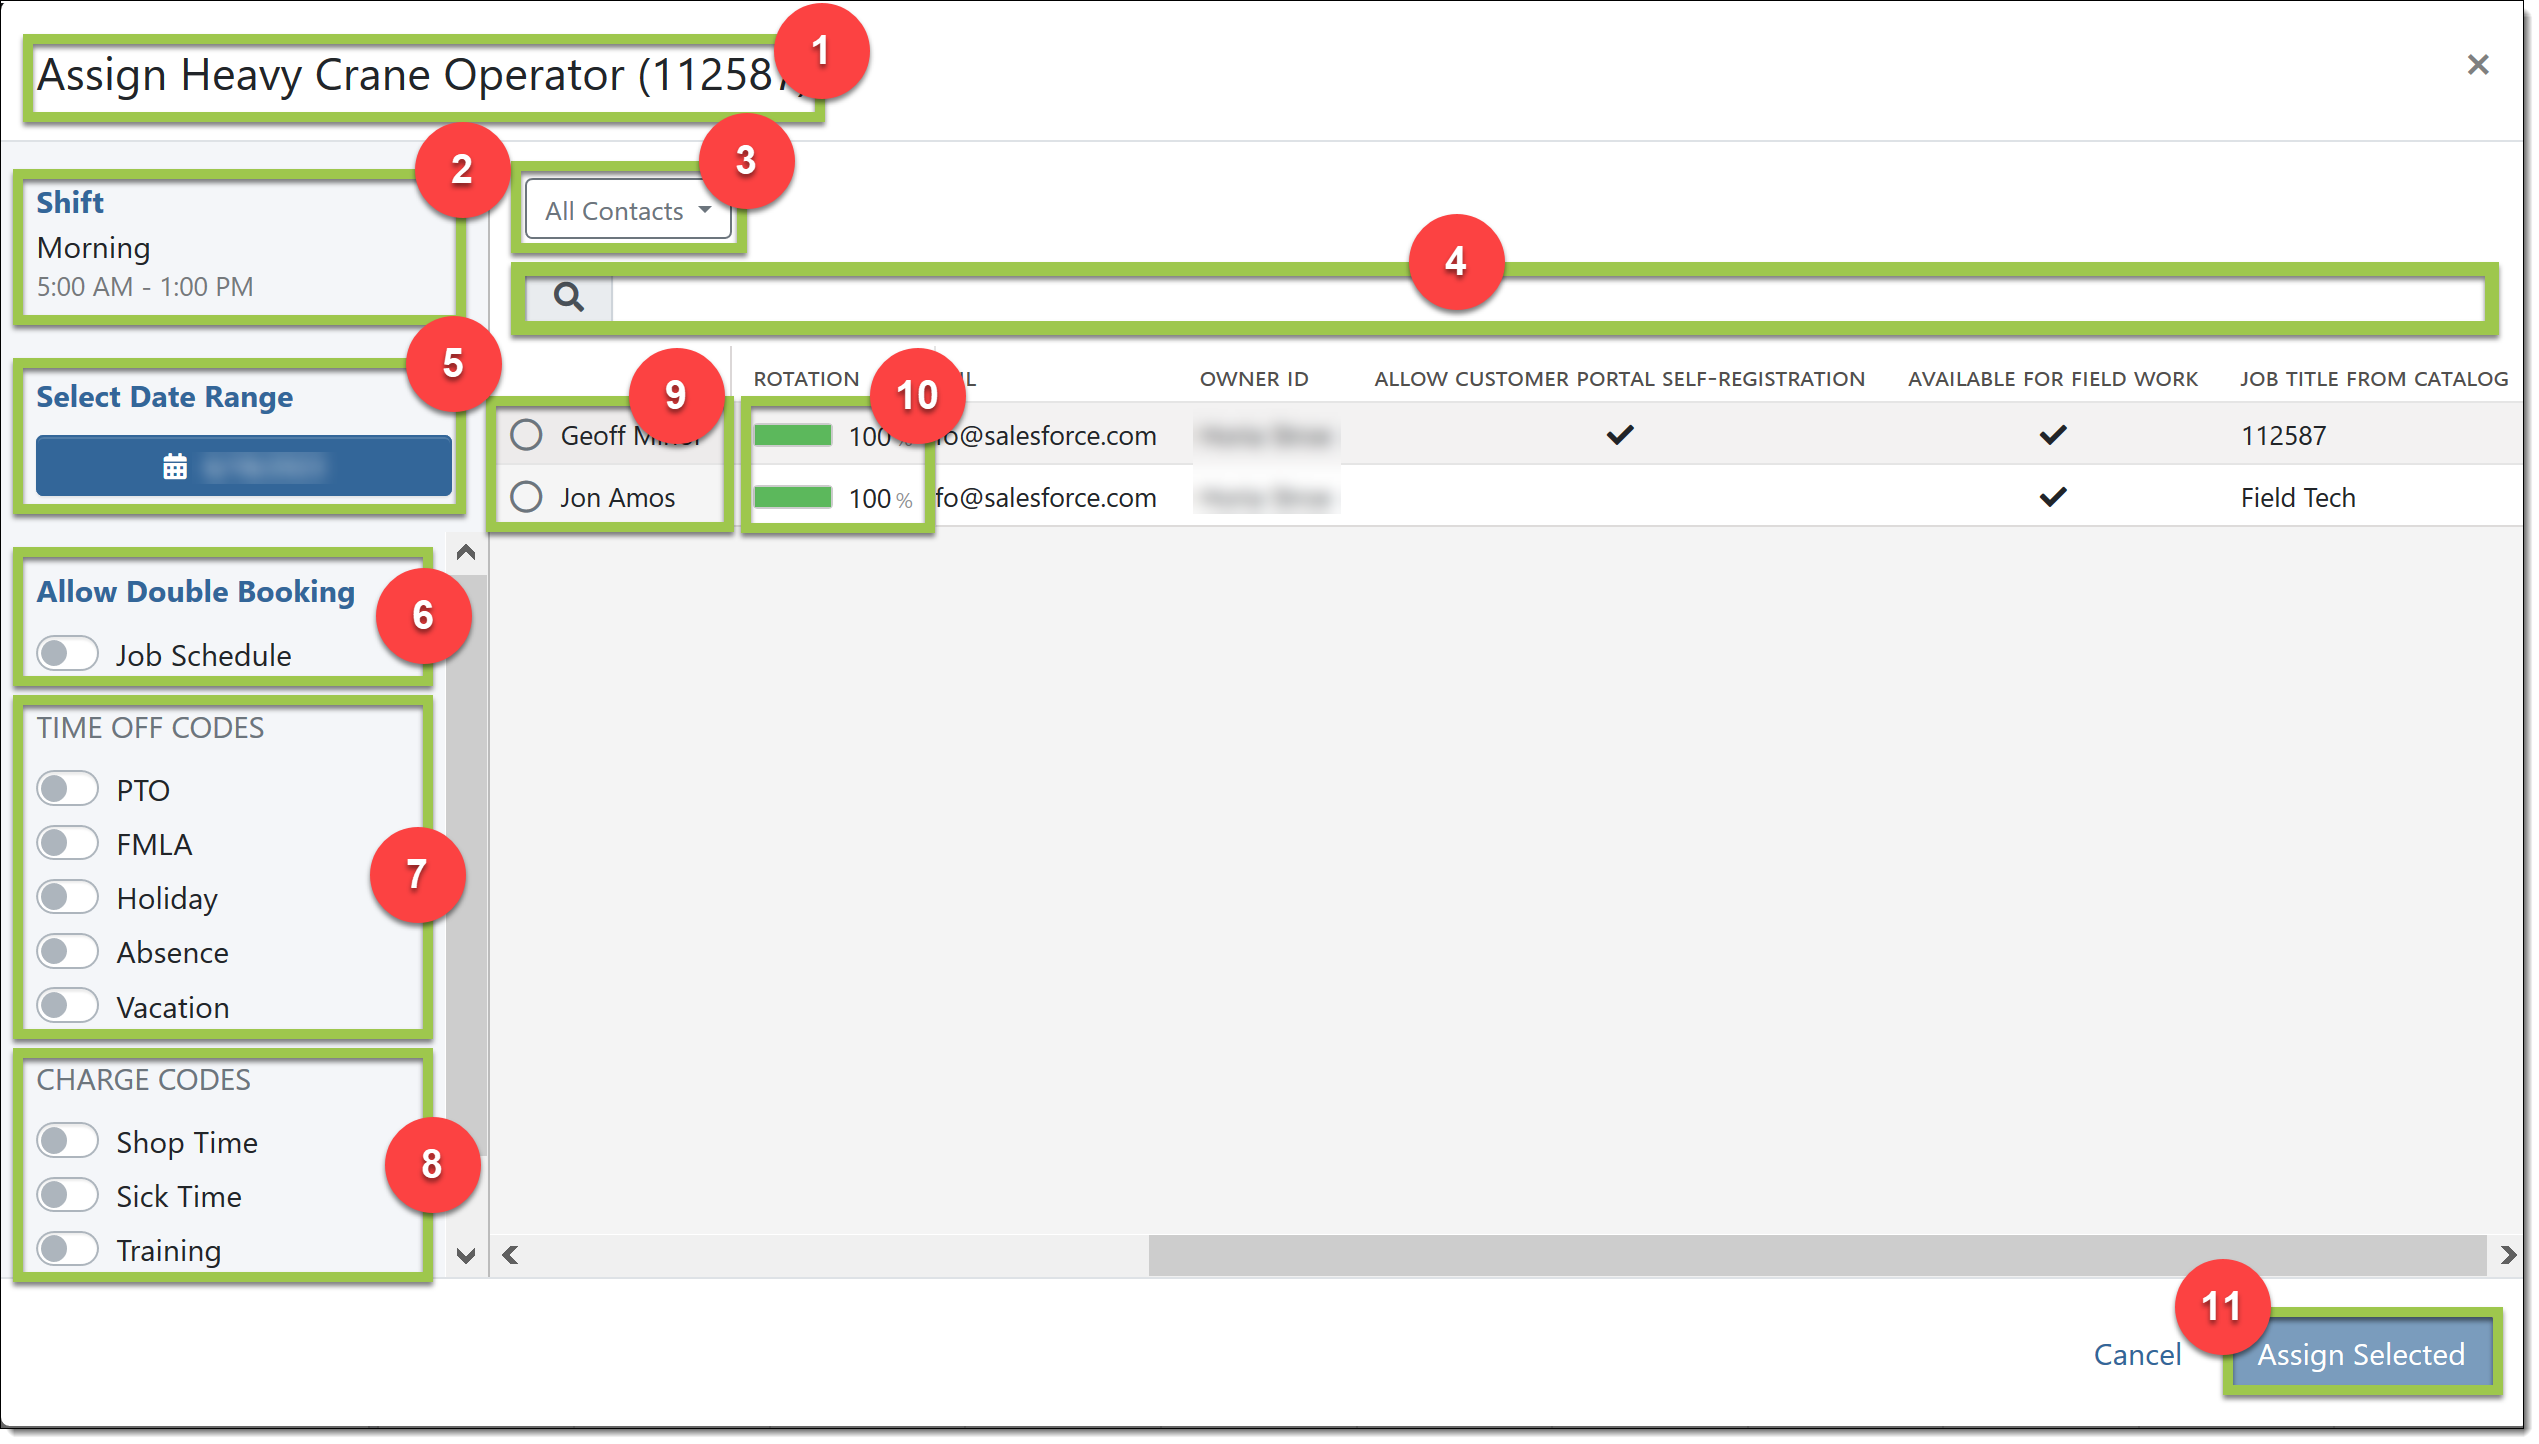
-
Displays the description for the selected role or equipment item being fulfilled
-
Shift: Displays the Shift the assignment is for
-
Filter the available resources by a Price Book Item list view
The available filters are determined by the Price Book Item list views the user has access to.
-
Enter text in the search field to further filter the list of resources
-
Select Date Range: Displays the date or date range being assigned
Click the date range button to adjust the date range
-
Allow Double Booking: Toggle the option on to show resources that are already scheduled for the selected shift and date range
If toggled on and the resource already has planned work during the date range, the resource still appears in the list and can be assigned
-
Time Off Codes: Toggle any Time Off Codes to ignore if the user already has Approved Time Off in the selected date range with the selected code
If toggled on and the crew member has approved time off in the date range with the selected code, the crew member still appear in the list and can be assigned
-
Charge Codes: Toggle any Charge Codes to ignore if the user already has a TimeCard in the selected date range with the selected code
If toggled on and the crew member has approved time off in the date range with the selected code, the crew member still appear in the list and can be assigned
-
Select the radio button for an available resource to assign to the selected shift for the working date range
-
The Rotation column shows how much of the selected date range the Contact’s Rotation allows to cover
Click on a rotation to filter the list to only Contacts with the selected Rotation
-
Click the Assign Selected button to add the resource to the Shift Scheduling calendar
|
After assigning the resource to the schedule, remember to also Publish the changes on the calendar to write the planning records. |
Considerations
Availability
Crew Members
A Crew Member is available to assign to a Shift if all of the following are true:
-
The Crew Member has been assigned to a Rotation that defines the date as a work day
-
Depending on selected options, no conflicting Crew Planning records exist for the contact
When scheduling, you can allow over or double booking.
-
The Crew Member has all Qualifications marked Required for the Job
-
Qualifications are not expired and will not expire during the duration of the Job
-
Depending on selected options, no Approved TimeOff records exist for the Crew Member for the date
When scheduling, you can select Time Off Codes to allow for scheduling.
-
Depending on selected options, no Timecard records with a Charge Code exist for the Crew Member for the Shift date
When scheduling, you can select Timecard Charge Codes to allow for scheduling.
Equipment
An Equipment item is available to assign to a Shift if all of the following are true:
-
The Equipment has no conflicting Equipment Planning records
When scheduling, you can allow over or double booking.
-
The Equipment has all required Qualifications marked Required for the Job
-
Qualifications are not expired and will not expire during the duration of the Job
Recommended Reading
-
Learn how to setup Shift Scheduling
-
FX Shift Scheduling minimum permissions
Review them minimum permissions required to use Shift Scheduling