FXL Data Grid
Prerequisites
-
To use the FXL Data Grid, you need the following licenses:
-
To use the FXL Data Grid, you must be using Lightning Experience with FieldFX Back Office and have the FieldFX Lightning Managed Package installed.
-
To use the FXL Data Grid, you need:
-
View Setup and ConfigurationSystem Permission from a Profile or Permission Set.
Basics
-
FXL Data Grid is a versatile record management tool in FieldFX Back Office when using Lightning Experience.
-
You can use the FXL Data Grid in much of the same way you use other spreadsheet applications to sort, filter, and edit records.
-
The records in the data grid are sortable by a single column.
-
The records in the data grid are filterable by most columns.
-
Keyboard shortcuts streamline navigation and data entry in the data grid.
-
Most cells displayed are individually editable.
-
When parent records are selected, the child records are also selected.
-
-
You can also use:
-
FXL Bulk Edit to update multiple records at once in the FXL Data Grid
-
FXL Stage Pricing to apply stage pricing to selected ticket items in the FXL Data Grid
-
-
Optionally, configure custom labels for Lightning Components.
Step-By Step Guides
Accessing the FXL Data Grid
-
Switch to the Lightning Experience
-
Access the list of records for which the FXL Data Grid is activated
Example:
You want to manage price book item records.
-
From your Home page, click Price Books

-
Click the price book

-
Review the records presented by the data grid.

The grid loads 2,000 records at a time. Click the Load More button to display additional roads.

The grid has a limit of 50,000 records.
After 50,000 records, the Load More button is disabled and displays as Row Limit Exceeded.

-
Sorting Records in the FXL Data Grid
-
The records in the data grid are sortable, either by a single column or by multiple columns.
For example:
You want to sort the price book records in the data grid by Pricing Method.
Sort by a Single Column
-
Click the PRICING METHOD column heading to sort the records in ascending order.
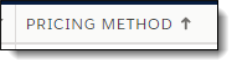
The Ascending icon displays next to the column heading.
-
If you want to sort in descending order instead, click the PRICING METHOD column heading again.
The Descending icon displays next to the column heading.
Sort by Multiple Columns
For example:
Sort by Discount Percent, then by Item Code.
-
Click the column headings in the order that you want to sort them.
Not all types of fields can be sorted. For example, multi-select picklist fields, rich text areas, and encrypted fields are not sortable and cannot be selected. The columns that are used for sorting display in a row just above the grid’s heading row.
For example, click the Discount Percent column heading, then click the Item Code column heading.
-
To remove a column sort, click the
Xnext to the column label. -
To change the direction of a column’s sort, click, on the column label.
The arrow on the left of the label indicates whether the sorting is ascending or descending. Example 1. Ticket Items sorted first by Input Qty (in descending order), then by the Discount Percent (in descending order), then by Item Code (in ascending order).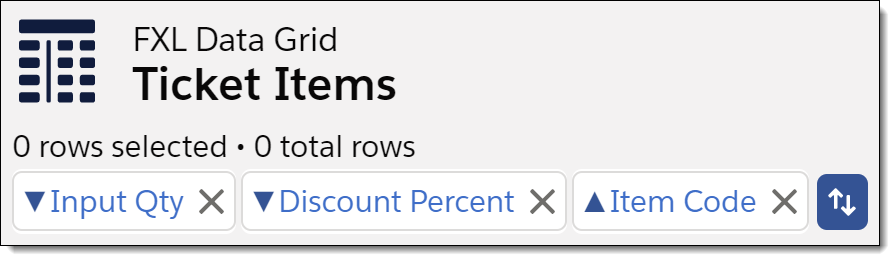
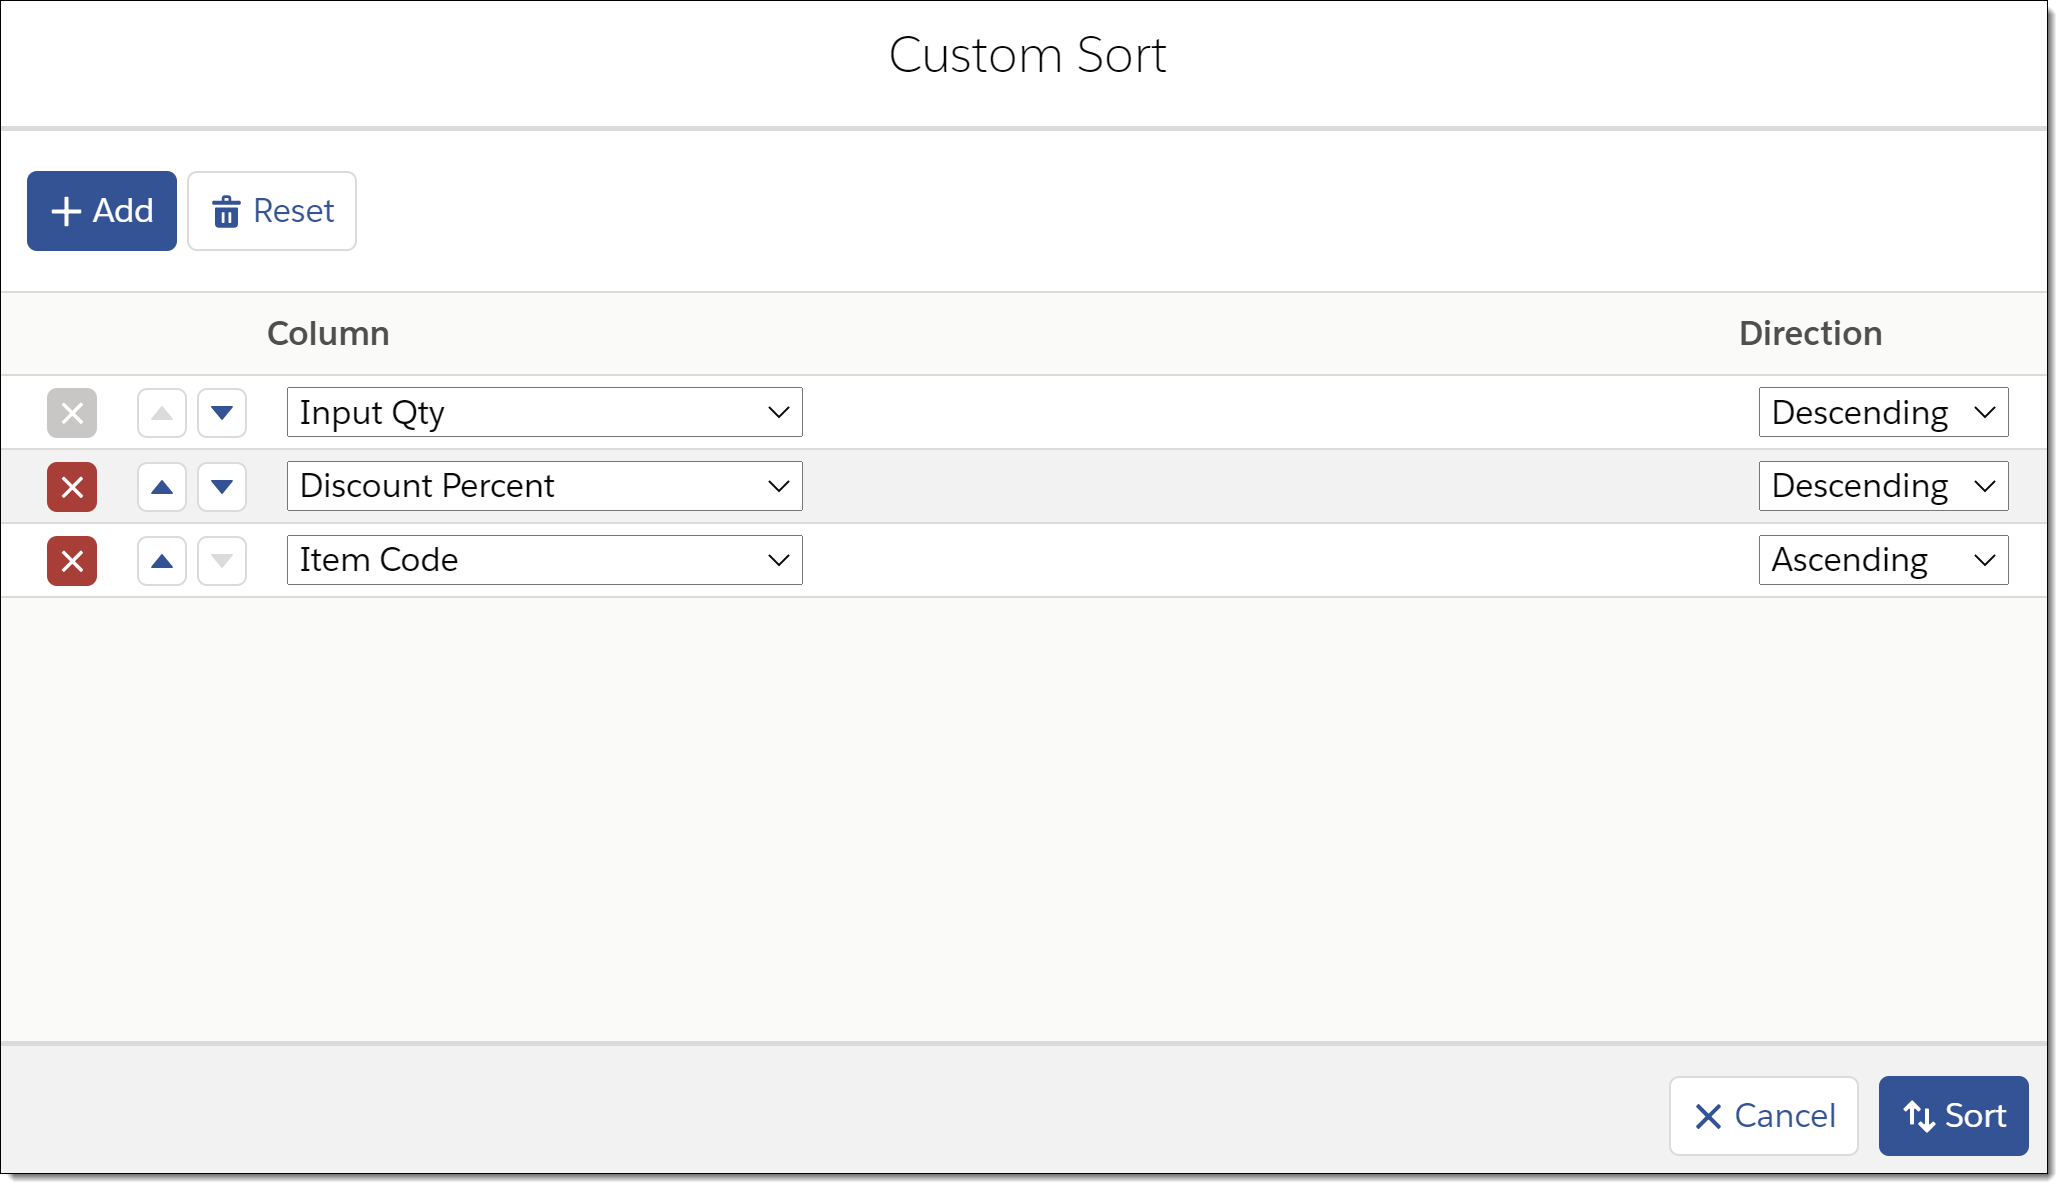
Use the unlabeled custom sorting button to access the Custom Sort screen.

On this screen, you can:
-
Add a Column to sort by
-
Delete a Column sort
-
Change the sort Direction of a Column
-
Reorder the Column sort priority
-
Reset the sorting to the Data Grid’s defined Initial Column Sort
Selecting Items in the FXL Data Grid
-
When items display in the grid, select a particular record by clicking in the blank box in the first column of the record.
A selected item displays with a black square in the box.
-
Selecting a parent item also selects all of the child items.
-
Deselect an item by clicking the box again, clearing the black square.
-
Deselecting a parent item also deselects all of the child items.
-
Use the square in the header row that displays the titles of columns to select all displayed records or deselect all records.
-
Children of parent items are selected and deselected with the parent item.
-
Only currently displayed records are selected or deselected.
If you click to select all items and then click to show additional items, the newly displayed items are not selected. Click the select all square again to select those items as well.
-
-
Row totals display at the bottom of the grid:
-
The total number of rows in the grid displays.
-
If any rows are selected, the number of rows selected also displays.
-
If any of the selected rows are parent items, the number of child items selected displays in parentheses.
-
Filtering Records in the FXL Data Grid
The user’s Profile or Permission Set must grant access to the View Setup and Configuration System Permission for lookups to function in an FX Lightning component, such as the FX Data Grid.
|
-
Filtering can be layered so you can drill down to the specific data you need.
Example:
You want to filter the price book records in the data grid by PRICING METHOD. Then you decide you want to add another layer of filtering using PRICE. The filter button in the PRICING METHOD column heading indicates both columns can be filtered.

-
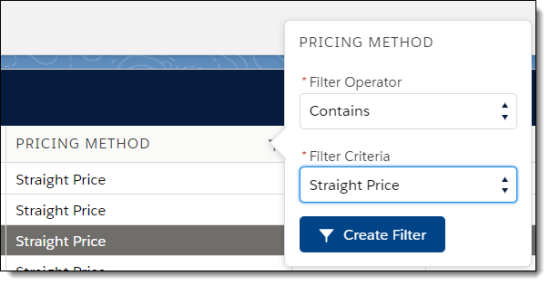
Click the filter button to access the filter window specific to PRICING METHOD
-
Select the Filter Operator
-
Enter the Filter Criteria
-
Complete any other available or required fields
-
Click Create Filter
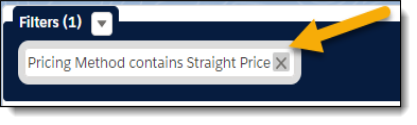 Figure 1. The Filters message confirms the records are sorted by Pricing Method.
 -
Click the filter button to access the filter window specific to PRICE.
-
Repeat steps 2–5.
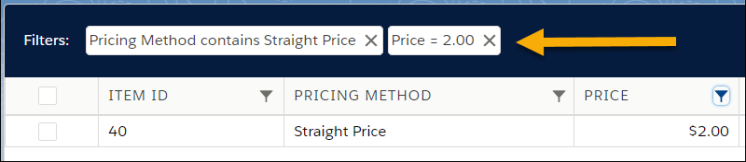 Figure 2. The Filters messages confirm the records are sorted by Pricing Method and, in a second layer of filtering, by Price.
Navigating in the FXL Data Grid with Keyboard Shortcuts
FXL Data Grid accepts the following keyboard shortcuts for inline navigation.
| Keyboard Shortcut | Action |
|---|---|
Tab |
Move right to the next cell in a row or to the first cell in the next row. |
→ |
|
Shift+Tab |
Move left to the next cell in a row or to the last cell in the previous row. |
← |
|
↑ |
Move up to the previous cell in a column or in a drop-down selection menu for a cell. |
↓ |
Move down to the next cell in a column or in a drop-down selection menu for a cell. |
Enter |
Access a cell editor or exit the cell editor. |
Alt+Shift+C |
Discard changes in the record before you have saved them. |
Alt+Shift+S |
Save changes to a record. |
Editing a Cell in the FXL Data Grid
-
You can update an editable cell within the FXL Data Grid
Locked cells display gray. -
The FXL Data Grid supports editing rich text fields.
-
There are multiple ways for you to access a cell to make edits.
-
Double-click the cell with your mouse.
-
Select the cell with your mouse and begin typing.
-
Select the cell with your mouse and press Enter.
-
Navigate to the cell using keyboard shortcuts and begin typing.
-
Navigate to the cell using keyboard shortcuts and press Enter.
-
To update an editable cell in the FXL Data Grid, follow these steps:
-
Access the cell
-
Edit the contents of the cell
-
Save the changes to the cell by clicking out of it after making changes or pressing Enter
Updating a Record in the FXL Data Grid
-
Edit the applicable cell(s) in the record.
-
When you are finished editing, click Save Changes to commit all your active edits to records.
If you click Discard Changes, you will lose all uncommitted edits.
Dependent Fields
-
When a field with a dependency on another field is added to the grid, the column heading displays an icon for more information.
-
Hovering the mouse over the icon shows a tooltip that identifies the controlling field.
| The Controlling Field does not have to display on the Data Grid with the dependency.However, the values for the dependent field still rely on the entry in the controlling field. |
| Controlling fields are defined by creating Field Dependencies in the object record in Setup.They are often used for defining picklist fields. |
FXL Bulk Edit
Basics
-
Use FXL Bulk Edit to update multiple records in the data grid at once.
-
You cannot edit the discount for items that have Locked Discount selected.
-
Other fields that cannot be edited will not be available for you to select for editing.
Those fields also display gray in the Data Grid; they are Locked Cells.
Step-By Step Guides
-
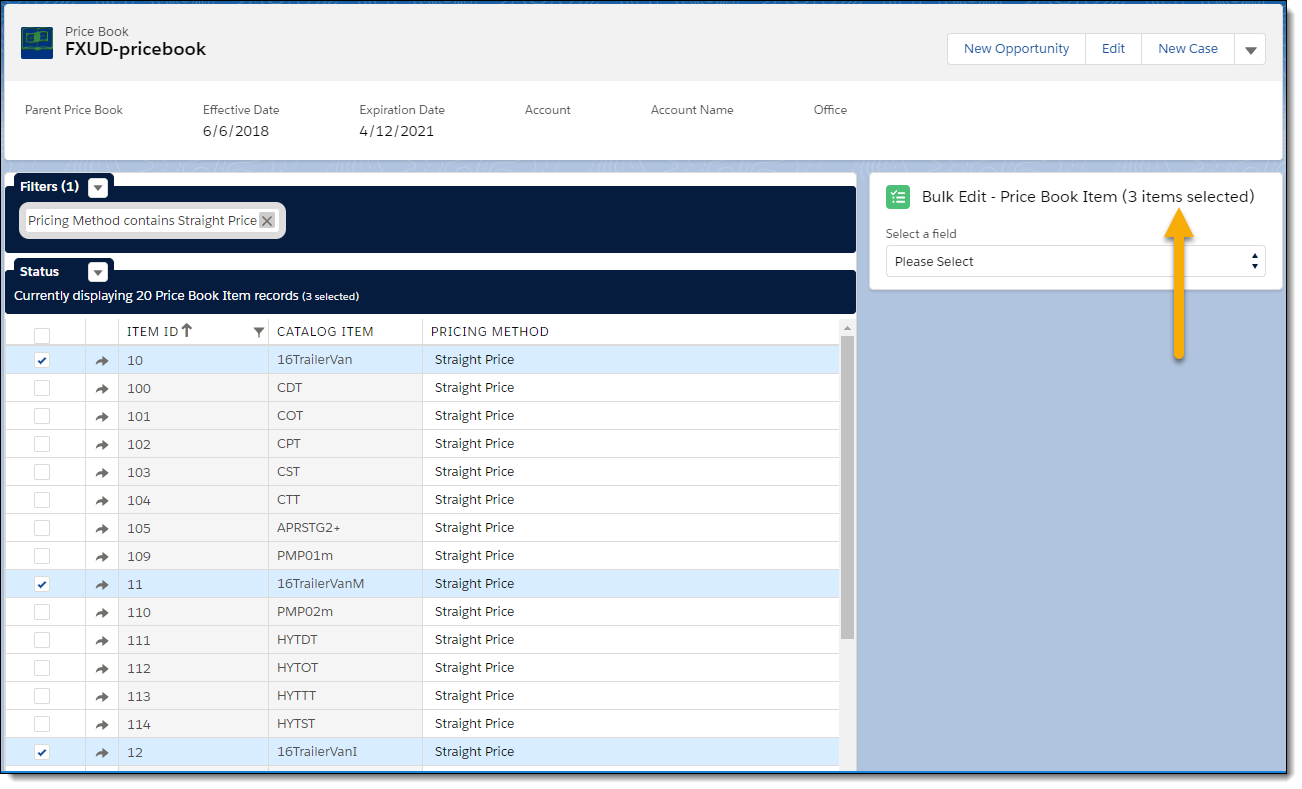
In the FX Data Grid, select the records you want to bulk edit
Bulk Edit displays the number of records you have selected.
-
Select a field to edit from the records you selected
If the field is not listed for selection, it is not editable. -
If the field you are editing has a dependency, the first record you select controls the filters used for lookup functions.
-
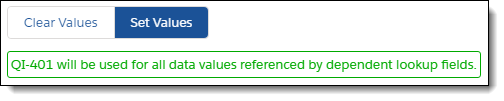
A message displays when you click Set Values listing the record that controls lookups with dependencies.
-
-
Select one of the editing controls available for the field to use:
-
Click Clear values to clear the field in the selected records.
-
Click Set Values and complete the fields that display to set the field to the same value in the selected records.
-
Click Adjust Values and complete the fields that display to adjust the numeric value for the field in each selected record by a greater or less than percentage or amount.

-
-
Click Update
A message confirms the number of records updated.
FXL Stage Pricing
Basics
-
FXL Stage Pricing applies a fixed price to a collection of ticket or quote items in FieldFX Back Office when using Lightning Experience.
-
Use FXL Stage Pricing when using Lightning Experience if you bill customers separately for each stage of a job.
For example:
$2,000.00 for Stage 1 and $5,000.00 for Stage 2
How it Works
-
You can apply FXL Stage Pricing to any number of ticket items in FieldFX Back Office when using Lightning Experience.
You can’t apply stage pricing to items that have Locked Discount selected. -
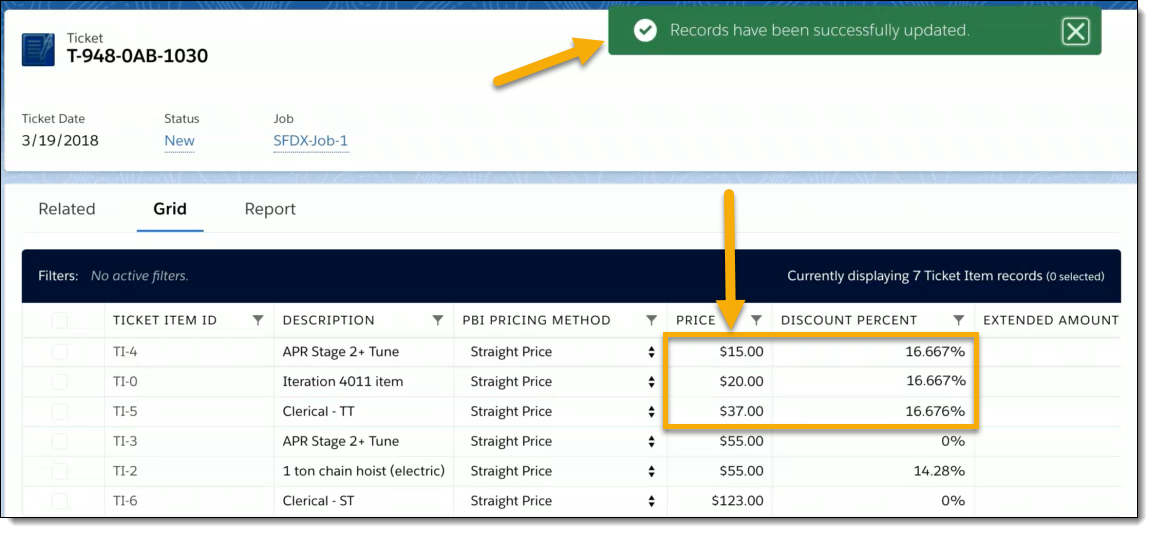
When you apply stage pricing, the discount percentage of each item changes to make the total Extended Amount for all items equal to the stage price.
For example:
-
If you have 10 items priced at $1,200, you can apply a stage price of $1,000 to the items.
-
This increases the discount percentage of each item to make the total Extended Amount for all items equal to $1,000.
-
-
If you change the Qty of an item included in a stage, the discount percentage for that item doesn’t change.
In this scenario, reapply stage pricing to the items in the stage.
Step-By Step Guides
-
In a FX Data Grid set up for tickets, select the records to which you want to apply stage pricing.
FXL Stage Pricing displays the number of records you have selected.
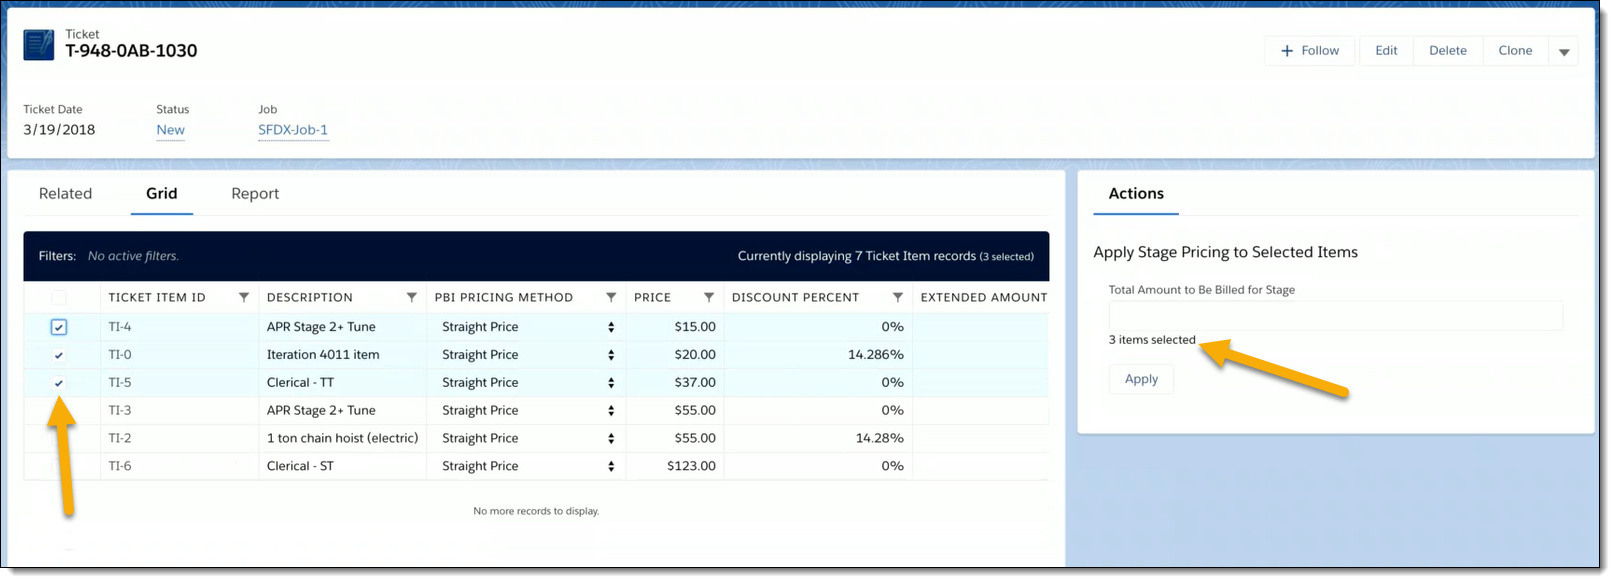
-
Under Apply Stage Pricing to Selected Items, enter the Total Amount to Be Billed for Stage
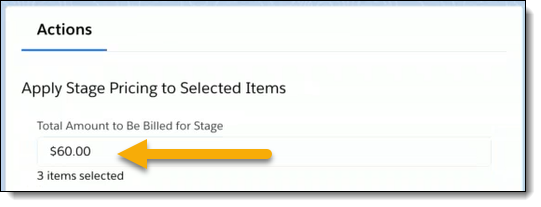
-
Click Apply
FXL Stage Pricing resets and the changes are reflected within the FX Data Grid.
FXL Bundle Maker
Basics
-
The FXL Bundle Maker enables dynamic parenting within the FXL Data Grid for Tickets, Quotes, Invoices, and Price Books.
-
You can use the FXL Bundle Maker with the FXL Data Grid to create a bundle of child items and associate them with a parent item.
-
After selecting the items on the grid to bundle as children of another item, select the parent.The parent can be either
-
An item that already exists on the grid
-
A new item to add to the grid
-
|
The FXL Bundle Maker responds to the selections you make at each step of using it.
|
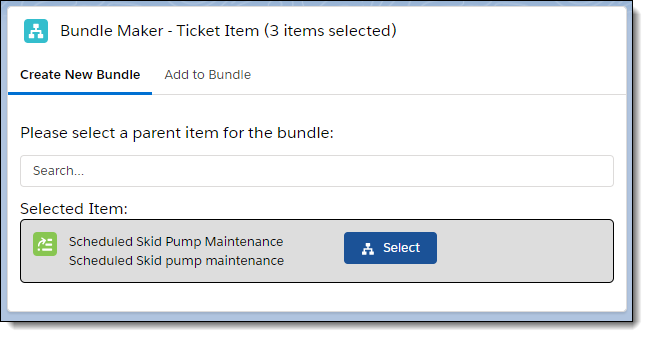
Creating a Bundle of Items
-
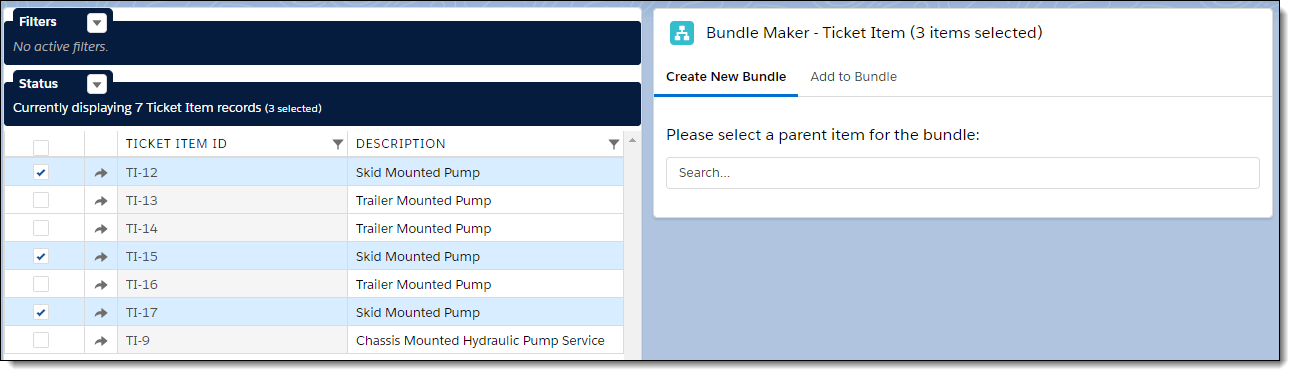
Select the items in the FXL Data Grid to be included in the bundle as child items
-
Click Create New Bundle in the FXL Bundle Maker
-
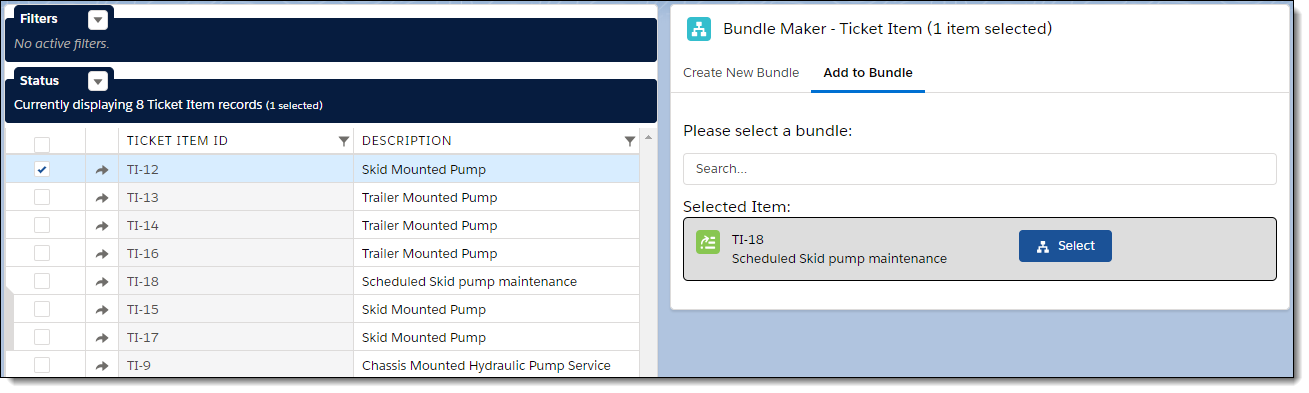
Search for and select a parent item for the bundle
-
Click Select
-
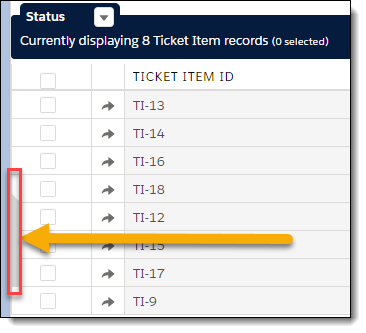
Confirm the items in the bundle are listed and marked together in the FXL Data Grid